I always look forward to the green glow that fills my kitchen when spring edges closer and St Patrick’s Day shamrock crafts start appearing on my table. There’s something cozy about scissors, paper scraps, and sticky fingers clustered around a pile of emerald hues while a kettle hums in the background.
Gathering materials for St Patrick’s Day shamrock crafts has become a little ritual.
A cup of tea, a playlist that drifts between folk songs and quiet pop, and the slow pleasure of shaping tiny clover forms turns an afternoon into a small celebration.
Paper shamrock garland with layered textures

I remember stringing paper shamrocks across my mantel and laughing at how the room felt instantly brighter. The paper had a soft tooth under my fingertips, edges slightly rough where scissors had nicked the surface, and light passed through the thinnest layers like stained glass.
Different greens sat next to each other—moss, lime, forest—creating subtle contrast. A faint papery scent mixed with the herbal tea on the table, and the garland swayed gently when someone opened the door, casting playful shadow clovers on the wall.
Steps
- Fold sheets of green paper and trace a heart-based shamrock template onto each fold.
- Cut the shapes out and layer smaller hearts on top of larger ones to create depth.
- Punch small holes near the top of each shamrock and thread a length of twine through them.
- Space the shamrocks along the twine and tie small knots or add tape behind each piece to hold placement.
Felt shamrock coasters with stitched edges
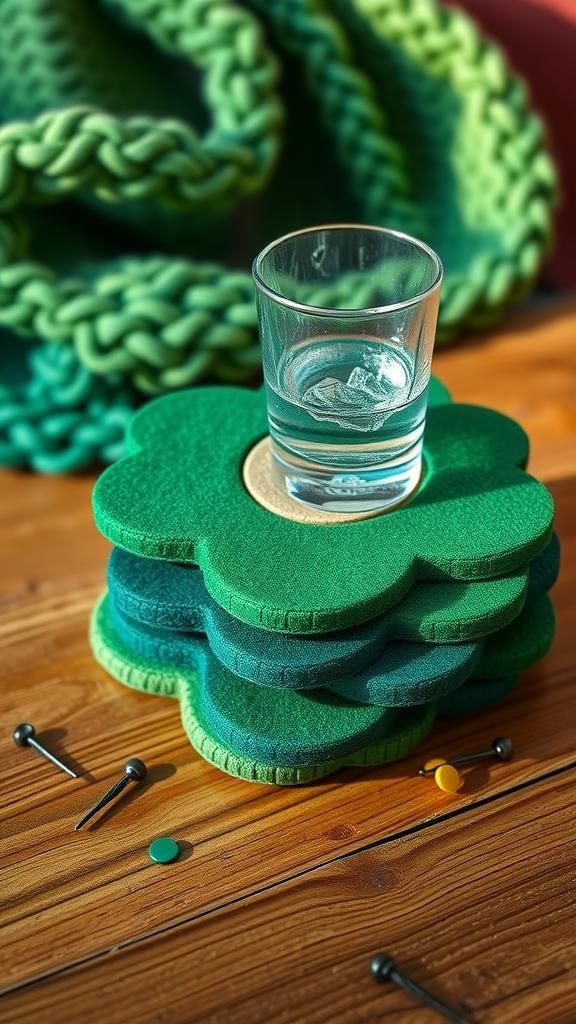
A set of felt shamrock coasters lived on my coffee table for a whole week and saved a few table rings while adding a playful touch. The felt felt both snug and springy beneath my palm, edges fuzzy where fibers unweaved a little, and tiny stitches gave each coaster a handmade heartbeat.
The thread caught the light occasionally, creating specks of sheen against matte green. When a cold glass touched the felt, an almost silent thunk turned into a comforting rhythm during conversation, and the colors stayed soft even with repeated use.
Steps
- Trace shamrock outlines onto felt sheets and cut out pairs for each coaster.
- Place matching pieces together and use blanket stitches around the edge with embroidery thread.
- Add a small layer of batting between pieces for added thickness before finishing the stitches.
- Repeat to create a set and trim any stray fibers for a neat finish.
Clay shamrock charms for keyrings and gifts

Working with air-dry clay to make tiny shamrocks turned my windowsill into an impromptu kiln. The clay was cool against my palm, smoothing under a fingertip until the leaf shapes felt ready.
After drying, each charm took on a matte, earthy look that smelled faintly of wet clay at first and then nothing at all. Metallic paint added just a whisper of shine along veins, and when attached to little rings they jangled softly in pockets.
Handing one to a friend felt like offering a small, quiet token of luck.
Steps
- Roll out a slab of air-dry clay and press heart shapes to form three-leaf shamrocks.
- Smooth edges with a damp fingertip and use a small tool to add vein details.
- Create a tiny hole near the top of each charm before drying so a ring can be added.
- After fully drying, sand gently, paint highlights, and attach keyring hardware.
Stained glass effect shamrock suncatchers
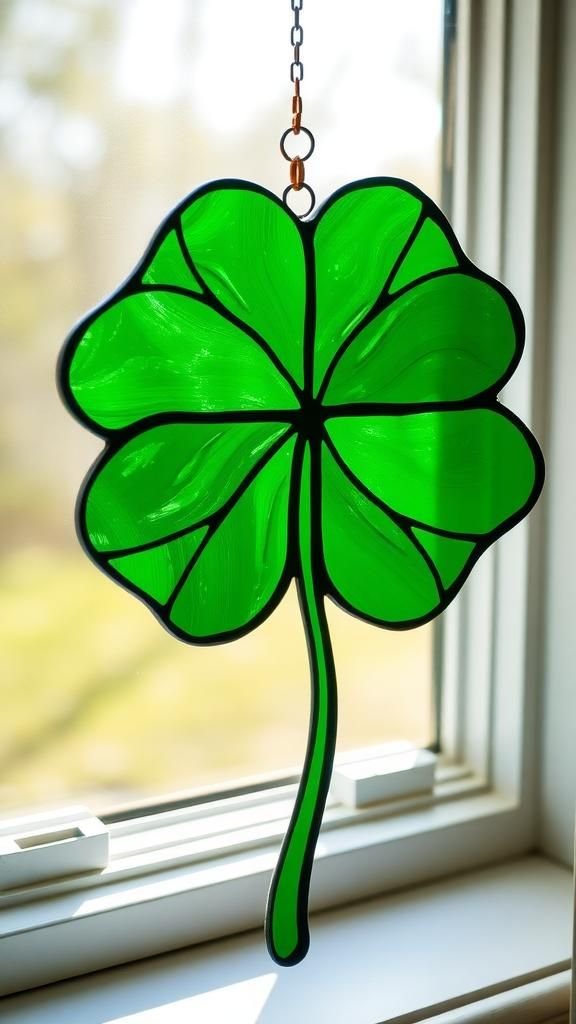
I taped a shamrock suncatcher to my kitchen window and watched the colors bloom when noon sun hit it. The translucent paints caught light like a distant church window, edges glowing brighter and centers remaining jewel-toned.
Painting thin veins felt meditative; each brush stroke left a tiny ripple in the tint. On windy days the suncatcher tilted and sent floating green flecks across the opposite wall.
The whole piece felt delicate and calm, turning ordinary sunlight into a cheerful, moving ornament.
Steps
- Cut shamrock outlines from clear plastic sheets large enough for window display.
- Trace vein patterns with leading paint and let it cure so raised lines form.
- Fill sections with transparent glass paint in varying green shades and let dry.
- Remove any protective film, then hang on a suction hook or tape to a window.
Salt dough shamrock ornaments with warm tones

Making salt dough shamrocks felt nostalgic, like something from a childhood kitchen. The dough was slightly gritty and warm when kneaded quickly, floral scent of spices if any were added barely present, and raw shapes left a pale, doughy sheen.
After baking, edges crisped and colors deepened, taking on a soft golden tint. Light sanding brought out smoother highlights and a matte finish that felt pleasant to the touch.
Hanging these on a simple ribbon brought old memories into new corners of my home.
Steps
- Mix salt, flour, and water to form a smooth dough and roll it to an even thickness.
- Use shamrock-shaped cutters to press out ornaments and pierce small holes near the top.
- Bake at low heat until firm, then let cool completely on a rack.
- Sand edges lightly, paint or varnish if desired, and thread ribbon through the holes.
Shamrock painted rocks for garden pops
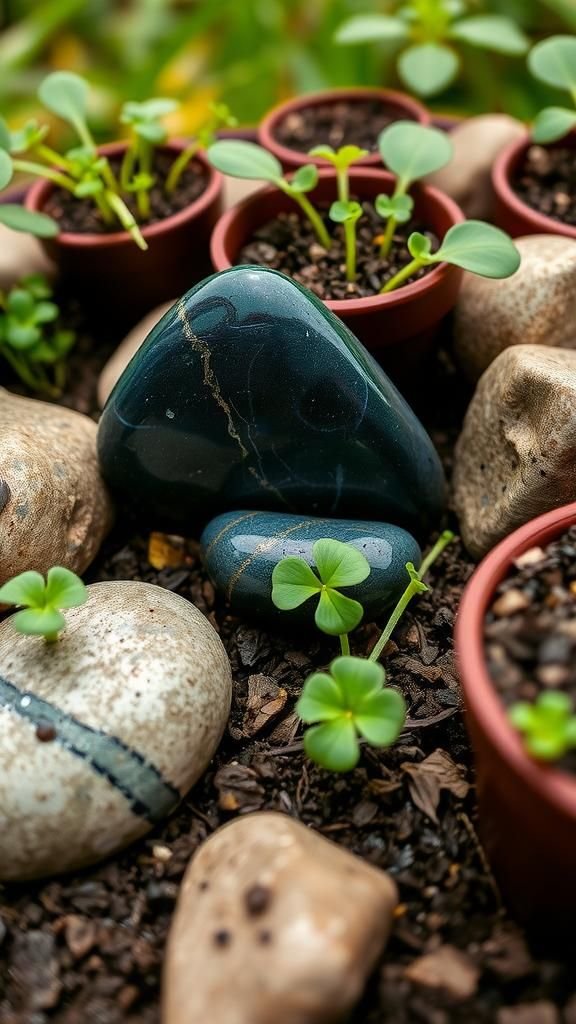
One rainy afternoon I painted rocks with tiny shamrocks and tucked them into plant pots around the porch. The stones were smooth and cool, mottled grays and creams beneath a glossy coat of paint.
Brush bristles left delicate strokes where green met stone, and the final varnish caught rain like tiny mirrors. Placing them in soil gave each pot a cheerful accent and sometimes a small visit from a curious sparrow.
The contrast between rough earth and glossy clover felt quietly satisfying and cheerful on gloomy days.
Steps
- Select smooth, flat stones and clean them to remove dust and grit.
- Sketch a shamrock outline with a pencil, then fill in with acrylic paints.
- Let paint dry fully, add small details or highlights, and seal with outdoor varnish.
- Place painted rocks among potted plants or along a garden path for decoration.
Shamrock wreath with layered paper leaves
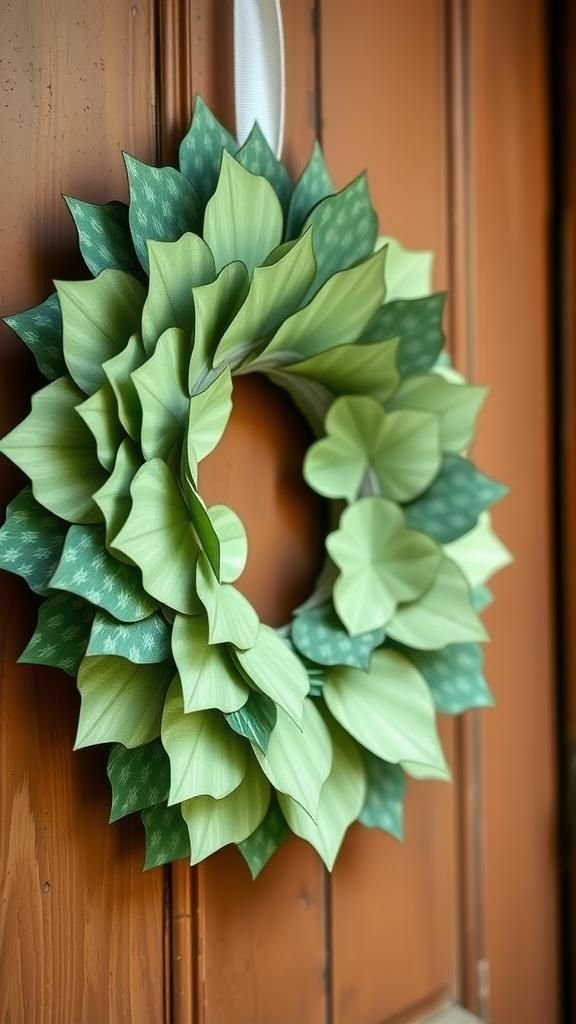
A paper shamrock wreath hung on my front door and felt like a quiet invitation. Each paper leaf had the crispness of cardstock and a slight papery rustle when wind nudged it.
Varying hues and tiny patterned papers—dots, stripes, speckles—created a lively surface when seen up close. From a distance the wreath read as a lush green circle, but leaning in revealed playful textures and irregular edges.
Neighbors stopping by often commented on the little imperfections, which somehow made the piece feel more personal.
Steps
- Cut numerous shamrock shapes from cardstock in different greens and patterns.
- Attach the shapes to a circular base, layering them to create fullness and depth.
- Tuck a few leaves in opposite directions to vary the silhouette and add visual interest.
- Hang the wreath on a door hook or nail and let it sway with breezes.
Shamrock window cling with translucent hues
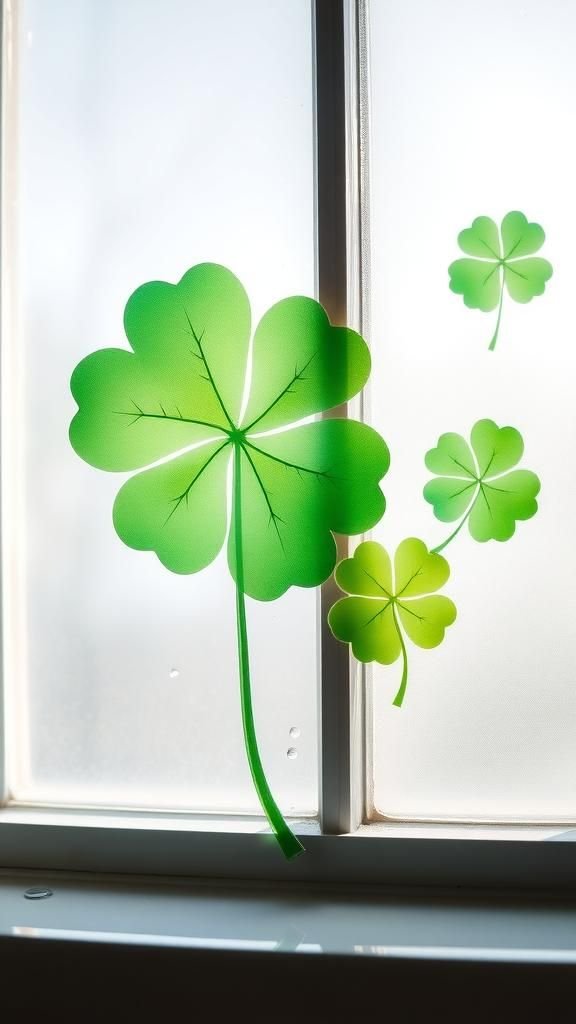
I made a translucent shamrock cling for a small bathroom window and loved how it softened morning light. The cling had a rubbery smoothness, almost cool to the touch, and when peeled from its backing it snapped with a faint, satisfying sound.
Greens blended into one another like watercolor, and sunlight refracted into cushioned pools of color on the sill. Cleaning the window around it left a faint residue that smelled faintly of adhesive, but the overall effect felt light and playful on foggy days.
Steps
- Trace shamrock shapes onto translucent vinyl sheets and cut them carefully.
- Paint or tint the vinyl sections using translucent window paint for color variation.
- Allow paint to cure, peel backing, and press the clings onto a clean window surface.
- Smooth out any bubbles with a soft cloth for an even appearance.
Shamrock confetti for tabletop cheer
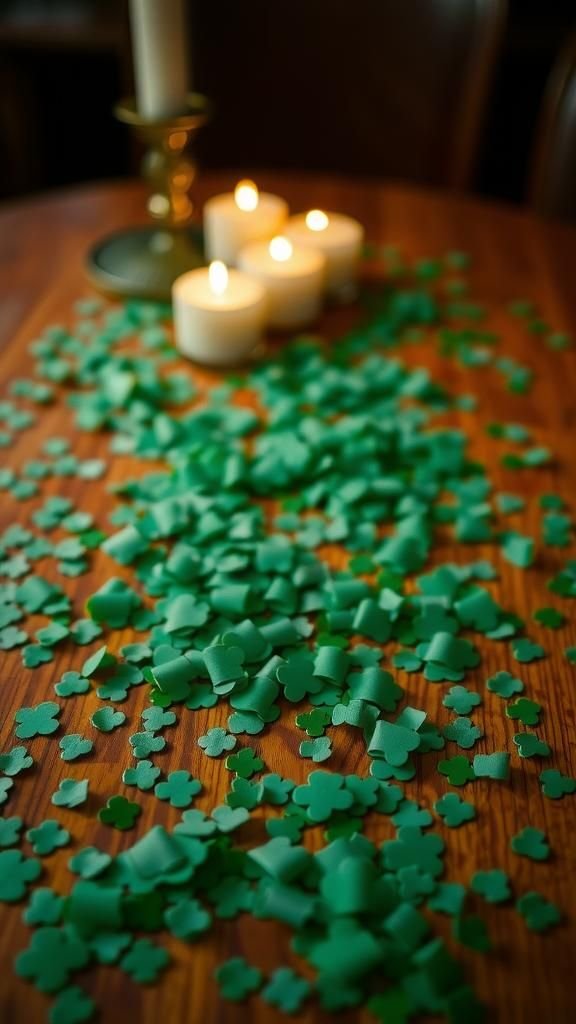
I scattered tiny shamrock confetti along a narrow dining table during a casual gathering and loved how they caught the light. Each piece had a crisp paper edge and a playful spring in its tiny shape, bouncing slightly when someone brushed past.
Greens ranged from mint to deep bottle, and metallic-backed pieces added a little glint like distant stars. Under candlelight the metallic ones winked, creating a soft constellation among plates and napkins.
Picking a few up felt like holding a miniature celebration between fingertips.
Steps
- Use small shamrock punches on scrap green paper and metallic cardstock to create confetti pieces.
- Gather the cut shapes in a bowl and mix to balance matte and shiny elements.
- Scatter the confetti gently along the center of a table or around place settings.
- Store any leftovers in a small jar for future gatherings.
Shamrock magnetic fridge motifs in greens and gold
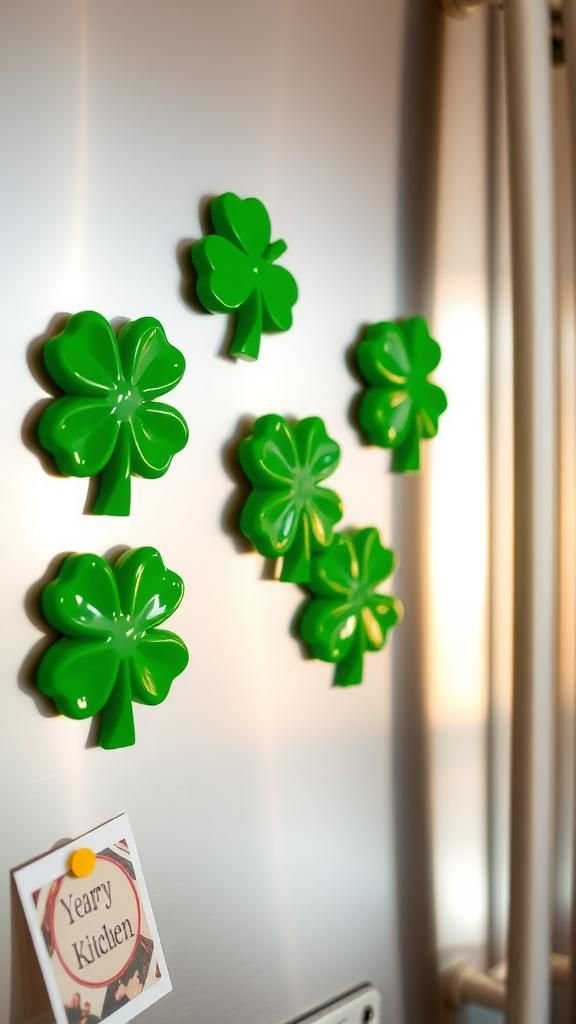
Small shamrock magnets lined up on my fridge turned it into a little tableau of memories. The magnets were slightly heavy for their size, with smooth painted fronts and cool metal backs that clicked reassuringly against the steel door.
Greens balanced with a hint of gold leaf on a few pieces, which reflected kitchen light in tiny flashes. Notes and photos attached to them took on a friendlier look, and every time I reached for the handle a tiny cluster of clovers greeted me like old friends.
Steps
- Cut shamrock shapes from sturdy material like thin wood or thick cardboard.
- Paint each front with acrylics and add a touch of gold leaf or metallic paint on some pieces.
- Glue small round magnets to the backs and press firmly to secure.
- Let dry completely and place on the fridge to hold notes and photos.
Shamrock lanterns casting soft green light
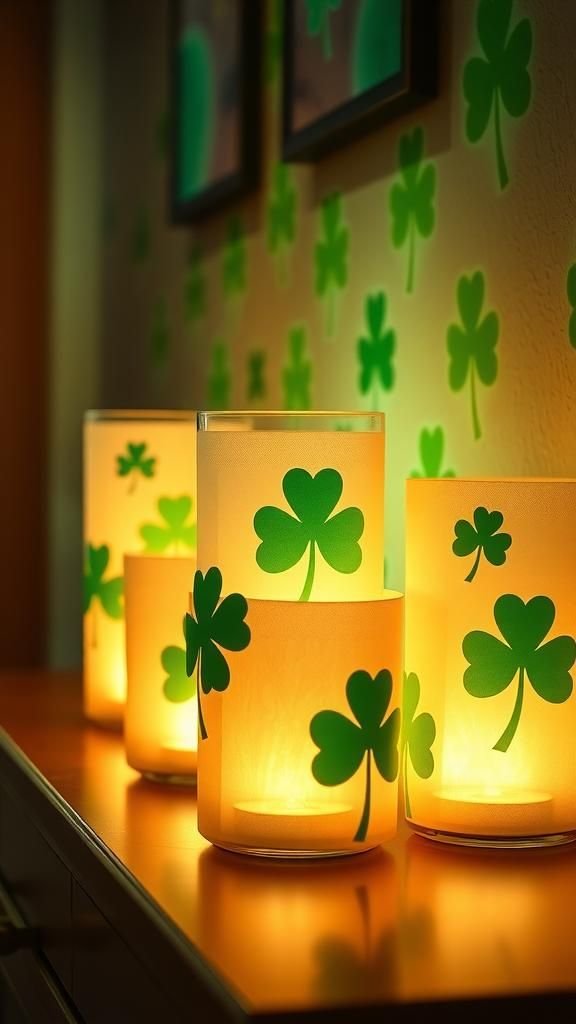
I placed little shamrock lanterns along the hallway one evening and the glow felt gentle and kind. Thin paper or vellum diffused candlelight into warm pools, and the cut clover shapes created moving silhouettes on the walls.
The scent of wax and a hint of smoke lingered briefly when candles were first lit, then settled into a quiet background hum. Passing by, the soft light warmed my skin and made the corridor feel like a path through a small, enchanted garden.
Steps
- Cut shamrock patterns into vellum or thin paper panels sized to fit around small glass jars.
- Wrap the panels around jars and secure with glue or decorative tape near the seam.
- Place tea lights or LED candles inside each jar and arrange them along a hallway or tabletop.
- Dim room lights slightly to let the shamrock silhouettes appear clearly on nearby surfaces.
Shamrock cutlery wraps for festive place settings

I slipped shamrock wraps around cutlery for a small dinner and loved the tiny touch they added to each plate. The wraps had crisp edges and a faint bend where they hugged the utensils, soft ribbon tying them into a neat bundle.
The texture of cardstock contrasted with the cool metal of forks and spoons, creating a pleasing pairing. Guests picked them up with a smile, and the table felt both casual and intentional.
The little paper shamrocks peeking out added a visual rhythm along the table.
Steps
- Cut strips of cardstock long enough to wrap around napkins and cutlery sets.
- Affix a small shamrock cutout or sticker to each strip as a focal point.
- Wrap the strip around the napkin and utensils, securing with a dab of glue or a small piece of washi tape.
- Add a short ribbon or twine if desired for decoration before placing at each setting.
Shamrock embroidered bookmarks with soft threadwork
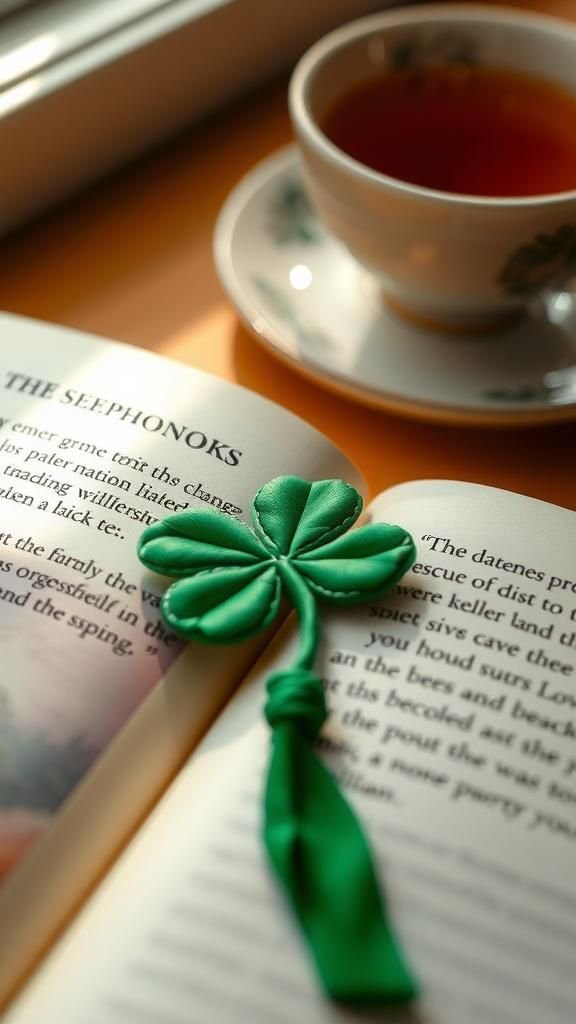
A tiny embroidered shamrock bookmark sat in my current read, edges soft and thread slightly raised where stitches crossed. The linen backing had a gentle roughness while the cotton thread felt smooth and slightly satiny.
Each leaf was formed by little satin stitches that caught light differently as the book shifted. The bookmark slipped between pages easily and peered out like a green wink.
Holding it brought a small quiet pleasure, like a private charm tucked away to return to on colder mornings.
Steps
- Cut a strip of linen or sturdy fabric to bookmark size and finish the edges with a narrow hem.
- Transfer a small shamrock design onto the fabric using a washable marker.
- Stitch the shamrock using satin and backstitches for definition with embroidery thread.
- Optionally attach a small tassel to one end for extra charm.
Shamrock napkin rings from upcycled materials
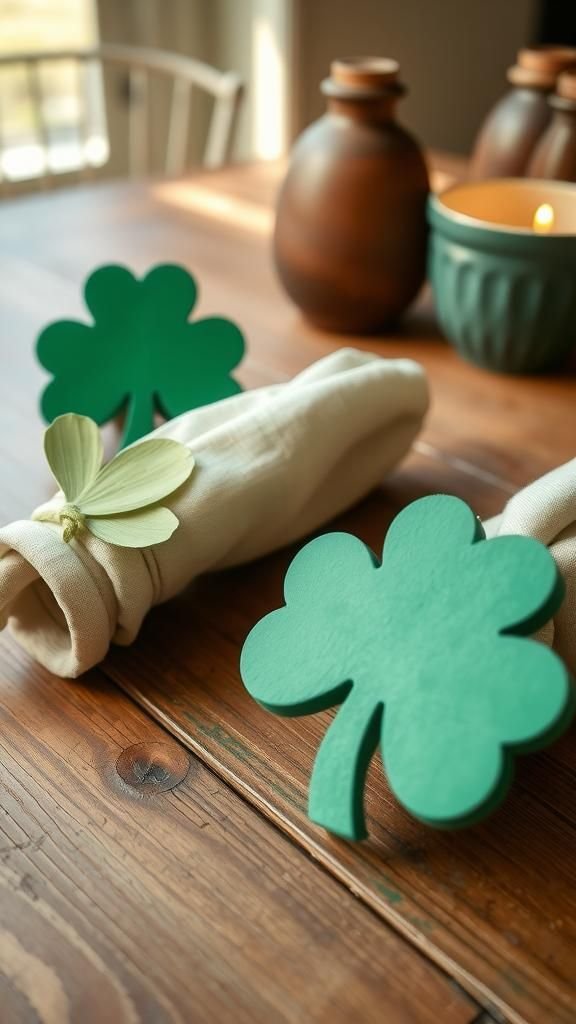
I fashioned napkin rings with shamrock cutouts from recycled cardboard and they gave the table a playful thrifted look. The cardboard had layered edges and a faint corrugated pattern visible at the cut sides, softened by paint and a light sanding.
Painted greens varied in tone, and a few had sparkly accents that caught fork light. Sliding a napkin through each ring felt like threading a small story, and seeing the repeated motif along the length of the table pulled the whole meal into a cohesive, relaxed scene.
Steps
- Cut rings from sturdy cardboard or upcycled packaging and smooth the edges.
- Paint the rings in green hues and glue a shamrock cutout to the front of each.
- Add decorative touches like glitter, ribbon, or small beads if desired.
- Thread napkins through the rings and arrange them at each place setting.
Shamrock mosaic tiles for a tabletop accent
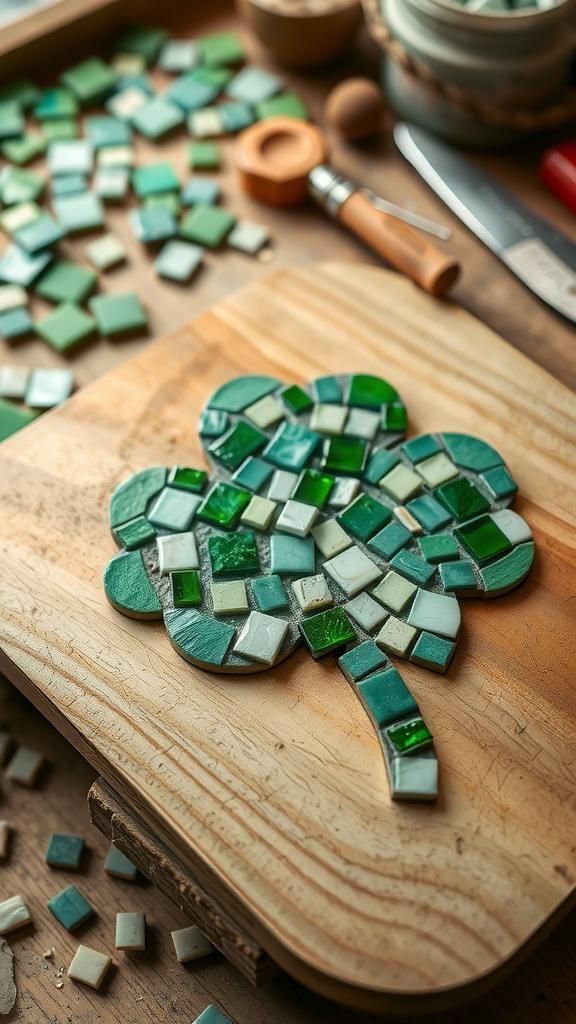
Creating a shamrock mosaic felt quietly meditative as tiny pieces clicked together. The glass tiles were cool and reflective, edges sharp where they had been trimmed, each with slightly different surface textures—matte, crackle, glossy.
Arranging them into a shamrock pattern transformed small shards into a coherent shape that shimmered under direct light. Grout filled gaps like quiet breath between tiles, muting the bright reflections into a softer shimmer.
Once sealed, the tabletop held a jewel-like center that made coffee breaks feel ceremonious.
Steps
- Sketch a shamrock pattern on a board sized for the tabletop accent area.
- Arrange glass or ceramic tiles within the sketch, cutting pieces to fit curves as needed.
- Set tiles with adhesive and allow to cure, then apply grout to fill gaps.
- Clean excess grout, let dry, and seal the surface for protection.
Shamrock tea towel prints with hand-stamped charm
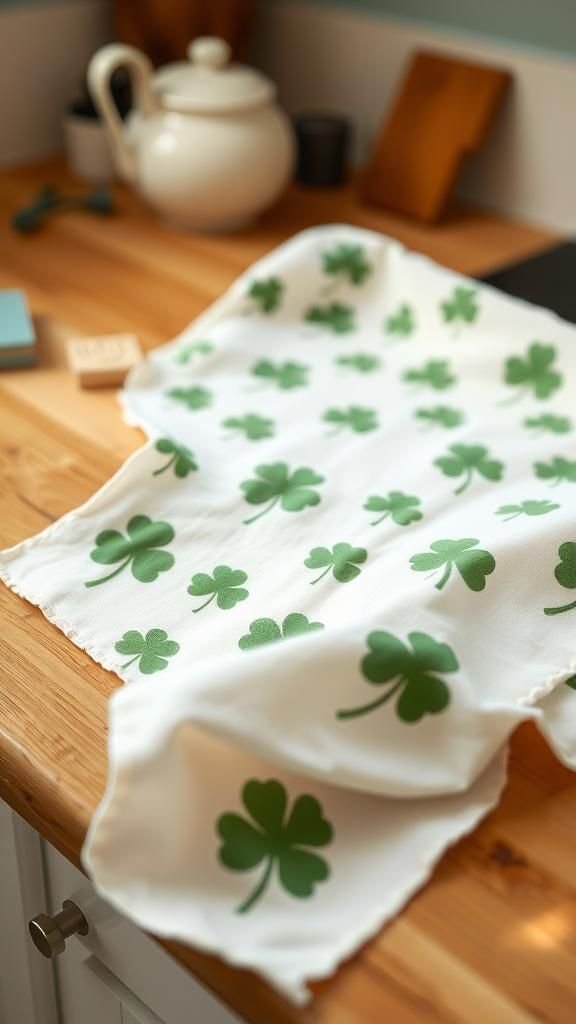
I stamped shamrocks onto tea towels and the fabric took on a homey, printed-surface smell for a while. The ink sat slightly raised where stamps pressed firm, and each impression had tiny variations that felt warm and human.
Folding the towels revealed a repeating rhythm of clovers, and a damp towel released a faint tang of paint the first wash. The prints brightened otherwise plain linens and made kitchen chores feel a touch more festive.
Passing by, I found myself smoothing one out just to look at the pattern again.
Steps
- Carve a simple shamrock stamp from a piece of soft carving block or a potato.
- Press the stamp into textile ink and apply evenly onto a clean cotton tea towel.
- Repeat the pattern across the towel, allowing for slight spacing variation for a handmade look.
- Heat-set the ink if required and launder according to ink instructions before regular use.
Shamrock candles with pressed leaf silhouettes

A cluster of candles with tiny shamrock silhouettes warmed my living room on a quiet night. The wax had a soft sheen and a faint vanilla undertone from the candle blend, and the pressed shapes sat like little green islands beneath a clear wax overlay.
When lit, flames flickered behind the clover forms and cast dancing shadows across the table. The room felt intimate and gentle, the scent mingling with the faint aroma of old books and evening rain.
Holding a candle gave a small, calm pleasure.
Steps
- Melt candle wax in a double boiler and pour a thin base layer into small molds.
- Place small shamrock cutouts or leaf silhouettes onto the semi-set base and pour a clear top layer.
- Insert wicks and allow candles to cool and harden completely.
- Trim wicks and arrange candles in clusters for a soft ambient effect.
Shamrock embroidered hoop art for wall display
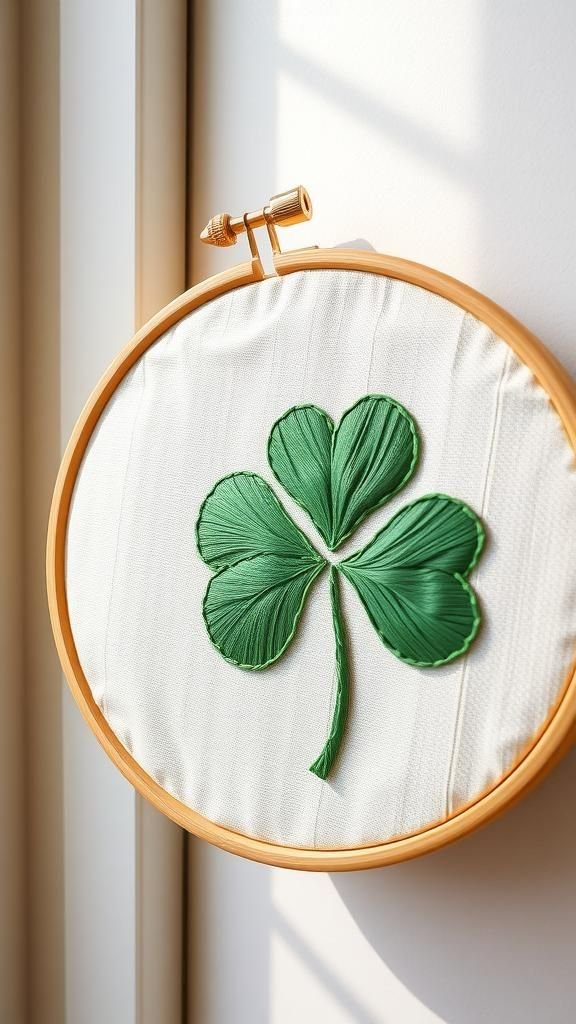
An embroidered shamrock hoop added a gentle nod of green above my desk and made writing feel a touch friendlier. The fabric inside the hoop had a neat tautness, threads crossing glossy and matte in places where different stitches met.
The leaves appeared slightly raised, giving a subtle three-dimensional presence against the flat backdrop. From a distance the piece read as a simple green motif, but up close the tiny knots and thread ends told stories of patient evenings and quiet hands.
It stayed hung for months without feeling overbearing.
Steps
- Stretch fabric in an embroidery hoop and transfer a shamrock outline onto the surface.
- Stitch the outline with backstitch and fill the leaves with satin or seed stitches for texture.
- Add small accent stitches or french knots for detailing and interest.
- Trim excess fabric at the back and hang the hoop on a wall with a small nail.
Shamrock painted mason jars as vases
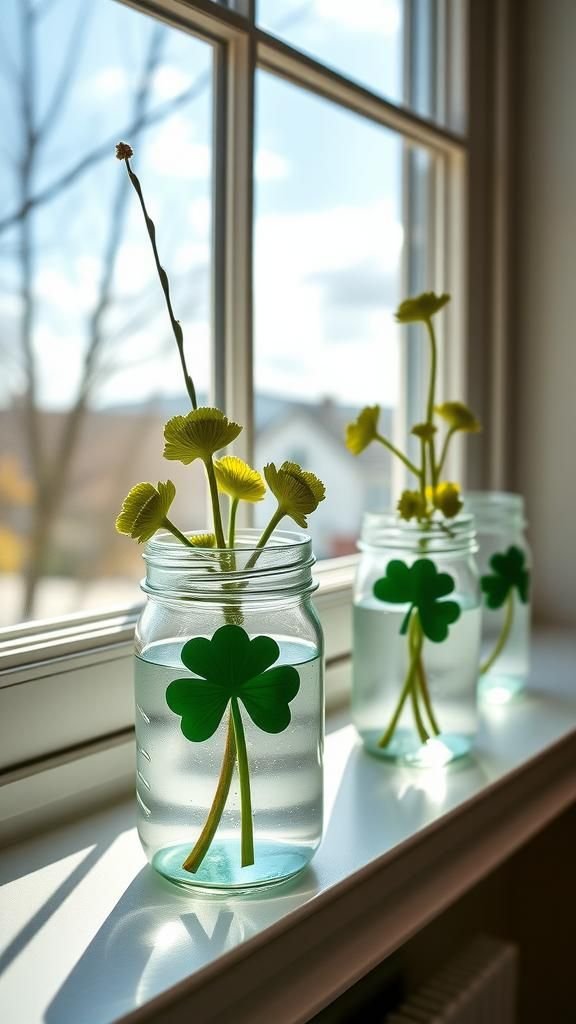
I turned mason jars into little shamrock vases and they brightened a windowsill full of cut stems. The glass felt cool and slightly textured where paint adhered, and the painted shamrocks had visible brush marks that reminded me of handwork.
Small bouquets of daisies and sprigs looked friendlier when framed by green silhouettes, and condensation on water made the painted surfaces glisten faintly. The jars clinked softly when rearranged, and their cheerful presence made simple flowers read like a deliberate centerpiece instead of an afterthought.
Steps
- Clean mason jars and paint shamrock shapes with glass-friendly paints on the exterior.
- Leave painted jars to dry fully and cure according to paint instructions.
- Fill jars with water and fresh stems, arranging small bouquets for each jar.
- Group jars together on a sill or table for an informal centerpiece.
Shamrock pinned brooches from felt and beads

I made shamrock brooches with tiny bead centers and they became conversation starters at a casual meetup. The felt felt soft and warm against a palm, while beads offered a smooth contrast and a little glint.
Each brooch had a small safety pin sewn into its back, and the stitching created a subtle ridge that added character. Wearing one felt whimsical in a way that threaded celebration into everyday clothing.
People asked about the materials and often smiled when handed a spare brooch before leaving.
Steps
- Cut two matching shamrock shapes from felt for each brooch and add a small piece of batting between them.
- Sew beads into the center for decoration and secure the edges with neat running stitches.
- Attach a brooch pin or safety pin to the back with tight stitches.
- Trim any loose threads and press gently to shape before wearing.
Shamrock table runner with appliqué charm
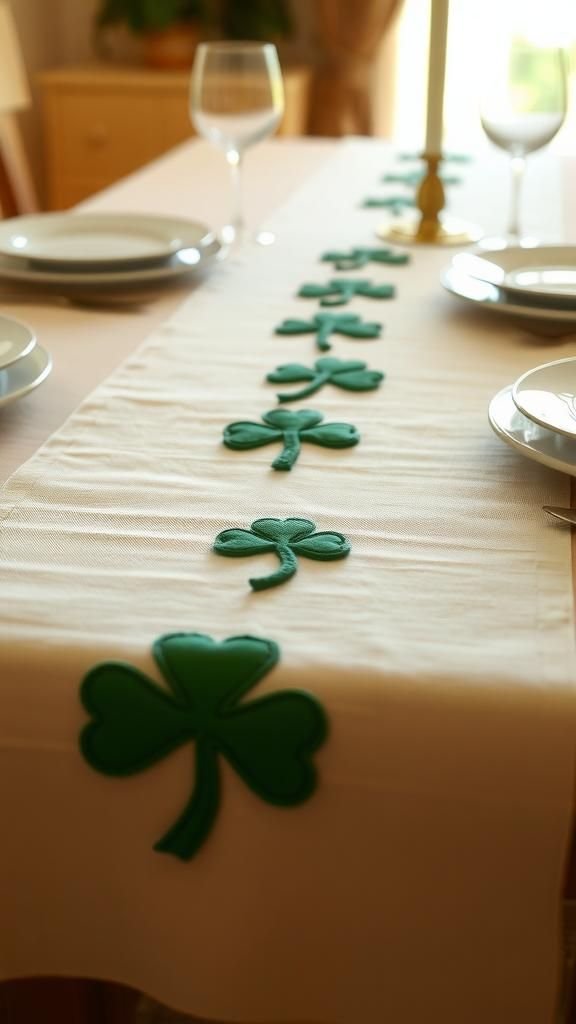
I layered shamrock appliqués down a linen table runner and the table instantly felt like a cozy gathering place. The runner’s fabric had a cool weave under my hands, and each appliqué sat slightly raised, creating a textured path of green.
Threaded edges curled faintly where stitches met fabric, adding gentle relief. When plates and glasses were set, the runner acted like a unifying backdrop, its clover trail giving rhythm to the place settings.
Cleaning revealed a few loose threads, but those lent a lived-in honesty I appreciated.
Steps
- Cut shamrock shapes from a contrasting green fabric and arrange them along the center of a linen runner.
- Pin or baste the appliqués in place and stitch around the edges with coordinating thread.
- Add decorative embroidery or small accents between shamrocks if desired.
- Press the runner lightly and place it on the table for display.
Table of Contents