Spring floral wreath DIY ideas spark a certain kind of cozy excitement for me every year. I always find myself wandering through farmers markets and garden beds, picking up stems and imagining how different textures and colors will sit together on a front door.
Spring Floral Wreath DIY Ideas became my way of stretching creative muscles while welcoming the softer light and warmer breezes.
Making a wreath feels like a small ritual: a cup of tea nearby, a scattered pile of petals, and the quiet pleasure of arranging blooms until something feels right. These ideas are friendly prompts for playing with color, scent, and shape around the house.
Dried lavender hoop with rustic burlap accents
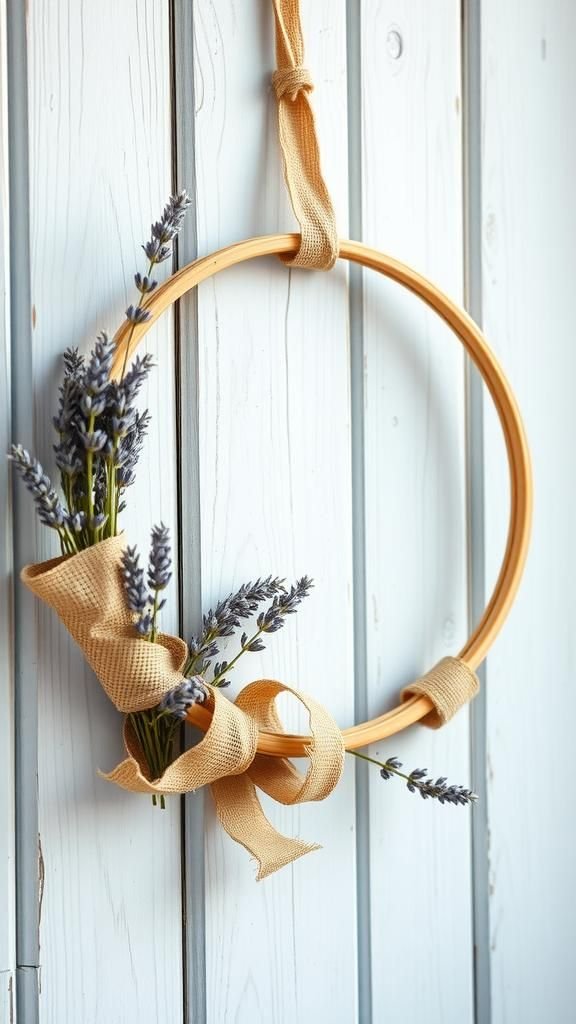
I fell for dried lavender on a warm afternoon market stroll; the smell lingers in the memory more than in the room. This wreath pairs thin lavender sprigs with a rounded hoop, linen textures, and a touch of burlap for a countryside feeling.
The muted purple petals and delicate stems create a soft silhouette against a painted door. It felt calming to set it on the table and breathe in herbal notes, while the rough burlap offered a tactile contrast to fragile blossoms.
Steps
- Gather a small metal or wooden hoop, bundles of dried lavender, short burlap strips, thin floral wire, and scissors.
- Position lavender bundles along one side of the hoop, layering stems so the blooms overlap naturally.
- Secure each bundle to the hoop with floral wire, wrapping until stems feel stable and the lavender fan looks even.
- Tie or tuck burlap strips into place for texture, allowing edges to fray slightly for a rustic look.
- Create a small loop of wire or ribbon on the back for hanging and trim excess stems.
Tulip half-moon wreath bursting with bright color

A half-moon arrangement of tulips felt playful the first time I saw it on a friend’s porch. The curved shape lets blooms lean together, creating a sense of movement like a bouquet caught mid-sway.
Petal edges gleam in spring light and stems tuck into greenery that muffles the structure beneath. I remember the way reds and corals popped against a white door, while the crisp interior leaves added a fresher tone.
It reads festive without being over the top, and smells faintly of early garden dew.
Steps
- Collect a crescent-shaped base or bend a wire frame into a half-moon, plus fresh tulips and leafy greens.
- Arrange tulip stems along the crescent so heads cluster on one side, alternating colors for depth.
- Fasten stems to the frame with floral tape or wire, keeping most greenery on the inner curve for support.
- Fill gaps with sprigs of foliage for fullness and a clean outer edge.
- Add a ribbon loop on the back for hanging and trim stem ends for neatness.
Eucalyptus and baby’s breath: airy minimalist circle

Eucalyptus has a cool, silvery look that feels grounded and elegant. When combined with clouds of baby’s breath it becomes almost whisper-like around a circular base.
I remember arranging a bunch on my kitchen counter and watching the tiny white blossoms soften the eucalyptus’s bold leaves. The scent was subtle and comforting, the leaves’ matte texture contrasting the feathery blooms.
It worked well on a muted door where the wreath read as calm and refined rather than showy, and the overall impression was pleasantly light.
Steps
- Prepare a plain circular base, fresh or preserved eucalyptus stems, and several sprigs of baby’s breath.
- Layer eucalyptus stems around the base, overlapping to create a flowing ring and secure with thin florist wire.
- Tuck small clusters of baby’s breath into gaps to form soft, cloud-like pockets.
- Make sure the silhouette stays balanced by evening out dense and airy sections.
- Add a discreet hanging loop at the back and trim any protruding stem tips.
Bright daffodil cluster with ribbon tail flourish

That burst of sunny daffodils always lifts my mood; their trumpet shapes feel joyful against a spring sky. This style gathers compact clusters and adds a ribbon tail that catches breezes, offering a playful sweep beneath the blooms.
I remember the snap of the ribbon fabric, the way the yellow reflected warm afternoon sun, and a subtle green base that kept the cluster grounded. It looked like a pocket of sunshine pinned to a door, and passerby smiles seemed to respond to the cheerful color.
Steps
- Select a round base, fresh daffodils with sturdy stems, coordinating ribbon, and floral tape or wire.
- Group daffodils into a tight cluster and secure to one side of the base, overlapping stems for volume.
- Fasten the ribbon at the cluster’s base and let two long tails hang down or curl slightly.
- Conceal stem joints with small sprigs of greenery for a neat finish.
- Create a hanging loop behind the base and trim excess stems for balance.
Wildflower meadow ring with mixed textures
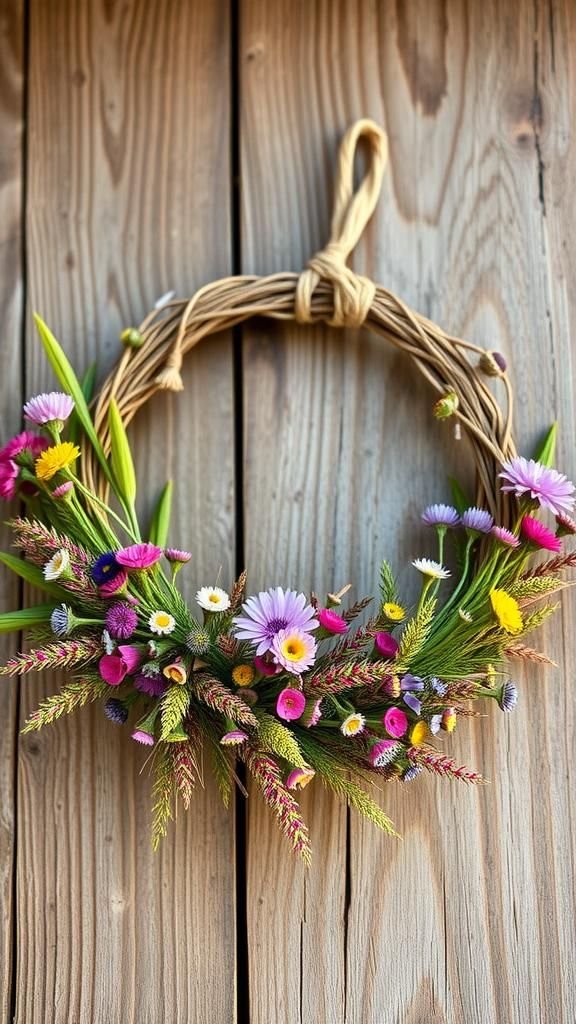
A wildflower-inspired ring feels collected rather than curated, like a stroll through a local meadow folded into a circle. I once gathered an assortment of small blooms and grasses that created a lively, textural surface full of unexpected color pops.
Little seed heads and feathery grasses gave it a windswept quality while soft petals offered brighter notes. It read very hand-made in the best way, with a slightly irregular edge that reminded me of sunny afternoons and barefoot walks.
Steps
- Choose a sturdy ring base and pick a mix of wildflowers, small blooms, and ornamental grasses.
- Cluster blooms in small bundles and affix them around the ring, varying heights and colors for an organic feel.
- Weave grasses through the clusters to add movement and soften edges.
- Fill in any sparse spots with tiny filler flowers or seed heads for evenness.
- Add a simple hanging loop and lightly trim stray stems for a pleasing silhouette.
Herb garden wreath with rosemary and thyme

An herb wreath felt practical at first, then quickly charming when its scent filled the porch. Rosemary’s piney stems and thyme’s tiny leaves created an inviting, green-rich ring that smelled unexpectedly like comfort.
I liked the contrast between rosemary’s rigid texture and thyme’s soft scatter; the overall shape was neat but lively. It suggested a kitchen nearby and quietly announced seasonality.
The aroma asked for a slow inhale, and the palette was understated—greens in several tones that read fresh against a painted surface.
Steps
- Gather a circular base along with fresh rosemary sprigs, thyme stems, and thin floral wire.
- Arrange bundles of rosemary around the base, aligning stems to create a continuous band.
- Interject thyme sprigs between rosemary clusters to soften the profile and add low texture.
- Secure everything with wire, making sure herbs feel snug and evenly distributed.
- Attach a loop on the back for hanging and trim any uneven stems for a tidy edge.
Peony and ranunculus: soft romantic statement piece
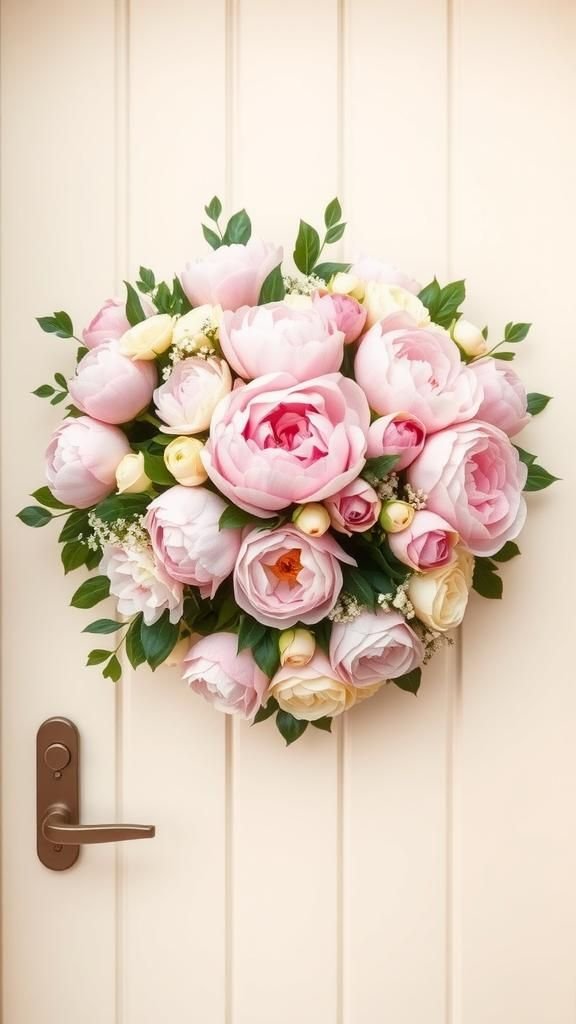
Large peony heads paired with layers of ranunculus petals made a wreath that felt indulgent without being fussy. The blooms had that lush, soft density that invited a hand to linger near the petals.
I remember arranging them and noticing how light caught the layered shapes, creating shadows and depth like folds in fabric. The scent was floral and faint, and the overall effect leaned toward romantic and generous.
It read like a celebration of spring’s abundance and worked beautifully on neutral backgrounds.
Steps
- Pick a sturdy round base and collect peonies, ranunculus, and filler greens for support.
- Place the largest blooms first, spacing them to create a balanced focal band.
- Nestle ranunculus between peonies to fill gaps and enhance the layered look.
- Add small greens to support bloom heads and soften the wreath’s edge.
- Secure stems well and fasten a hanging loop on the reverse side.
Citrus slice accents for a sunny, aromatic wreath
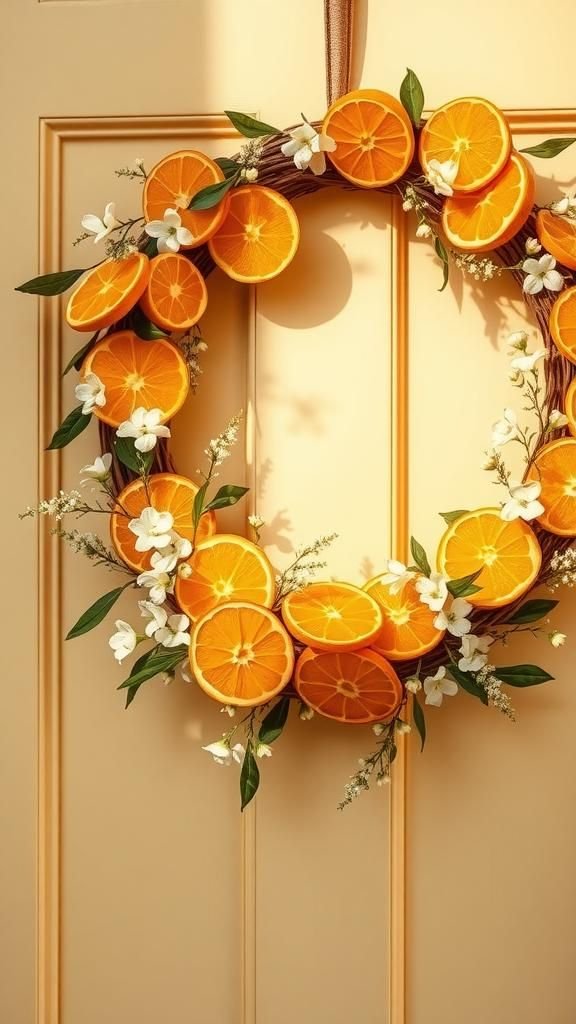
I first noticed dried citrus slices strung through a wreath at a market stall and loved the unexpected tang. Thin rounds of orange and lemon added a sunlit glow and a crispy, fragrant suggestion.
Paired with small white blooms and feathery greenery, the citrus shapes read almost like tiny suns rimmed in rind. It felt playful and clean, with a slight crackle to the dried slices that invited a closer look.
The scent suggestion lingered faintly, making the piece feel bright on a cool spring morning.
Steps
- Prepare a base and dry thin citrus slices ahead of time until slightly crisp but not brittle.
- Arrange citrus slices around the wreath, spacing them evenly or clustering a few for emphasis.
- Insert small white filler blooms and delicate greenery between slices to balance color.
- Secure elements with floral wire or clear craft thread so slices remain visible.
- Add a discreet hanging loop and clean up any loose bits for a neat finish.
Succulent-centered wreath with mossy base and contrast
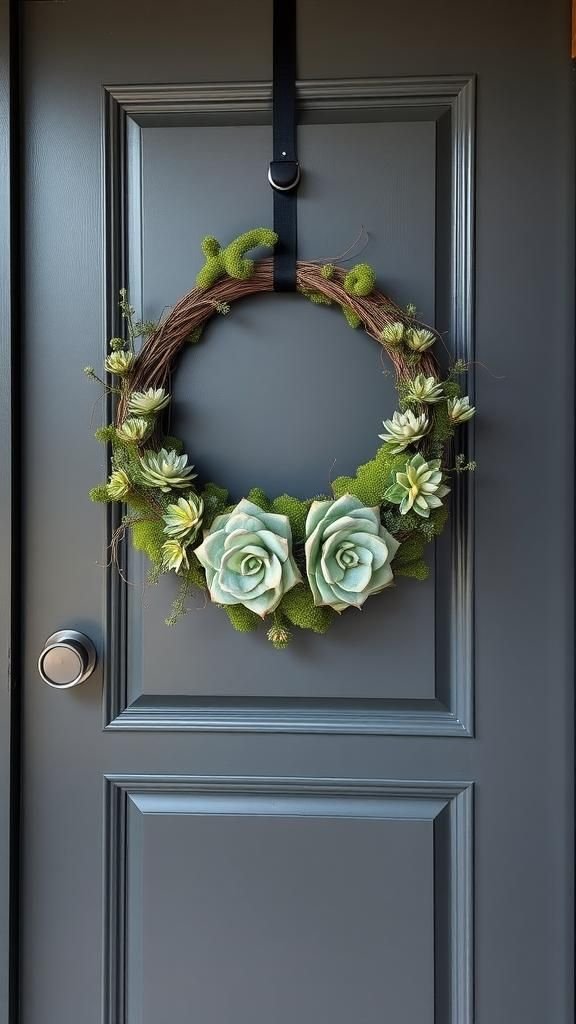
A wreath centered around a cluster of succulents felt modern and pleasantly unexpected. The fleshy leaves offered a sculptural contrast to soft moss that filled the base.
I enjoyed the tactile opposition: succulents’ smooth surfaces against the moss’s velvet-like cushion. The palette leaned toward muted greens and dusty blues, giving a slightly architectural vibe.
It felt like a small living sculpture, steady and serene, that brought a hint of indoor garden calm to the entryway without overpowering other décor.
Steps
- Choose a ring base and cover it with a thick layer of preserved or living moss.
- Select a variety of small succulents and arrange them in a central cluster or asymmetrical grouping.
- Secure succulent bases into the moss with floral pins or a dab of soil if working with living plants.
- Add small sprigs of contrasting texture around the succulents for balance.
- Ensure a sturdy hanging point on the back and mist lightly if using live succulents.
Paper flower wreath with pastel crepe textures

Papery textures and pastel hues made a wreath that felt like a forever-spring piece. I remember crafting delicate crepe petals that held shape well and offered a matte, tactile surface.
The color palette of soft blush, mint, and lemon read gentle and playful. There was pleasure in the quiet crinkle when a petal moved and the way light diffused across the paper.
It perched happily on an interior door and never wilted, bringing a crafted, whimsical energy to a hallway where petals stayed beautifully intact.
Steps
- Gather crepe paper in chosen pastel shades, a circular base, floral wire, hot glue, and craft scissors.
- Form individual petals from crepe sheets and assemble them into layered blossoms of varying sizes.
- Affix flowers to the base, arranging colors for balance and textural contrast.
- Fill gaps with smaller paper buds and leaves to create a cohesive surface.
- Add a ribbon or loop for hanging and inspect for any loose edges to secure.
Mini succulent ring favors for a petite door display

A petite ring populated with tiny succulents felt delightfully compact and modern. The scaled-down composition had an immediate charm; small rosettes and muted tones gave a quiet presence.
I enjoyed how the miniature plants created a sense of careful thought without demanding much space. The mossy pockets around each succulent cushioned them in an almost jewel-like setting.
On a narrow door, the wreath read as a refined accent—subtle, botanical, and slightly sculptural—calling attention to texture rather than loud color.
Steps
- Select a small circular base and several mini succulents along with preserved moss and pins.
- Create small moss beds around the base where each succulent will sit.
- Press succulents gently into the moss and secure with pins or a dab of soil if living.
- Arrange plants to maintain visual balance and vary heights slightly for dimension.
- Attach a slim hanging loop and check that all succulents are stable.
Forsythia branch wreath with spiky yellow drama

Long forsythia branches brought an energetic yellow pop that felt almost electric against winter-leaning skies. The spiky, linear blooms created movement and a vivid silhouette.
I remember the lightness they gave when set in a loose ring; the branches arced and reached, making the shape feel lively and impulsive. The color read joyful and a bit wild, making the wreath a statement without being fussy.
It seemed to announce the calendar changing and brought a smile easily for anyone passing by.
Steps
- Gather several long forsythia branches, a flexible ring base, and floral wire or twine.
- Bend and layer branches around the ring, letting some tips extend outward for dynamic movement.
- Secure branch intersections with wire or twine so the structure stays intact.
- Adjust protruding tips to achieve a balanced, spiky silhouette.
- Form a hanging loop at the back and trim any awkward ends for a tidy look.
Magnolia leaf wreath with glossy deep green sheen
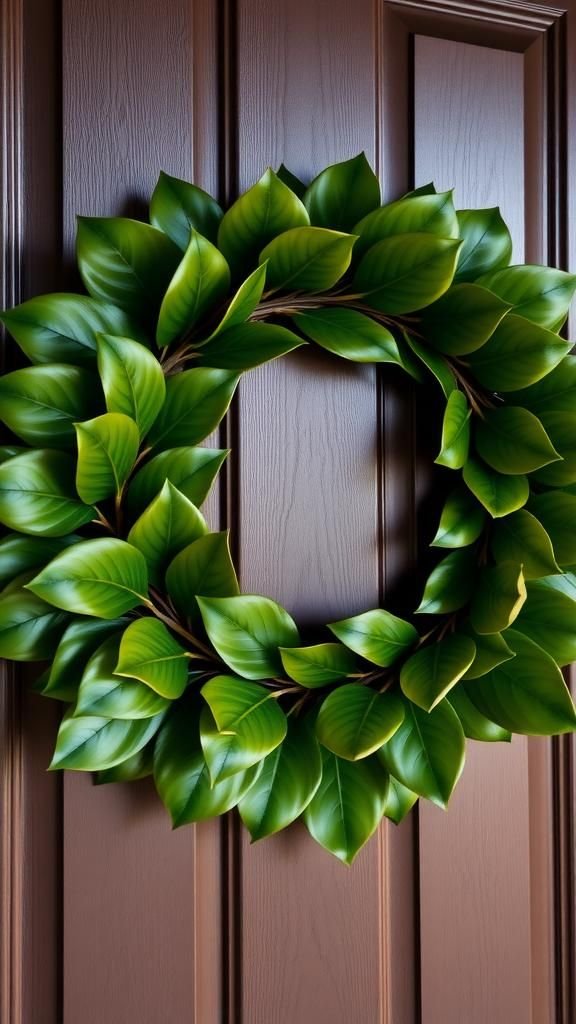
Magnolia leaves felt stately and evergreen, their glossy surfaces catching late-afternoon light in a dramatic way. The darker green on top contrasted with a warm, fuzzy underside that peeked in a few places, offering a subtle two-tone effect.
I appreciated the sculptural quality of the broad leaves when layered into a tight circle; the wreath read formal yet welcoming, like a quiet nod to classic southern porches. It seemed to hold up well outdoors and added a refined, natural weight to the entrance.
Steps
- Collect large magnolia leaves, a sturdy wreath frame, and floral wire or clips.
- Overlap leaves around the frame, aligning glossy sides outward for a polished look.
- Secure leaf stems to the frame with wire in small hidden loops.
- Adjust overlapping to hide gaps and reveal a touch of the fuzzy undersides for warmth.
- Create a strong hanging loop behind the frame and trim any excess stems.
Cherry blossom branch sprigs for a delicate halo

Short cherry blossom sprigs created a halo effect that felt fleeting and precious. The pale pink petals looked almost translucent in sunlight, and scattered stamens gave each cluster a lively center.
I placed a few branches to arch gently, and the result felt ephemeral, like a captured moment from a tree in full bloom. The scent was barely there but the visual suggested a hopeful season.
It read gentle and poetic, turning a plain entrance into something soft and unexpectedly delicate.
Steps
- Find a light circular base and gather several pale cherry blossom sprigs, fresh or high-quality faux branches.
- Position sprigs so they arch slightly around the wreath, creating a soft halo effect.
- Fasten stems discreetly with floral wire or tape, ensuring blossoms face outward for visibility.
- Fill in any thinner spots with additional small clusters for fullness.
- Attach a subtle hanging loop and trim stray stem ends for a clean outline.
Bluebell cascade on a narrow oval base for charm
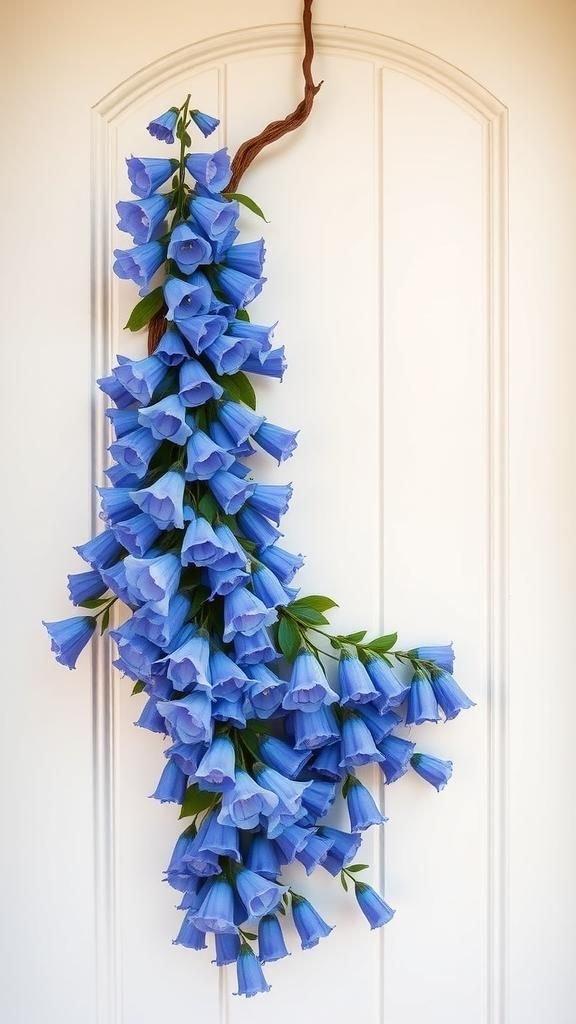
Bluebells offered a narrow, bell-shaped charm that read as pastoral and refined. Arranged on a slim oval base, they formed a cascading line that felt like a gentle waterfall of color.
I remember how the soft blue-violet contrasted with green stems and made the overall profile feel elongated and elegant. The tiny bell shapes created a pleasing rhythm when seen from a distance, and up close their delicate petals revealed fine veins.
It had a tucked-away garden quality that invited a second glance.
Steps
- Select an oval base and collect clusters of bluebells with supporting greenery.
- Arrange flowers along one side or down the center to form a cascading effect.
- Secure stems to the base with floral wire, overlapping clusters for a flowing line.
- Add small greens to the opposite side to balance the silhouette if desired.
- Attach a strong hanging loop at the back and trim excess stems for neatness.
Satin ribbon and silk blooms for a long-lasting look
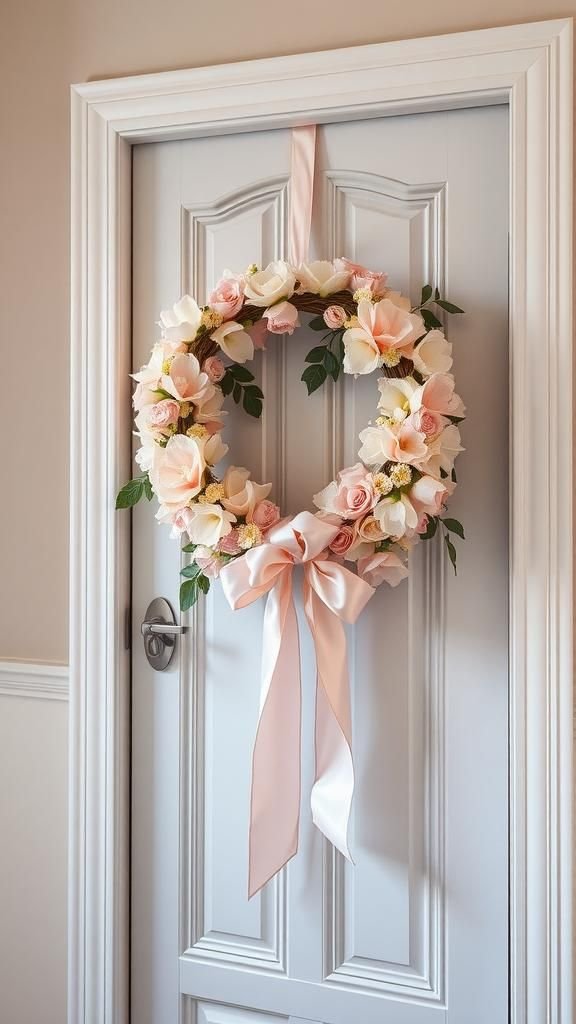
Silk blooms paired with satin ribbon made a lasting piece that still felt soft and springlike. The fabric petals had a matte sheen and kept their shape regardless of weather, while the ribbon added a gentle drape and a hint of sheen.
I appreciated how the textures played together: smooth ribbon edges and layered petals created a composed yet approachable surface. It sat well indoors or on a sheltered porch, offering color without the concern of wilting, and stayed inviting through breezy afternoons and quiet evenings.
Steps
- Choose a sturdy base, several high-quality silk blooms, and coordinated satin ribbons.
- Position silk flowers around the base, varying sizes for depth and a natural rhythm.
- Secure blooms with floral wire or a hot glue method appropriate for the materials.
- Add ribbon accents that drape slightly, tucking ends behind flowers for a polished finish.
- Attach a hanging loop and give the wreath a final visual balance check.
Forsythia and grapevine interplay for contrast

A grapevine base paired with bright spring blooms offered pleasing contrast between the rough, woody core and lively flowers. The twisted vine provided structure and a natural, slightly irregular silhouette, while lively yellow blooms created focal points against the brown texture.
I liked how the vine’s shadows played on the door beneath and how the blooms seemed to soften the overall profile. It suggested a handmade energy and a connection to the natural season, as if a branch had been coaxed into a celebratory circle.
Steps
- Obtain a grapevine wreath base and forsythia or similarly bright spring blooms.
- Tuck blooms into the grapevine twists at intervals, choosing cluster sizes for balance.
- Secure any loose stems with thin wire woven into the vine so elements stay put.
- Step back to check the balance and add small filler greens where needed.
- Ensure a secure hanging point and trim any protruding stem tips for tidiness.
Vintage brooch bouquet wreath for heirloom flair

I inherited a small box of vintage brooches and found arranging them into a wreath unexpectedly charming. The metallic gleam and glass stones reflected light like tiny treasures, and clustered together they felt like a memory-laden bouquet.
Velvet ribbons and muted silk leaves made the jewelry read more floral than ornamental. It sat as a conversation piece, balancing nostalgia and craft.
The tactile cool of metal against soft fabric gave a layered sensory experience that felt elegant without trying too hard.
Steps
- Collect a variety of vintage brooches, a padded base, soft fabric leaves, and pins or hot glue.
- Arrange brooches in a pleasing pattern on the base, starting with larger pieces as anchors.
- Fill gaps with fabric leaves or small silk flowers to soften edges and add depth.
- Secure each brooch firmly so nothing shifts during hanging.
- Add a ribbon loop at the back for hanging and inspect for loose elements.
Poppy and wheat arrangement for rustic spring contrast

Combining bright poppy heads with stalks of wheat balanced color and texture in an appealing way. The poppy petals felt delicate and papery beside the dry, linear wheat stems, creating a contrast between bloom and grain.
I remember how the wheat added a grounded, earthy note that kept the red of the poppies from feeling too flashy. The overall tone read like country spring—lively yet homey—and it carried a slight harvest hint that felt pleasantly unexpected for the season.
Steps
- Gather poppy blooms, dried wheat stalks, a circular base, and floral wire or tape.
- Place wheat stalks to form a subtle supportive band, then position poppies among them for color contrast.
- Secure stems with wire so poppies stand out yet feel integrated with the wheat.
- Fill any sparse spots with small greens or dried filler for cohesion.
- Attach a hanging loop and trim visible stem ends for a tidy finish.
Heather and pinecone accents for unexpected texture

Heather brought a bristly, textural look that paired surprisingly well with small pinecones for earthy punctuation. The tiny clustered flowers offered an angular haze while the pinecones added woody weight and visual anchors.
I enjoyed the tactile mix; the heather felt almost soft to the fingertips while cones provided an autumnal counterpoint that somehow read cozy rather than seasonal. The color range leaned toward dusky pinks and purples, which warmed a neutral door and brought a natural textured pattern.
Steps
- Select a circular wreath base along with sprigs of heather and small pinecones.
- Arrange heather sprigs around the base, creating pockets of color and texture.
- Nestle pinecones into clusters to serve as focal anchor points and secure with wire.
- Even out the visual weight by spacing cones and heather to avoid crowding.
- Attach a sturdy hanging loop and trim any stray stems or loose pieces.
Ivy loop with kissed berries for subtle color notes
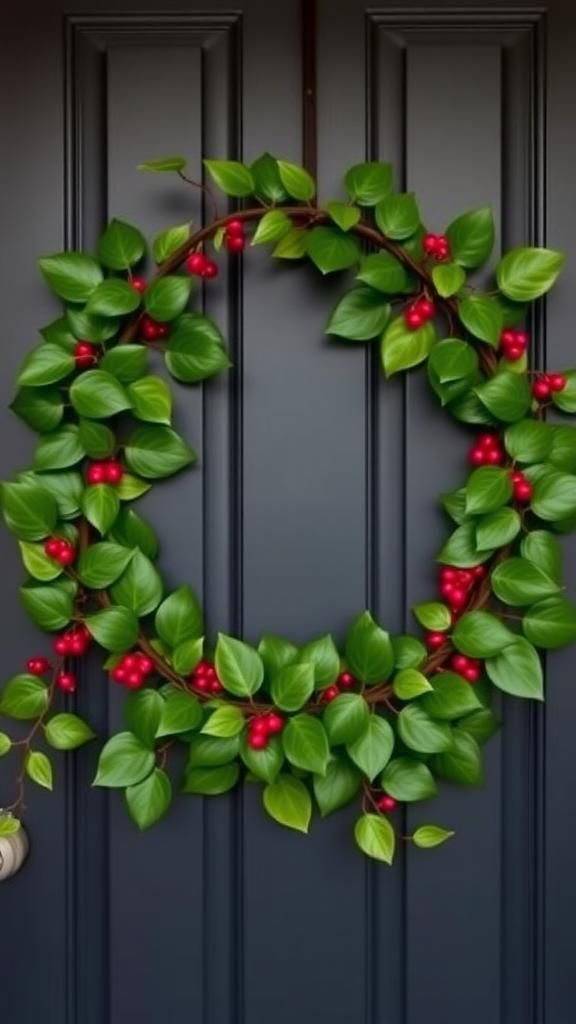
An ivy loop sprinkled with small berries had an elegant, restrained charm that felt timeless. The trailing leaves created a glossy, looping silhouette while berry pops introduced small points of color without overwhelming the form.
I liked how the design read botanical and tidy, almost architectural, with the berries acting like tiny punctuation marks. It fit well on a darker door where the glossy leaves provided a slight sheen and the berries offered just enough contrast to lift the composition.
Steps
- Choose a sturdy ring base and entwine ivy stems to form a continuous green loop.
- Add small berry sprigs at intervals, securing them into the ivy with fine wire.
- Adjust leaf direction for a polished, flowing silhouette and conceal fastenings behind foliage.
- Balance berry placement so no single side feels heavier than the other.
- Create a hanging loop and tidy any protruding stem tips for a smooth outline.
Table of Contents