I have a soft spot for paper snowflakes. There is something quietly joyful about watching a plain sheet become a delicate, airy shape, especially on a grey afternoon.
Snowflake Paper Craft Ideas have been a low-key ritual for me when the mood calls for something hands-on and pleasantly focused.
Over the years I kept a small stash of favorite templates and playful experiments. These Snowflake Paper Craft Ideas span simple, bold silhouettes to layered, textured pieces that catch light in different ways.
They feel like tiny, foldable winter stories waiting on the table.
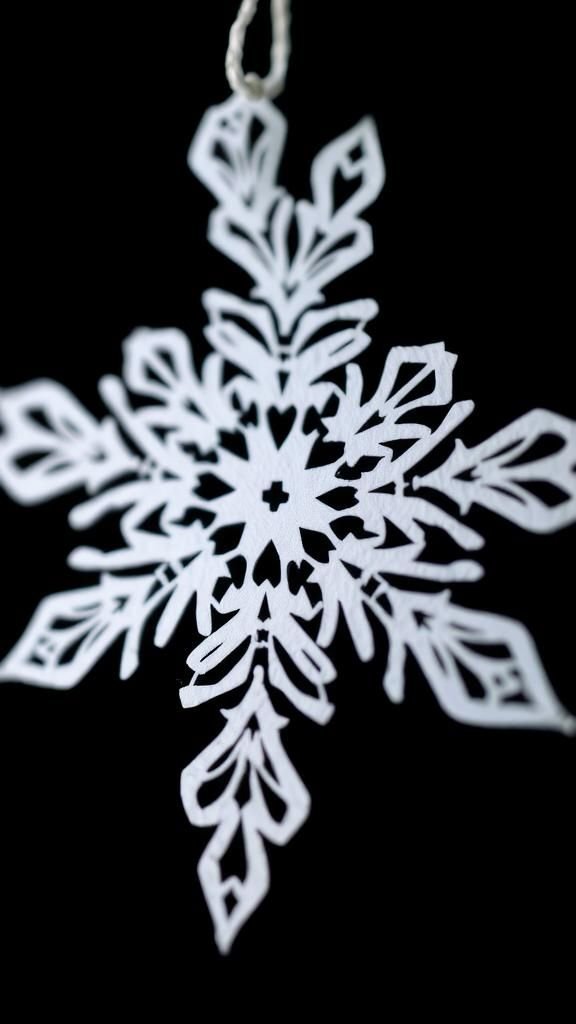
Classic folded snowflake with a nostalgic twist
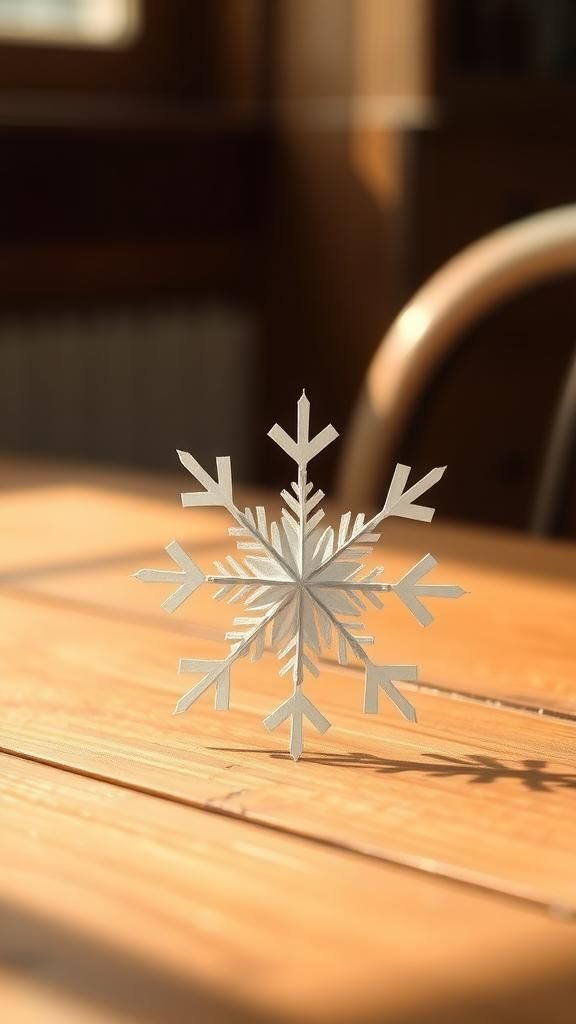
I remember the childhood thrill when a flat square became a lace-like star. The paper felt slightly warm from my hands and the pattern opened like breath on glass.
Sunlight slipping through the window made the thin slits glow and cast soft shadows that moved with a light breeze. Some designs leaned into wide, bold arms while others favored tiny, needlelike branches that reminded me of frost on a car window.
The quiet satisfaction of the finished piece stuck with me long after the cut shapes rested on the tabletop.
Steps
- Fold a square sheet of paper into a neat triangle shape by folding the edges toward the center to form layered sections.
- Mark a simple design along the curved outer edge using pencil lines as a guide for the openwork pattern.
- Cut along the marked lines to remove small shapes and create negative space, keeping the triangle intact.
- Unfold the paper gently to reveal a symmetrical snowflake and smooth any creases with fingertips for a flatter finish.
Layered vellum snowflake lanterns for gentle glow
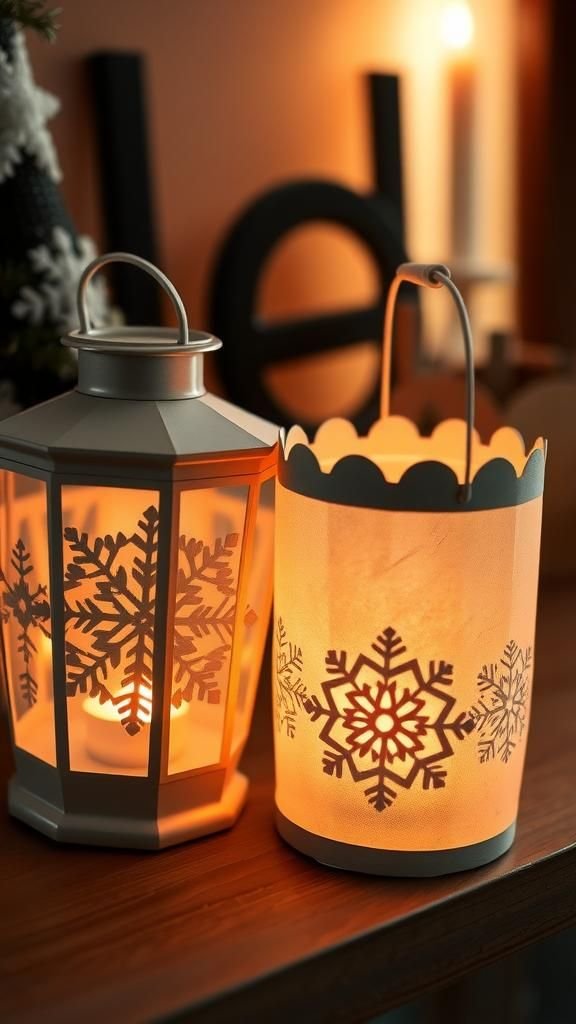
There is an inviting hush when vellum meets candlelight, the sheets taking on a soft warmth and a faintly translucent quality. A stack of layered snowflake shapes made of slightly frosted vellum created a mellow halo when a small candle sat beneath.
The edges held a faint shimmer and the overlapping arms blurred into tender gradients. The scent of warm wax mingled with the subtle papery smell, and the overall effect leaned toward cozy evenings and quiet reading corners.
It felt like a little paper world that breathed light slowly.
Steps
- Cut matching snowflake shapes from vellum sheets of varying translucency to create depth.
- Stack the vellum layers slightly offset to let each arm catch and soften the light differently.
- Secure the layers together at the center with a small adhesive dot and place the stack around a battery-operated candle inside a glass holder.
- Adjust the offsets by fanning the layers gently so light filters through the layered arms.
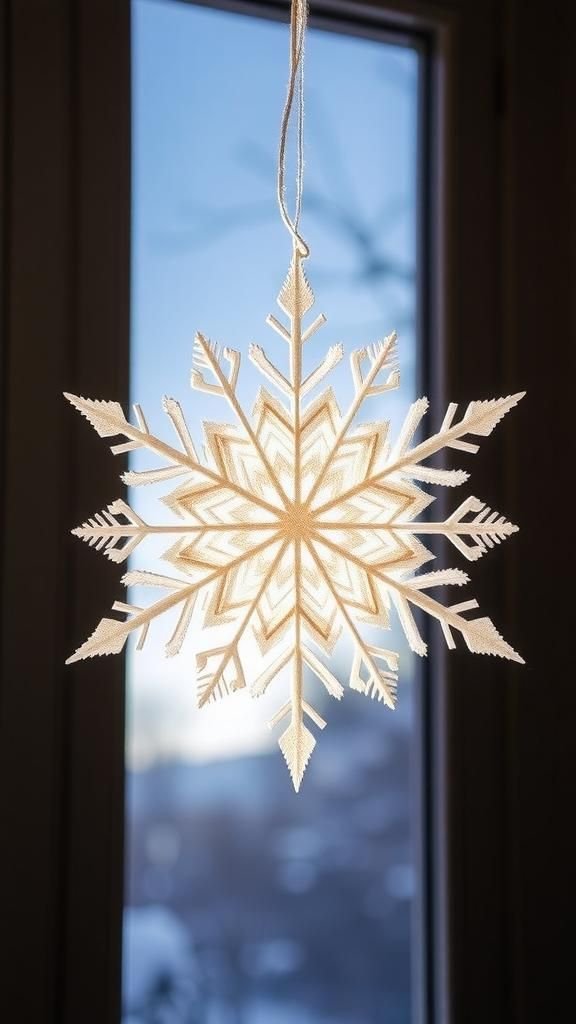
3D modular snowflake that floats in the air

This kind of snowflake felt like a tiny architectural idea that balanced on its own plane. Multiple identical arms joined around a central hub gave a satisfying sense of symmetry and volume.
The three-dimensionality caught light at different angles, and small shadows animated the surrounding wall as it turned. Paper edges read as crisp ridges and there was a playful quality as the structure spun slowly when nudged by a draft.
It reminded me of hanging stars from childhood rooms, only this one had a delicate, geometric personality.
Steps
- Fold and cut multiple identical arm units from lightweight cardstock following a modular template.
- Slot the arms together at their center points to form a radial hub, aligning the edges carefully for balance.
- Adjust the angle of each arm outward so the structure gains depth and suspends evenly.
- Tie a thread through the central hub and hang the assembled snowflake so it can turn gently in a draft.
Delicate quilled snowflake with filigree arms

Tiny coils and slender paper strips created a lace of dimensional curls that felt almost botanical. Each curled element offered a little shadow and the center formed a compact, floral-like hub.
The palette of soft white and pale blue lent a winter hush, while the tactile sense of rolled paper added a hand-crafted intimacy. Looking closely, the spirals carried a hint of warmth where glue had bonded them, and light skimmed the ridges to reveal subtle highlights.
It had a miniature, jewel-box charm that invited lingering looks.
Steps
- Prepare thin paper strips and roll each into tight coils, pinching or shaping them into teardrops and scrolls.
- Arrange the shaped coils into symmetric arm motifs around a small central circle on a backing paper.
- Secure each quilled piece with small dots of adhesive and allow the assembly to dry flat.
- Optionally, add a small hanger at the top of the backing to display the quilled snowflake.
Embossed paper snowflake with tactile ridges
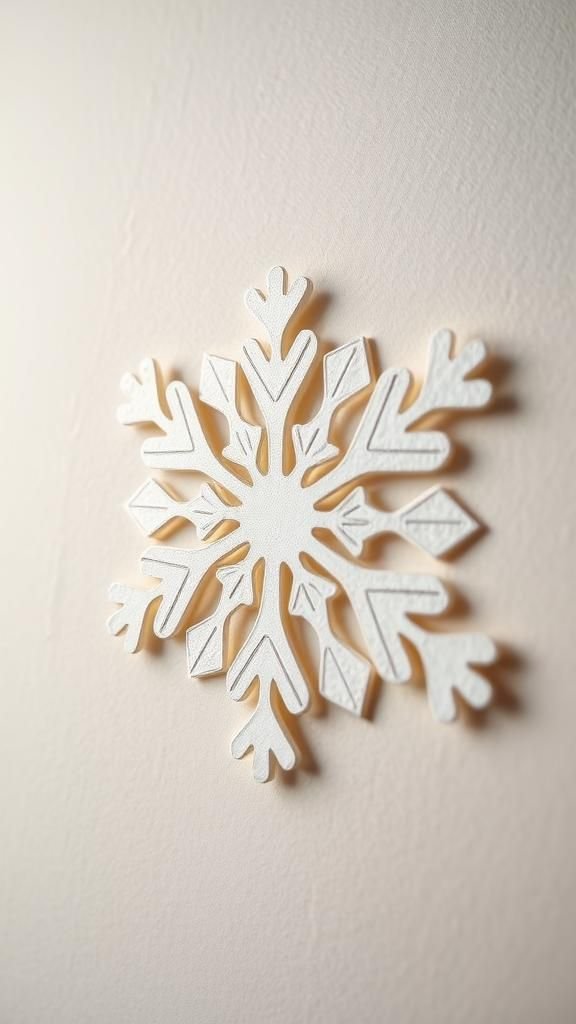
There is a rich satisfaction in raised lines that can be felt as well as seen. An embossed snowflake offered ridged arms and recessed valleys that changed with viewing angle.
The play of light and shadow across the raised veins made the pattern read like frozen branches under glass. The paper held a sturdy weight and the raised texture invited fingertips to trace the contours.
It conveyed a refined, bookish quality, like an old illustration that had been pressed and kept in a drawer until it held the faint smell of time.
Steps
- Trace a snowflake design onto a thicker paper and place it under an embossing stencil or template.
- Run a rounded embossing tool along the traced lines to raise the paper surface, following the vein-like pattern.
- Turn the paper occasionally to maintain even pressure and refine the raised contours.
- Brush a soft highlight powder over the raised areas to accentuate the embossed ridges if desired.
Watercolor wash snowflake cards with soft edges
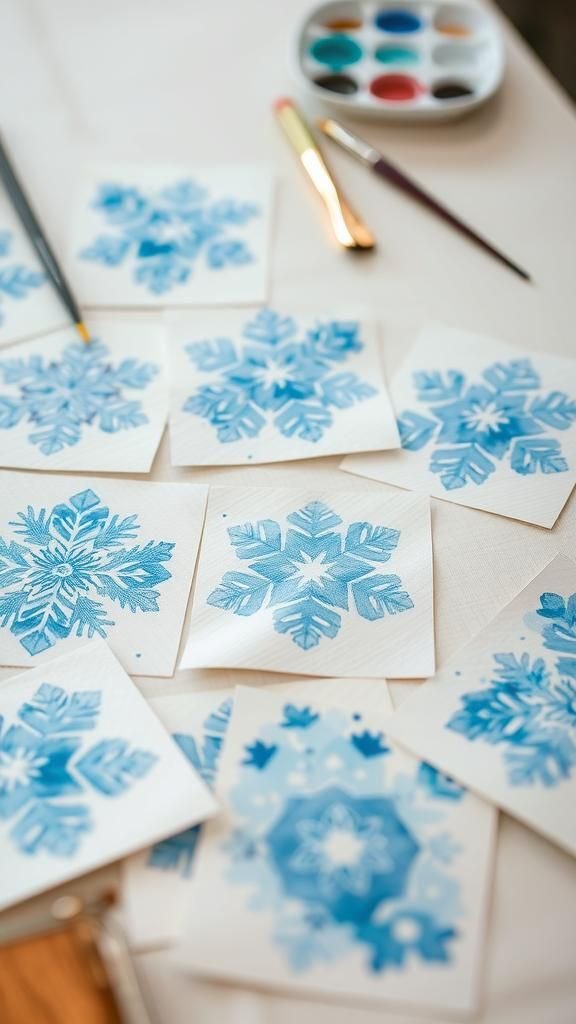
Pale washes of watery blues and washed-out indigos pooled and bled at the edges to create cloudlike arms. The watercolor paper had a pleasing tooth and the pigment settled into granulated textures that felt like tiny winter skies.
Print or stencil shapes carried a soft halo where the pigment met the paper, and the overall mood leaned toward gentle, handmade correspondence. The cards smelled faintly of damp paint and the colors read differently as they dried, sometimes deepening into moodier hues that kept me checking back through the day.
Steps
- Lay a simple snowflake stencil onto watercolor paper and apply a soft wash of pigment with a wide brush.
- Allow the paint to spread naturally at the stencil edges to create soft halos and organic gradients.
- Lift the stencil carefully once the wash is dry to reveal the soft-edged snowflake silhouette.
- Trim the paper to card size and pair with matching envelopes for a finished set.
Paper doily snowflake for a vintage lace look
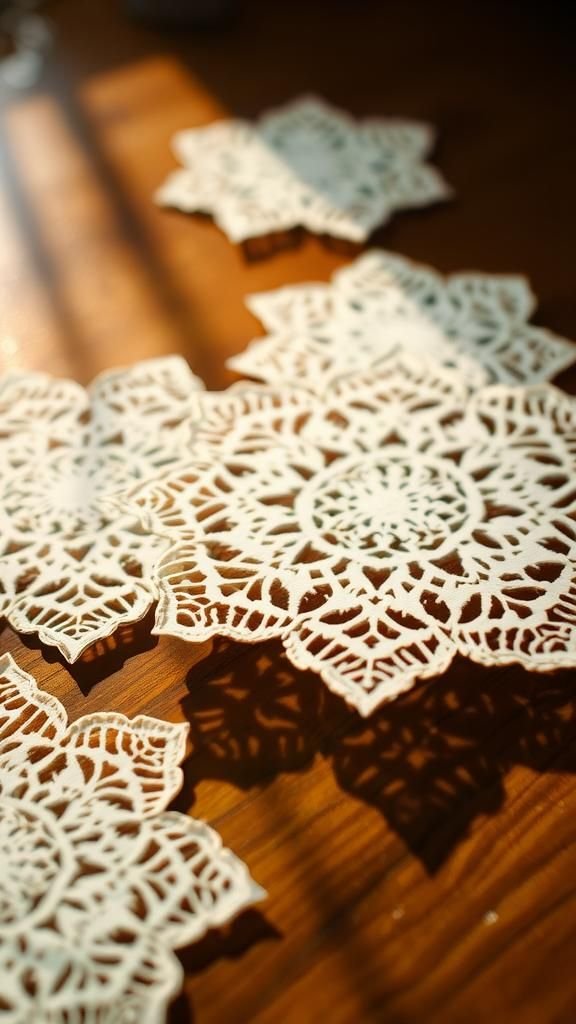
Thin, lacy doilies brought an old-fashioned delicacy that felt like borrowed linens. The perforated paper had tiny scallops and repeating motifs that translated naturally into snowflake arms.
When layered, the doilies sat like fragile lace collars and their faintly papery rustle added another sensory layer. Sunlight through the openwork created intricate shadow maps that stretched across the tabletop.
The overall effect hinted at afternoon tea and handwritten letters, a gentle nod to traditions folded into a small decorative moment.
Steps
- Select paper doilies of matching size and gently flatten any creases without harsh handling.
- Layer two or three doilies with slight rotational offsets to enhance the lace pattern.
- Secure the layers together at the center using a small adhesive dot and add a loop of thread for hanging.
- Display the assembled piece in a window or over a light source to let shadows form on nearby surfaces.
Stitched paper snowflake with tiny thread details

The juxtaposition of soft thread and crisp paper felt quietly domestic and pleasing. Tiny stitched lines traced geometric branches and knotted centers formed little tactile beads.
The sound of the needle pulling through paper was almost inaudible but familiar, a soft whisper against the table. Contrasting thread colors stood out against white paper like miniature embroidery on a blank sleeve.
The feel of the finished piece was slightly raised along the stitched lines, and the small imperfections in spacing added character, as if each arm carried a subtle, personal rhythm.
Steps
- Transfer a snowflake outline onto thick paper and prick small evenly spaced holes along the design with a fine needle.
- Thread a length of thin embroidery thread and stitch along the pricked holes to form linear branches and accents.
- Secure the thread ends neatly on the back and trim any excess with small snips.
- Mount the stitched snowflake on a backing card for stability and display as desired.
Snowflake garland that dances on a mantel

A line of paper snowflakes strung across a hearth creates a relaxed, seasonal rhythm. Each piece had its own personality but together they read like a little neighborhood of shapes, swaying slightly when someone passed.
The thread hummed with a quiet tension and occasional tiny bells added a soft chiming. The mix of sizes and textures kept the eye moving and the arrangement felt informal, like a collection casually draped after an afternoon of making.
The overall scene suggested evenings with soft music and warm cups on saucers nearby.
Steps
- Select a variety of paper snowflakes in different sizes and textures to create visual interest.
- Punch small holes near the top of each snowflake and thread them onto a length of thin twine or string.
- Space the snowflakes evenly along the string and knot lightly to hold them in place.
- Hang the garland across a mantel or window where it can sway and catch gentle drafts.
Glitter-edged snowflakes for subtle sparkle
A whisper of sparkled edge brought a playful glint without overwhelming the paper’s quiet voice. When light caught the edges, tiny points of brightness blinked like distant stars.
The surface retained a mostly matte feel while the rims carried a delicate shimmer. The glitter added a festive lift and the tactile contrast between the smooth paper and the grainy edge was enjoyable under fingertips.
The overall impression leaned toward restrained celebration, like a party hat folded closed until just the right moment.
Steps
- Trace snowflake shapes on paper and lightly apply adhesive along the outer edges using a fine applicator.
- Sprinkle a sparse layer of fine glitter onto the adhesive, tapping off any excess carefully.
- Allow the adhesive to dry fully so the glitter sets firmly to the edges.
- Shake away loose particles and display the snowflakes where light can accent the sparkled rims.
Paper mosaic snowflake with colorful tiny pieces

A mosaic approach turned each snowflake into a small map of colors and shapes. Tiny triangles and squares fitted together into radiating arms that hummed with a quiet vibrancy.
The color palette could range from frosty blues to bright jewel tones, and the tiny seams created a tactile landscape that invited inspection. Light skimmed the facets and the assembled patchwork read like stained glass in miniature.
The process felt patient and slow, with the final piece rewarding that attention with a dense, jewel-like presence on the page.
Steps
- Prepare small paper tiles in a chosen color palette by cutting thin strips and trimming them into tiny shapes.
- Lay out a radial snowflake outline on a backing sheet and arrange the tiles to form cohesive arm patterns.
- Adhere the tiles individually in place and press lightly so the mosaic sits flat.
- Trim any overhang and mount the finished mosaic snowflake on contrasting paper for display.
Silhouette snowflake mobiles with soft shadows
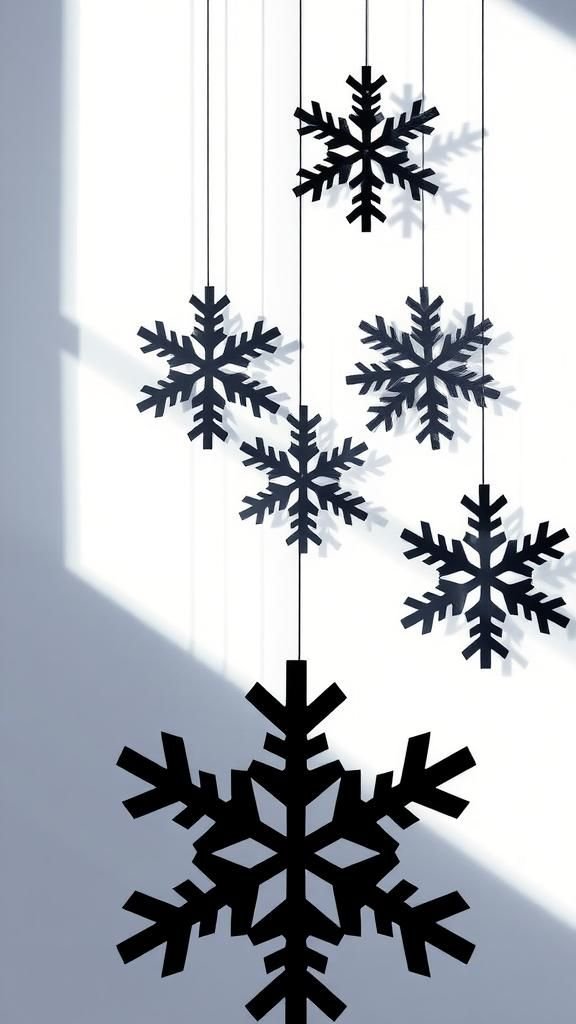
High-contrast silhouettes lent a graphic clarity that felt modern and spare. Thin black snowflake shapes suspended near a pale wall cast crisp, evolving shadows as the light shifted.
The interplay between paper and shadow offered a small performance; each rotation altered the pattern dramatically. The minimal palette made the forms read easily from across a room, and the soft rustle as pieces brushed one another added a subtle soundtrack.
It felt like watching a tiny theater of shapes unfurling quietly above everyday spaces.
Steps
- Cut bold snowflake silhouettes from sturdy black paper to ensure crisp shadow projection.
- Suspend the silhouettes at varying heights using clear thread from a simple frame or hoop.
- Position the mobile near a window or directed light source so the shapes cast defined shadows.
- Allow the pieces to move freely and observe the shifting shadow patterns on nearby walls.
Folded origami snowflake with precise angles
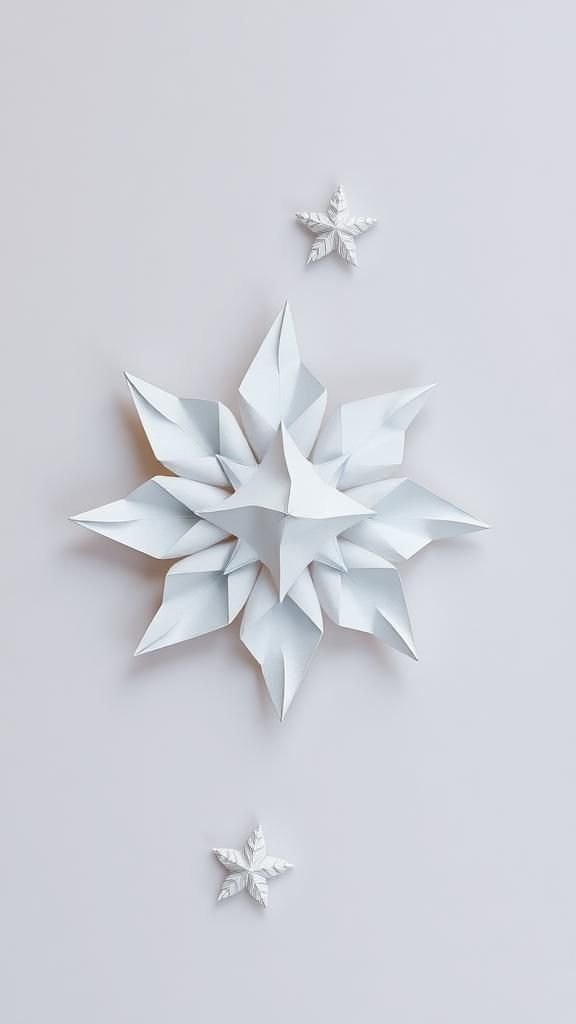
Origami lent a crispness and a sculptural calm. Each crease formed a plane that caught light like a tiny facet.
The resulting snowflake had a geometric restraint, as if designed by a steady, patient hand. The paper edges were clean and the form read differently depending on whether the light came from above or the side.
Holding it felt compact and purposeful, a small study in symmetry that suggested winter architecture more than romantic lace. It offered a pleasing mental pause, like a line of quiet punctuation in a busy day.
Steps
- Begin with a square of thin origami paper and fold along precise diagonal and radial creases to establish symmetry.
- Collapse the layered folds gently into a compact shape that reveals the snowflake outline.
- Make small strategic cuts into the folded edges to form decorative negative spaces.
- Unfold the paper carefully to reveal the crisp, geometric snowflake and press flat for display.
Pressed-petal snowflake that mixes florals and frost

Combining dried petals with paper elements created a layered, organic look that blurred floral softness and icy geometry. Petals pressed to a flat whispery state brought gentle color gradations and fragile veins into the design.
The contrast between botanical curves and angular snowflake arms felt poetic, like a memory of thawing mornings. When sealed between translucent paper layers, the petals lent a tender warmth to the otherwise cool motif.
The result read as intimate and slightly ephemeral, the kind of piece that invites a slow, appreciative glance.
Steps
- Gather thin dried petals and arrange them into radial patterns on a sheet of backing paper.
- Place a cut paper snowflake overlay on top, aligning the arms so petal colors peek through the openings.
- Sandwich the assembly between translucent sheets and press or laminate carefully to preserve the composition.
- Trim the edges for a neat finish and mount the pressed snowflake in a simple frame if desired.
Shadow-box snowflake with layered depth and backdrop

A shadow box turned a snowflake into a small scene. Layers of paper arranged at different depths offered a sense of distance, and the background color shifted the mood from crisp winter to dusky twilight.
The boxed framing made the piece feel curated, a tiny exhibit of paper craft and composition. Light entering the box cast layered shadows that read like a miniature landscape.
Viewing the piece felt like peering into a quiet world where scale was compressed and details invited long, calm inspection.
Steps
- Choose a deep frame or box and prepare several snowflake cutouts in graduated sizes for layered placement.
- Mount the largest piece near the back and add progressively smaller pieces on raised pads to create depth.
- Select a backdrop color or texture to complement the paper layers and secure it inside the box.
- Close the box and display it upright so the layered shadows form a cohesive composition.
Lace-paper snowflake with cutwork filigree
Fine, intricate cutwork made the snowflake read almost like textile lace. The thin arms carried tiny loops and scallops that caught the eye and held it, inviting close inspection.
Light slipping through the negative spaces created delicate, fractal-like shadows that moved slightly with a draft. The overall texture felt ethereal yet crafted, like a small heirloom folded into modern hands.
It gave a sense of quiet patience, a reminder of time spent in close attention to small, repeating marks and the pleasure of detail.
Steps
- Transfer a detailed filigree snowflake pattern onto thin paper suitable for fine cutting.
- Use a sharp blade to carefully remove the negative spaces, following the intricate lines with steady hands.
- Support the work on a cutting mat and take breaks to maintain precision and avoid tearing.
- Clean the edges gently and mount the lace snowflake against a contrasting background to highlight the cutwork.
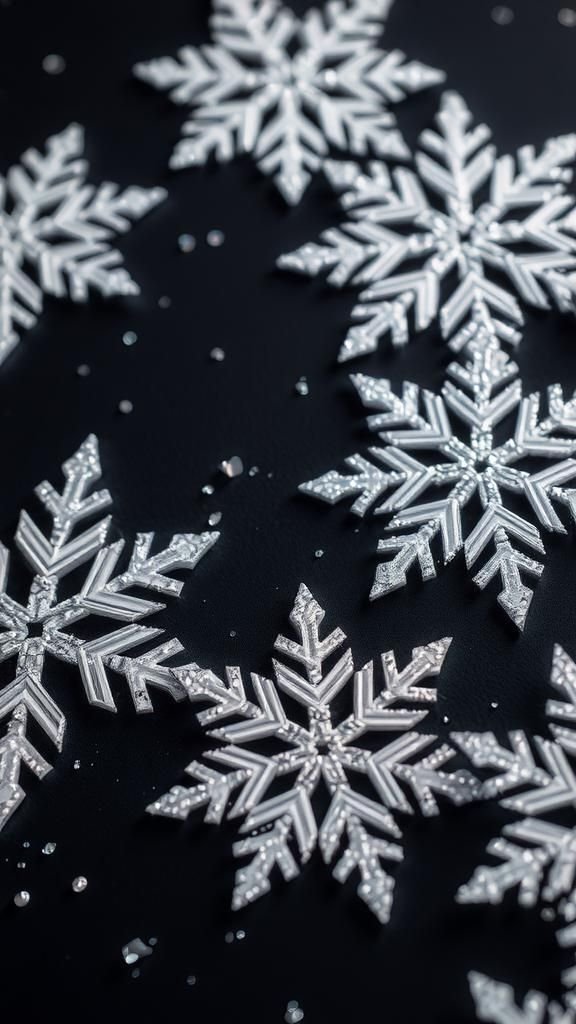
Mixed-media snowflake with metallic paper accents
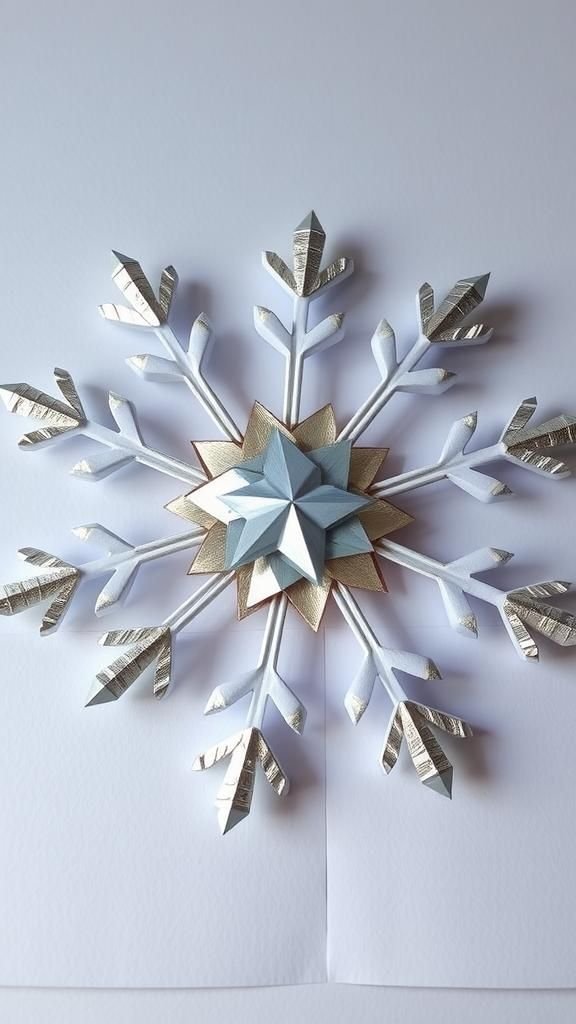
A touch of metallic paper introduced tiny flashes that made the snowflake feel celebratory without loudness. Small foil pieces caught direct light and the rest of the paper remained quietly matte, creating a pleasing interplay.
The cool gleam of silver or frost-toned gold breathed a subtle luxe into an otherwise simple paper composition. The tactile contrast between smooth metallic strips and textured paper was pleasant under fingertips, and the overall presence could anchor a tabletop display or lift a simple card into something slightly more festive.
Steps
- Design a paper snowflake base and cut small accent shapes from metallic paper.
- Position the metallic accents strategically along the arms and center to catch light.
- Adhere the accents firmly and smooth any edges so they sit flush with the base.
- Display the mixed-media snowflake where angled light can reveal the metallic flashes.
Pop-up snowflake card with playful dimension
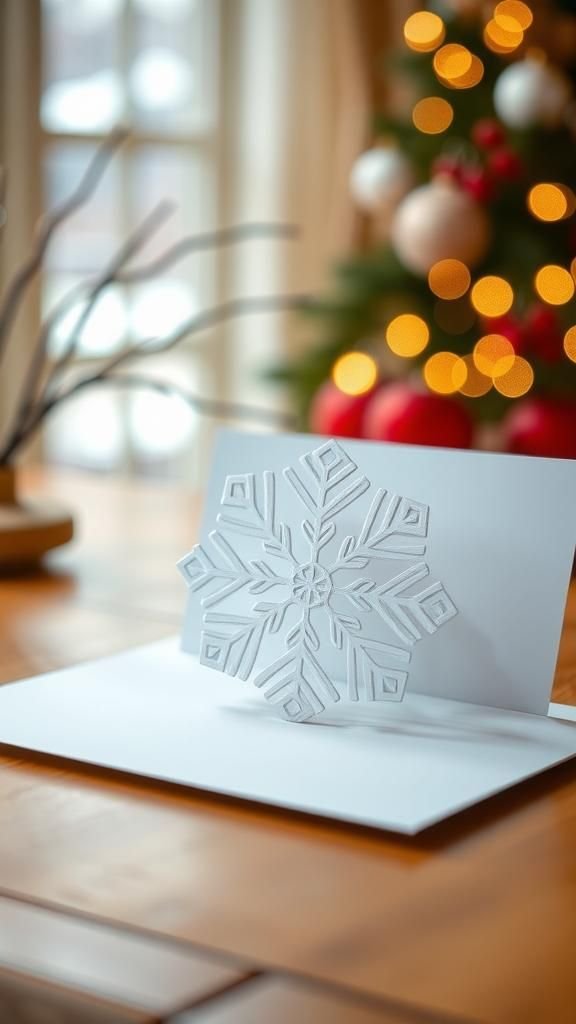
Opening the card felt like a small surprise unfolding across a tabletop. The pop-up element sprang into a crisp, three-dimensional form that contrasted nicely with the flat message space.
The mechanics had a slight architectural quality and the motion brought a moment of delight that lingered like a remembered laugh. Paper edges and internal supports created neat, clean lines, and the pop-up shadow gave a layered look that made the card feel substantial.
It was the kind of card that earned a shelf spot rather than disappearing into a drawer.
Steps
- Score and fold a card base and prepare a snowflake pop-up insert with tabs for support.
- Position the pop-up insert inside the base and glue the tabs so the snowflake stands when opened.
- Test the opening motion to ensure the pop-up lays flat when closed and rises smoothly when opened.
- Decorate the card exterior to complement the interior pop-up and allow adhesive to dry fully before gifting.
Tiny snowflake gift tags with layered textures

Small tags offered a charming finishing touch to wrapped parcels. Layering different papers created subtle relief and the tags felt pleasingly tactile between the fingers.
A mix of matte and slightly glossy papers suggested contrast while remaining understated. When tied to twine, the tags added a whisper of handmade warmth and the gestures of wrapping felt more considered.
The smell of fresh ribbon and the faint creak of paper at the folds made the whole process intimate, a little exchange of care lodged into a parcel corner.
Steps
- Cut small snowflake tag shapes from assorted textured papers and punch a hole near the top.
- Layer contrasting paper remnants to create subtle relief and glue each stack together firmly.
- Thread twine or ribbon through the punched hole and knot to secure the tag to a gift.
- Arrange tags in matching sets for a cohesive look on multiple presents.
Confetti snowflake sprinkle for playful table decor
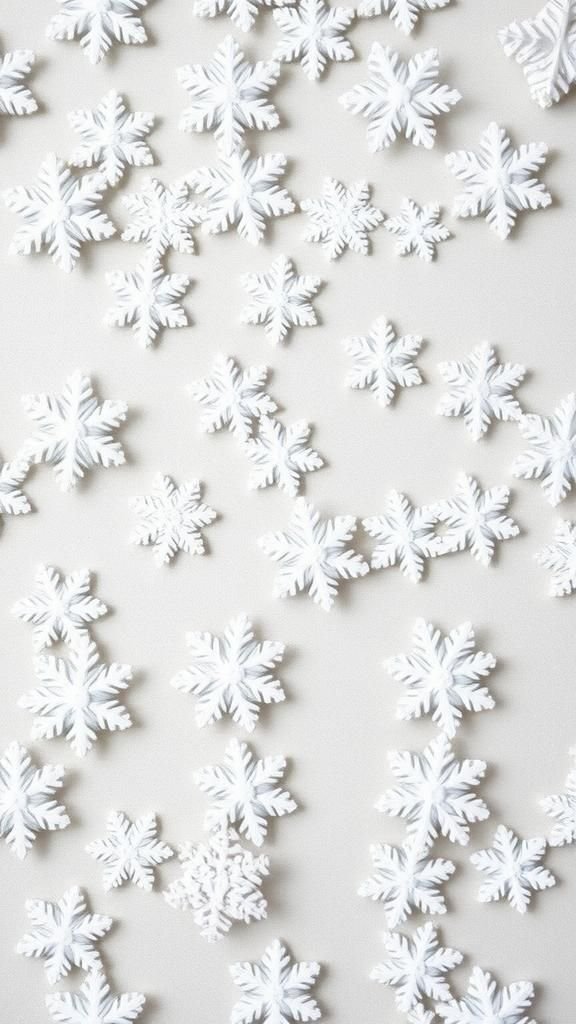
A scatter of tiny punched snowflakes transformed a table into a gentle winter scene. The confetti pieces caught light and created a soft spangled effect that felt celebratory but casual.
Paper edges were small and crisp, and the pile made a pleasant, rustling sound when fingers brushed through it. The little shapes invited playful rearrangement and the overall atmosphere became lighter, like the room had been dusted with miniature moons.
It added a fleeting sense of merriment to gatherings and left simple, pretty traces on tabletops.
Steps
- Use a small snowflake punch to create a collection of confetti from lightweight paper scraps.
- Mix papers of varying shades and finishes to add depth and subtle shimmer to the confetti mix.
- Scatter the confetti across the table setting or place in clear bowls as decorative accents.
- Collect and reuse leftover confetti pieces to minimize waste and extend the decoration.
Icicle-fringed snowflake for elongated elegance
Long tapered icicles hanging from the arms lent a graceful, dangling quality. The thin strips created movement and the resulting silhouette looked elongated and slightly dramatic.
When the piece swayed, the narrow fringes picked up light in fine lines that suggested motion even at rest. The overall feeling was a blend of delicate architecture and whispering ornament, suited to windows or doorways where the elongated profile could read against sky or interior.
It felt refined and quietly theatrical at the same time.
Steps
- Design a snowflake with extended arm tips and cut narrow icicle-like strips along the lower edges.
- Vary the lengths of the fringe pieces slightly to create a natural, flowing silhouette.
- Gently fan the fringe so the pieces separate and catch light individually.
- Hang the finished snowflake vertically where it can move and show off its elongated profile.
Table of Contents