I’ve always enjoyed the calm rhythm of knotting cord while a plant watched from its pot. Simple Macrame Plant Hanger Patterns became a quiet weekend ritual for me, a way to slow down and create something that felt both humble and comforting.
These Simple Macrame Plant Hanger Patterns are written with approachable ideas that lean on texture and shape rather than complexity.
I picked projects that let the fingers wander, offering soft tactile rewards and warm moments of light catching through the cords.
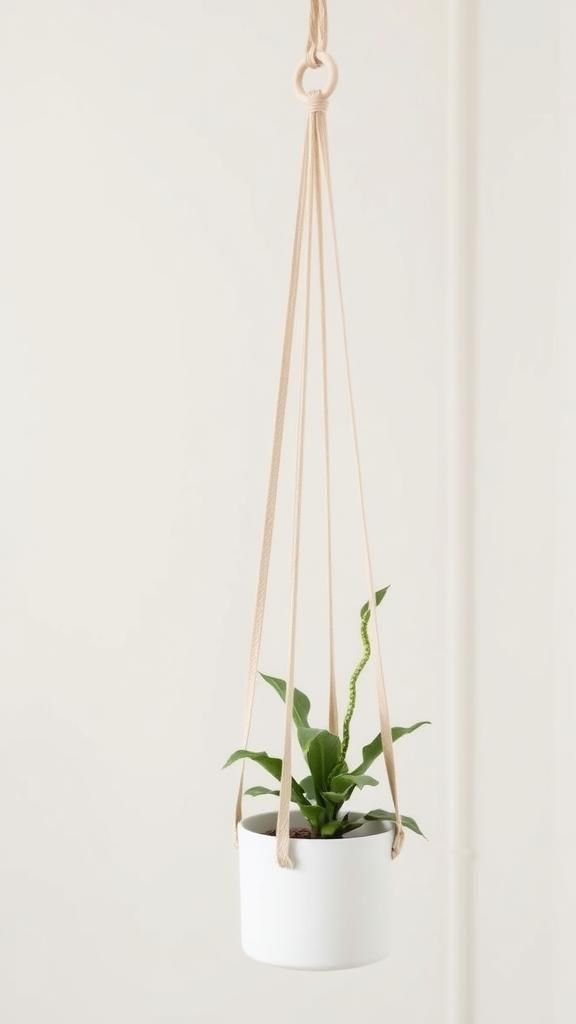
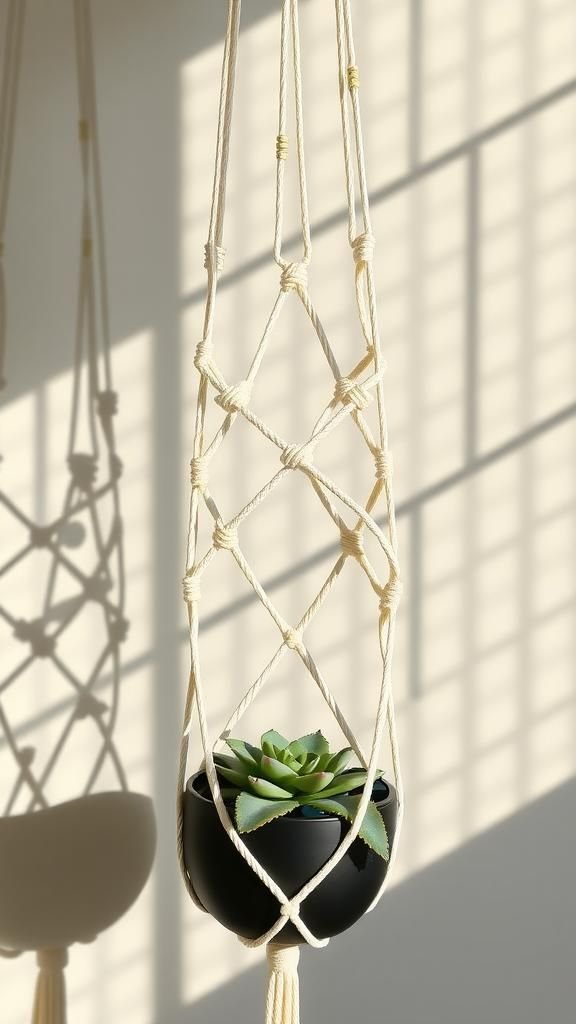
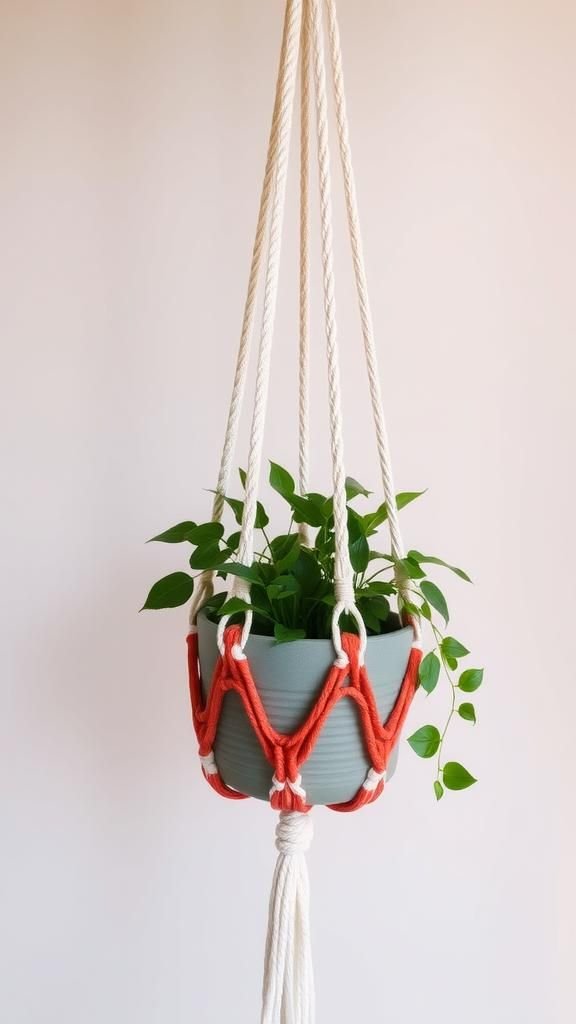
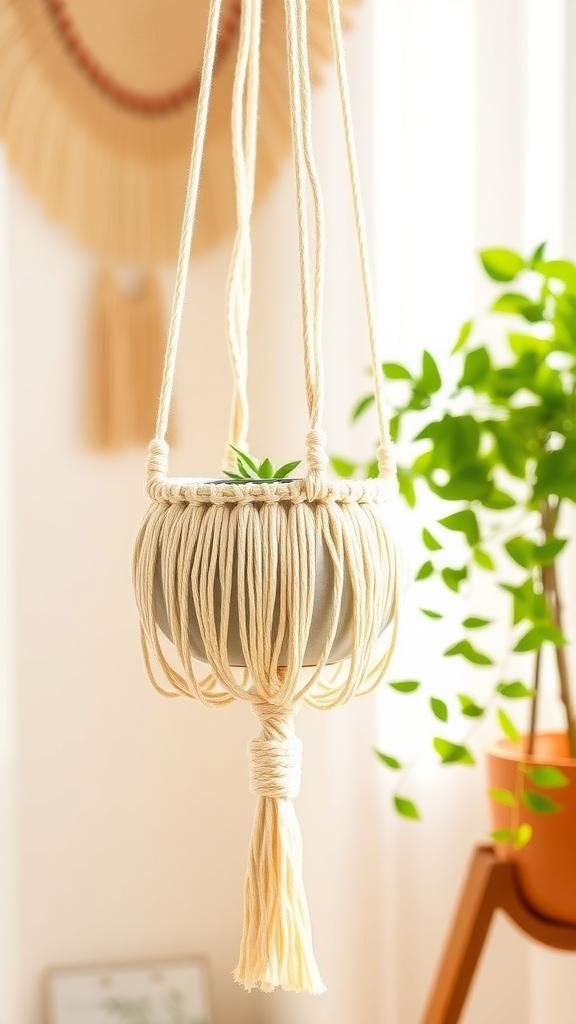
Classic square-knot cradle with soft cotton cords
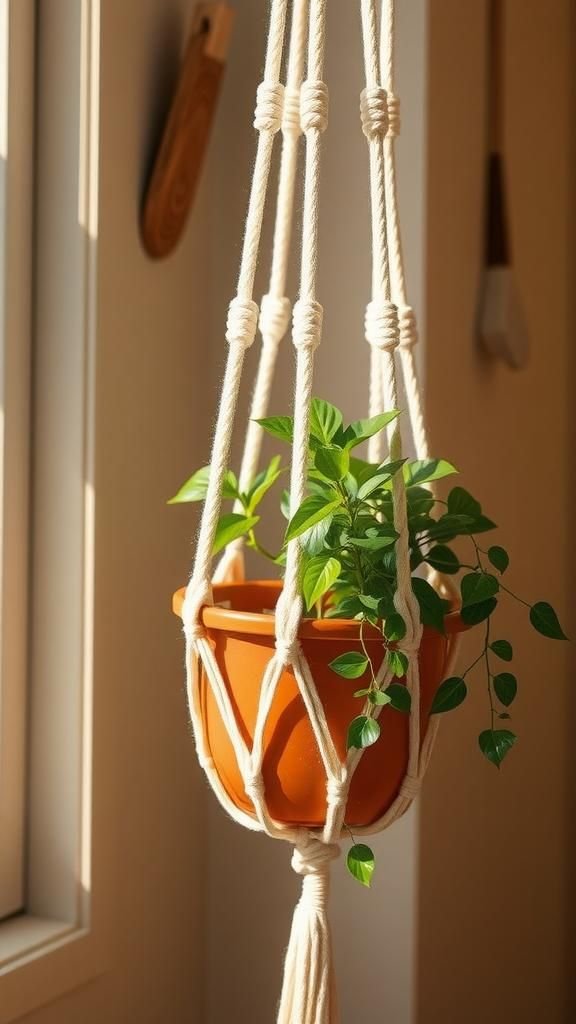
This hanger feels familiar the moment it hangs in a sunny window; the square knots make a tidy grid that seems to hug the pot. The cotton cord has a gentle give, and running my fingers along the intersections brings a small, soothing friction that somehow echoes slow afternoons.
The neutral color palette keeps the attention on the pot and plant, while the pattern’s compact density gives a reassuring sense of security. Watching the dancerly shadow of the grid across a wall is unexpectedly calming.
Steps
- Gather four long cords and a shorter loop for the top ring, then fold cords in half over the loop.
- Pair the doubled cords and create a row of square knots along the length until the desired cradle height is reached.
- Gather the ends underneath the pot area and bind them with an additional cord to form the base tassel, trimming excess to even.
- Thread a pot into the cradle and hang the loop from a sturdy hook for display.
Spiral knot column for a charming twist
I remember the first time I watched a spiral knot form: the cords seemed to twist into a living rope that slowly unfurled around itself. The spiral has a lively motion that catches light in a pleasing sweep, and the textured ridge invites a tactile pause when hands pass by.
In my living room the spiral casts a soft curved shadow that complements round ceramic pots. This pattern sits comfortably between playful and composed, offering a little kinetic energy without feeling busy.
Steps
- Prepare multiple equal length cords and secure them at the top with a ring or loop.
- Work a series of identical half knots around the group, allowing the column to naturally twist into a spiral.
- Continue the half knot sequence until the spiral reaches the desired height for pot support.
- Finish by forming a gathered base beneath the pot region and tidy the ends into a neat tassel.
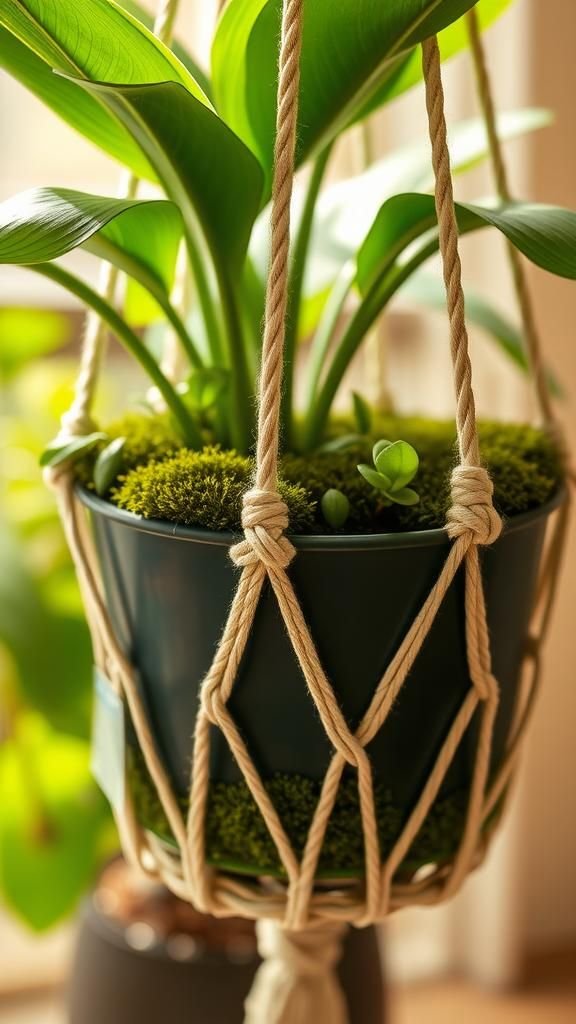
Open netted cradle that highlights pot shape
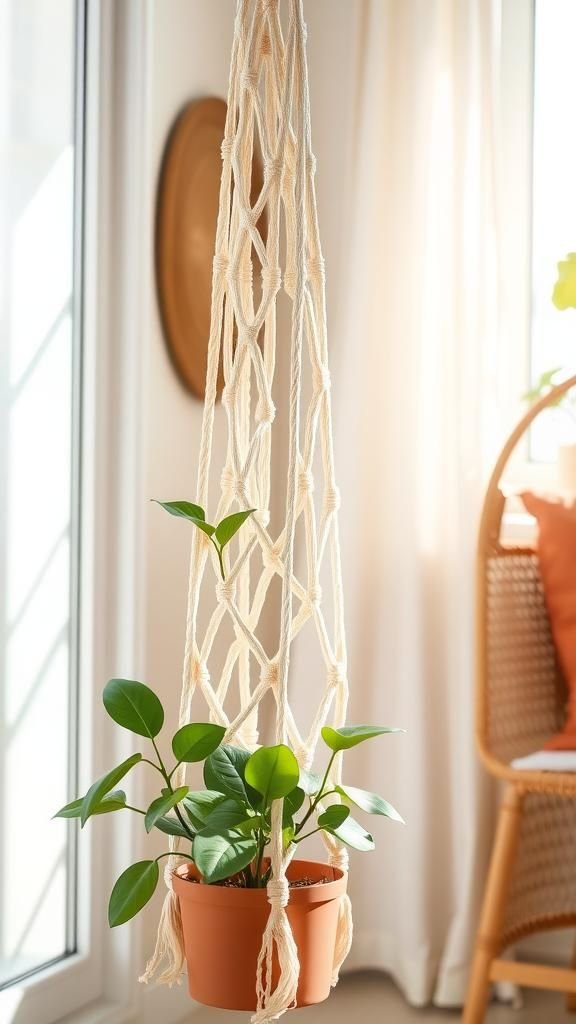
This netted hanger feels airy and light; the open spaces let the pot’s curve become the centerpiece. Running a hand along the cords produces a faint, ropey friction that pairs well with glossy ceramic.
The openness creates an elegant silhouette that shifts as the plant grows, and breeze makes the cords sway with a soft whisper. It’s a design that blends out of the background rather than demanding attention, which makes it perfect for a window corner or a small balcony where the plant wants to be seen.
Steps
- Fold several long cords over a top loop and divide them into even groups around the circle.
- Form repeating alternating knots to create a loose net pattern that opens up between knot points.
- Adjust spacing to match the pot’s curves, continuing the net until the cradle depth feels balanced.
- Gather cords at the base under the pot area and bind to make a supporting tassel.
Beaded accents for a boho textured look
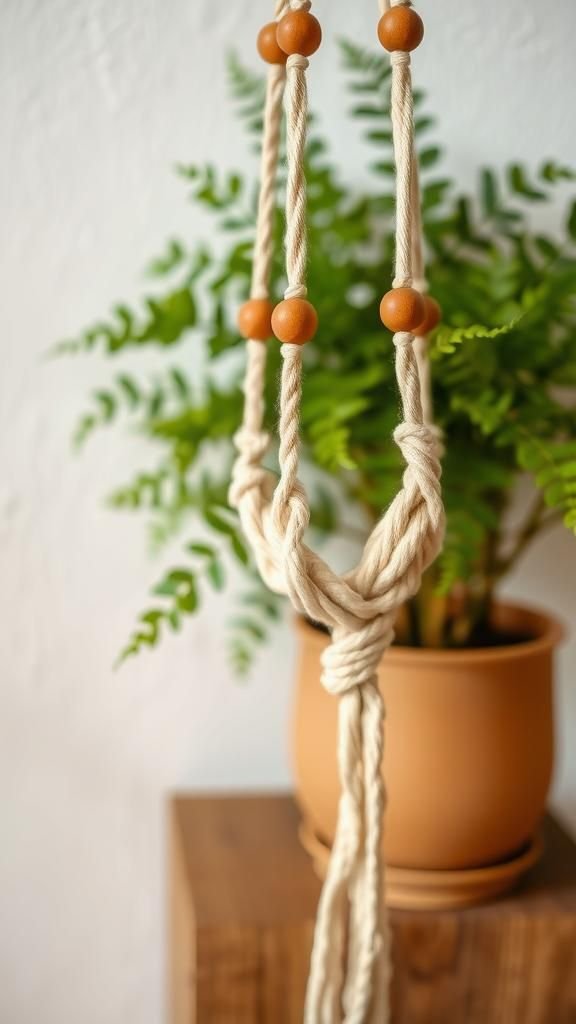
Adding beads brings a gentle, playful counterpoint to the softness of cord. The wooden beads sit cool against fingertips and add a satisfying clack when strands move together.
I liked the way their warm grain warmed the whole piece, creating a rustic feel that pairs well with clay pots. The beads punctuate the pattern so the eye travels along the cords, catching both light and shadow.
This hanger feels handcrafted in a way that invites small smiles when noticed during a daily pass.
Steps
- Select cords and wooden or ceramic beads that will slide comfortably onto each strand.
- String beads onto chosen cords at planned intervals before creating main knot patterns.
- Create the hanger pattern around the beaded sections, letting beads act as decorative nodes.
- Secure the bottom with a binding knot and finish with an optional trimmed tassel.
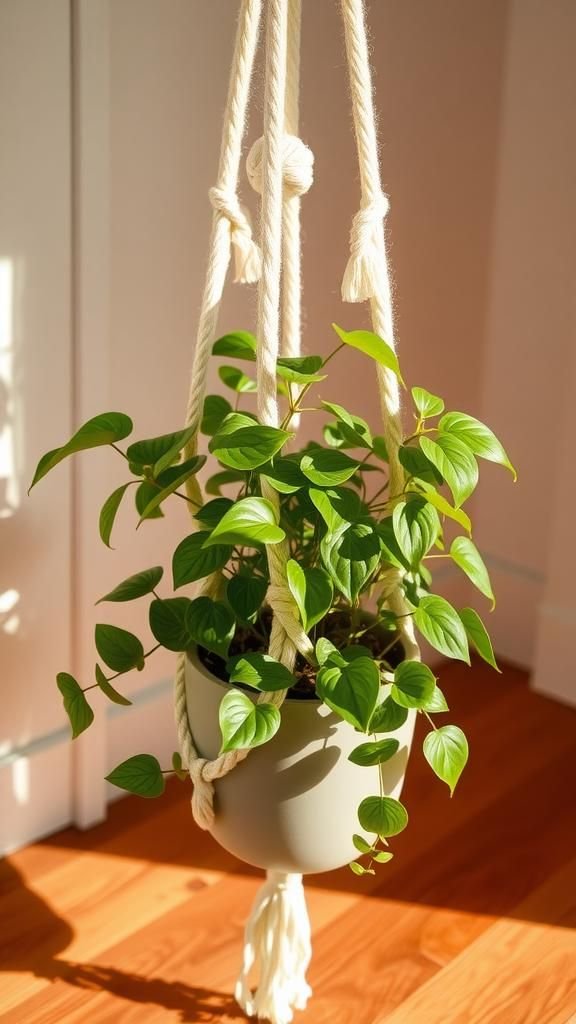
Minimalist loop top for a clean modern feel
Simple lines often feel the most restful, and a smooth loop top brings that calm to a macrame hanger. The top becomes a quiet frame, letting the pot and plant take center stage.
I appreciated the soft curve of the loop under a thumb; it feels like a small handcrafted handle that belongs in the home. The overall silhouette is slim and pared back, which pairs well with glossy ceramic pots and spaces that favor negative space.
It’s a gentle statement rather than a shout.
Steps
- Cut four or six long cords and fold them over to form a sturdy loop at the top by tying a secure wrap.
- Create a simple pattern of alternating knots below the loop to form a balanced cradle.
- Continue until the cradle depth matches the pot size and finish with a gathered base knot.
- Trim the tassel to a neat length to complete the sleek look.
Double pot twin hanger for paired displays
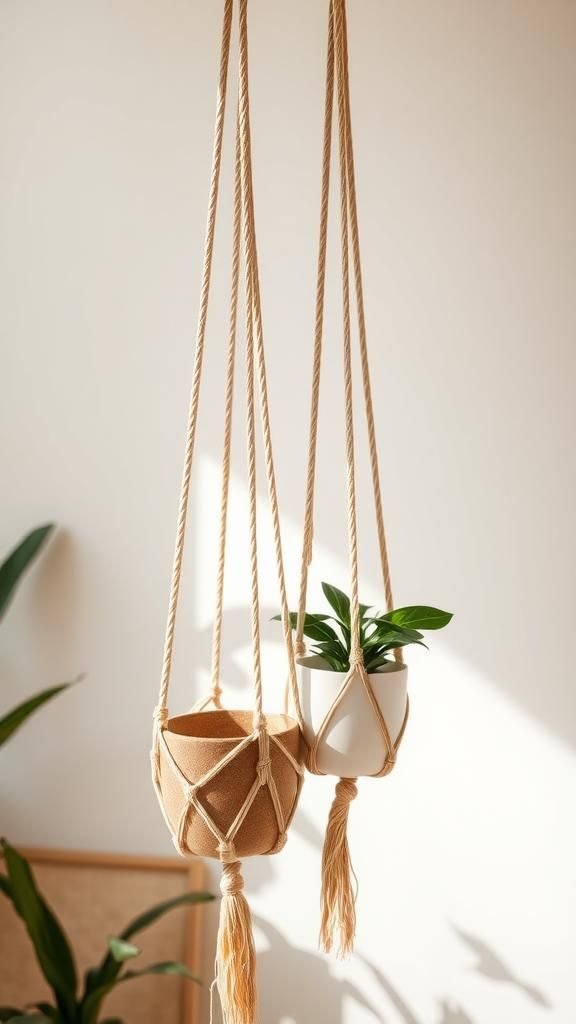
A twin hanger brings a friendly, balanced presence to a corner. Two pots sit side by side, each cradled by a mirrored set of cords that echo across the center.
When the air moves the pair sways slightly in unison, offering a small choreography of green. The symmetry feels comforting, like two companions sharing a space.
I enjoyed arranging different pot heights so the composition felt layered, and the juxtaposition of clay and glazed finishes created pleasing contrasts against the braided cords.
Steps
- Prepare double the usual cords and divide them into two mirrored groups for each pot cradle.
- Create matching knot patterns for each side, ensuring the hang points are evenly spaced along the central ring.
- Adjust lengths so both pots sit at a harmonious height and secure the bases with gathered knots.
- Add decorative tassels or leave the ends natural for a relaxed finish.
Tassel-bottom accent for a relaxed fringe finish
A lush tassel at the bottom adds a playful, laid-back energy to a hanger. The soft strands form a gentle skirt that seems to breathe with the plant, and the slight rustle of fiber feels comforting.
I liked the informal edge the tassel brought, softening the geometric knots above. When trimmed to a rounded shape it felt almost like a little cloud beneath the pot.
The tactile difference between the compact knots and flowing tassel made the whole piece feel hand-tended in a pleasant, domestic way.
Steps
- Complete the main knotting for the cradle and then gather all working cords beneath the pot area.
- Wrap an accent cord tightly around the gathered section to create a neat neck for the tassel.
- Secure the wrap with a knot, then unravel and comb the hanging ends to develop fullness.
- Trim the tassel evenly into a rounded or angled shape for the desired look.
Wooden ring top with rustic charm and warmth
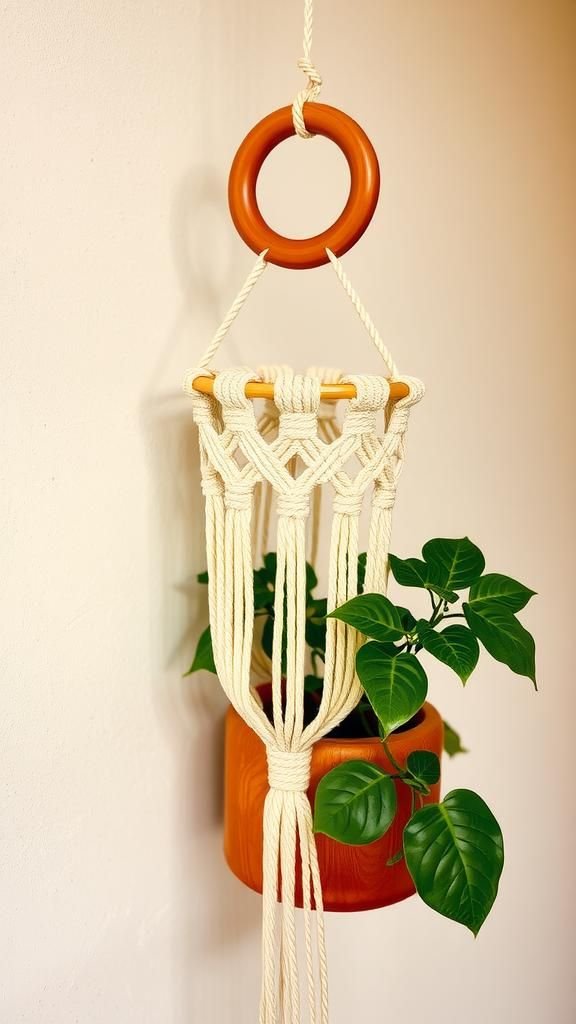
A wooden ring at the top lends a handcrafted, organic anchor to a hanger. The smooth grain of the ring feels pleasant against fingertips and the warm wood tone complements natural cord nicely.
The ring creates a clear focal point where cords fan out, and its weight gives a steady confidence to the overall piece. I often preferred a slightly darker ring to create contrast with light cord, which made the hanger read like a small sculpture.
The tactile blend of wood and fiber felt balanced and sincere.
Steps
- Select a wooden ring of appropriate diameter and attach folded cords evenly around it by looping and pulling ends through.
- Begin the knotting pattern beneath the ring, spacing cords to create an even fan before forming the cradle.
- Continue knot sequences down to the base, ensuring symmetry for balanced pot support.
- Finish with a secure base knot and tidy the hanging ends into a small tassel.
Diagonal diamond pattern for an elegant lattice look
The diamond lattice carries an architectural elegance while remaining warmly handmade. Each diamond frame catches light differently, creating a gentle interplay of shadow that feels almost textile-like on a wall.
My fingers enjoy tracing the angular lines; the alternating open spaces make the pot peek through like a jewel. The overall effect reads refined yet approachable, pairing well with a sculptural pot.
It’s the kind of piece that asks for a slow glance and rewards it with textured detail and a calming symmetry.
Steps
- Secure a bundle of cords at the top and divide them into working groups for creating diagonal knots.
- Form diagonal half hitch sequences crossing in alternating directions to build a repeating diamond lattice.
- Repeat the diamond units until the desired cradle depth is reached to accommodate the pot.
- Gather the cords beneath the pot area and bind them into a secure base knot with a tidy tassel.
Short succulent holder, compact small-pot solution
A tiny hanger designed for a small pot brings a touch of whimsy to a shelf edge or clustered display. The compact proportions feel charming; the cord squeezes into a snug cradle that supports a shallow pot without overwhelming it.
I enjoyed placing a little rosette succulent inside and watching the planter look weightless, almost suspended by a soft web. The minimal material list keeps the hanger modest while still presenting a handcrafted moment that brightens an otherwise ordinary ledge.
Steps
- Cut shorter cords suited to a small pot size and fold them over a small loop or ring.
- Create a few rows of tight knots to form a shallow cradle that fits the pot snugly.
- Finish with a tight gathering knot beneath the pot and trim the ends for a neat look.
- Hang the holder from a low hook or place it within a plant cluster for display.
Wrapped top loop with contrasting color thread
The wrapped loop adds a splash of personality where the hanger meets the hook. A contrasting color thread wrapped around the loop introduces a small graphic accent that draws the eye upward.
The wrapped band has a satisfying, slightly raised texture and gives the top a tailored finish that feels intentional. I often matched the wrapping color with a pot accent to create a subtle dialogue.
It’s a tiny detail that changes the tone from casual to thoughtfully composed without becoming precious.
Steps
- Form the main loop at the top with folded cords and select a contrasting thread for wrapping.
- Wrap the chosen thread tightly around the base of the loop several times to create a neat collar.
- Secure the wrap with a discreet knot on the underside and continue the hanger pattern below the wrap.
- Finish the cradle and base as preferred to complete the piece.
Macrame shelf cradle for a tiny hanging shelf
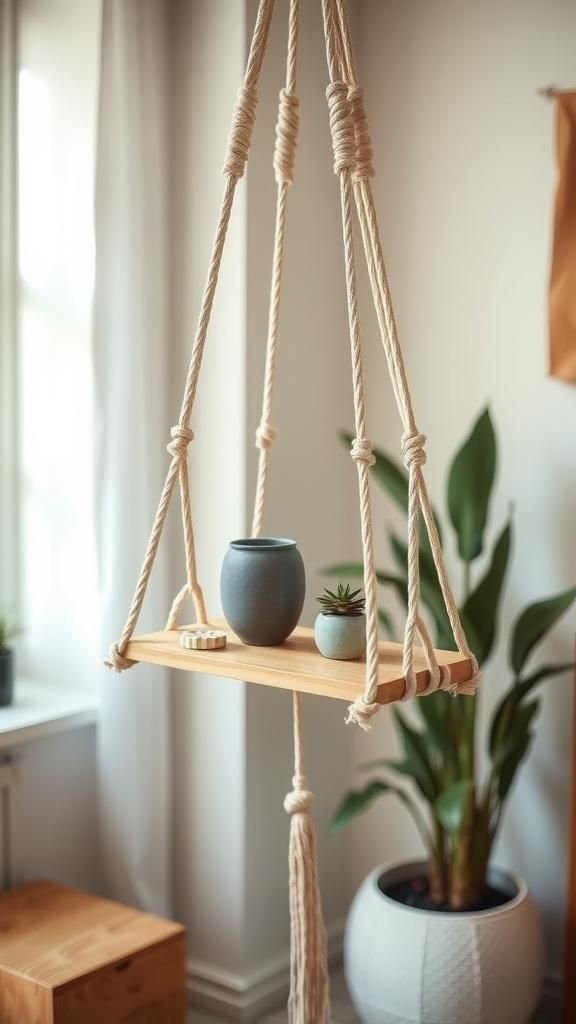
A small suspended shelf feels like a miniature stage for a plant. The flat cradle supports a shallow board or dish, and the heavier lines stop the shelf from feeling flimsy.
The combination of cord and wood brings an earthy tactile interplay; the board’s smoothness contrasts with the rope’s subtle roughness. I enjoyed arranging a single plant and a small keepsake together, creating a little vignette that floats in the room.
The setup adds depth without taking floor space, offering a cozy elevated nook for a favorite pot.
Steps
- Prepare cords and a small wooden board or platform sized to the pot and fold cords over a central loop.
- Create supporting knots around the platform edges to hold it level, forming a cradle beneath the board.
- Balance the board within the knot framework and secure cords tightly so the shelf sits steady.
- Trim and finish the cord ends neatly to maintain a clean, suspended appearance.
Color-block strands for playful visual contrast
Playing with color in the strands brightens a hanger without adding fuss. Bands of muted color threaded into the cords create a rhythmic visual beat that feels upbeat and personal.
The joins between hues have a soft transition and catch light differently, making the hanger read as much textile as plant accessory. I liked mixing earthy and pastel tones, which added warmth without feeling loud.
The colored sections act like little bookmarks along the length, encouraging the eye to travel and settle on the pot below.
Steps
- Arrange cords by color, alternating or grouping tones to create a planned color-block rhythm.
- Begin knotting according to the chosen pattern, keeping color groupings consistent through the length.
- Balance the visual weight by mirroring color placements on either side of the hanger for symmetry.
- Finish with a gathered base or layered tassels that reflect the color scheme.
Jute fiber hanger for a rugged outdoor feel
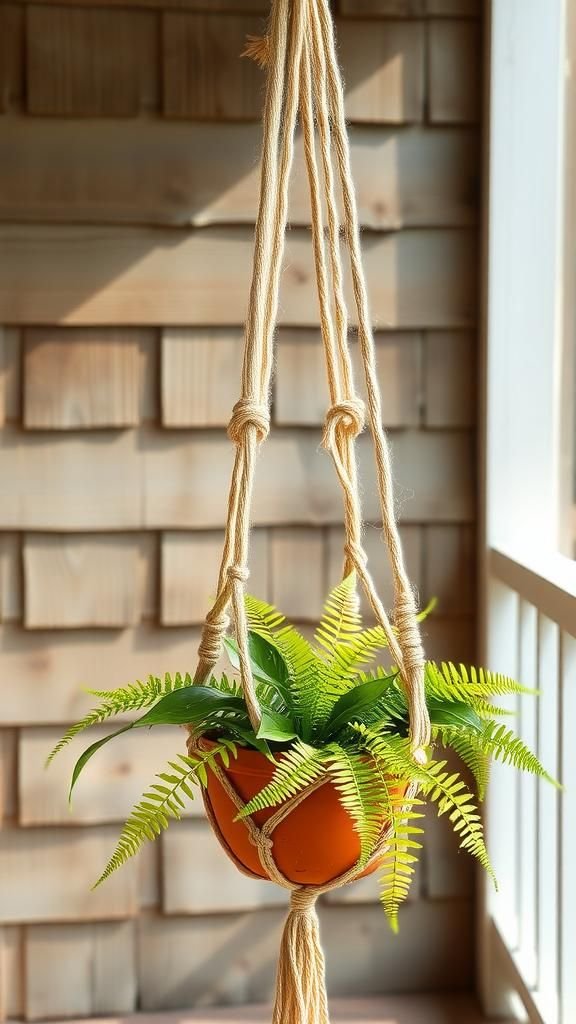
Jute brings a rougher, more rustic voice to a hanger, perfect for an outdoor nook. The fibers have a coarse whisper as they brush together, and the warm brown tone feels grounded beside clay pots.
In my experience jute develops a lived-in patina over time, responding to sun and breeze in a way that feels honest. This hanger becomes part of the garden language, reading like a friendly, weathered object rather than a pristine accessory.
The heavier texture pairs nicely with robust plants that enjoy fresh air.
Steps
- Choose sturdy jute cord cut to outdoor-appropriate lengths and fold over a weather-resistant ring for the top.
- Form larger, secure knot patterns to support the weight of heavier outdoor pots.
- Allow for slightly extra cord to account for natural stretching and fraying over time.
- Finish with a robust gathered base and consider an additional wrap for reinforcement.
Asymmetrical cascading hanger for dynamic movement
An asymmetrical design brings lively movement and an artful, slightly rebellious edge. One side flows longer than the other, creating an elegant imbalance that emphasizes a trailing plant’s curve.
The staggered lengths cause a gentle swing and pleasing counterbalance when the air moves. I appreciated how the irregular silhouette made the whole piece feel curated and free.
The uneven ends create a casual fringe that reads intentional and relaxed, perfect for a spot that welcomes a little personality.
Steps
- Cut cords of varying lengths and secure them at the top, arranging them purposely off-center.
- Create differing knot sequences on each side to build an intentional height contrast between cradles or strands.
- Shape the lower ends into an informal tassel or leave them raw for a cascading finish.
- Adjust hanging point to find the composition that best showcases the asymmetry.
Wrapped base with decorative knot collar detail
A neatly wrapped base can feel like the necklace clasp of a hanger, tidy and intentional. The collar of wrapped cord gives a small architectural moment beneath the pot, concentrating texture in a way that feels deliberate.
Running a thumb over the wrapping reveals a slight ridge that contrasts with the smoother tassel ends. I liked how this focused detail made the whole hanger read as finished and cared-for, a tiny flourish that elevated a simple pattern into something that seemed quietly curated.
Steps
- Complete the hanger cradle and gather cords beneath the pot region for a consolidated base.
- Wrap an accent cord firmly around the gathered section several times to create a decorative collar.
- Tie off the wrap securely on the underside and hide the knot within the wrapped band.
- Trim remaining cord ends neatly or leave a short tassel below the collar for visual interest.
Fringed midsection for layered bohemian texture
Introducing a fringed band across the middle creates a layered, textile-like effect that feels cozy and a touch playful. The fringe flutters softly with the slightest air current, adding a quiet kinetic note.
Running fingers through the mid-fringe offers a gentle, fibrous sensation that contrasts the tighter knots above and below. In my small apartment the fringe acted like a soft curtain segment, adding depth without overwhelming the plant.
It’s an accessory that leans into a relaxed, lived-in aesthetic.
Steps
- Build the main knot pattern for the hanger and leave a midsection of loose cords where the fringe will be formed.
- Comb out the midsection cords to develop fullness and tease fiber apart for a soft edge.
- Add a wrapped band above the fringe to anchor it visually and keep fibers from shifting.
- Trim the fringe to a desired length and shape for a cohesive layered look.
Hanging terrarium cradle for glass globe planters
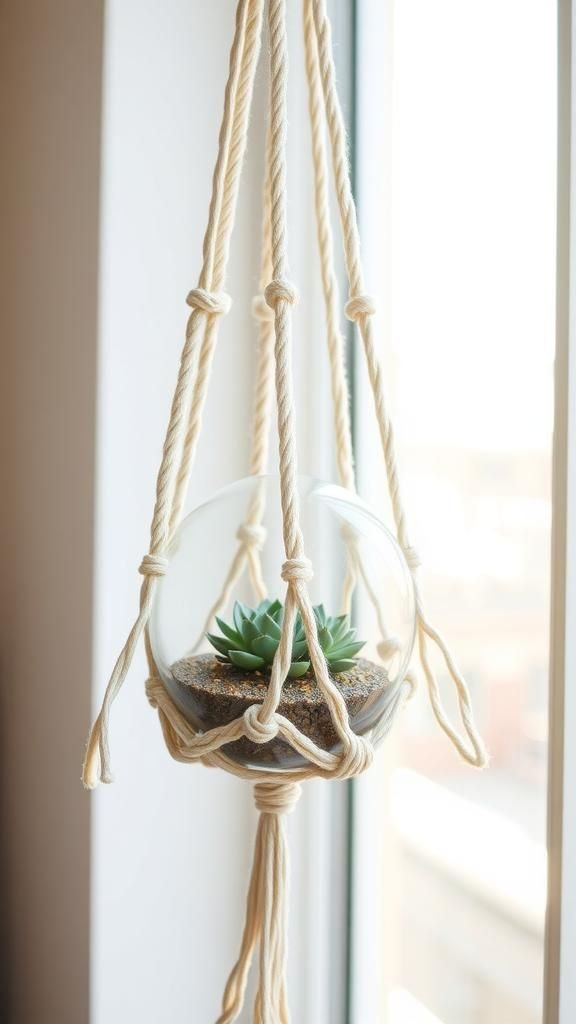
A cradle made for a glass globe feels delicate and suspended, like holding a little green planet. The knots form a supporting web that gently cups the curved glass, and the light refracting through the globe creates shimmering highlights on the nearby cords.
I enjoyed the way the cradle seemed almost weightless, and the subtle clink of glass against cord brought an intimate, fragile mood. The overall airiness makes the terrarium appear to float, turning a plant into a suspended scene.
Steps
- Choose softer, smooth cords that will cushion glass and fold them over a supportive loop for the top.
- Create a rounded cradle pattern that conforms to the globe’s curvature with evenly spaced knots.
- Adjust the net to cradle the terrarium snugly and secure the base with a tight gathering knot.
- Ensure the hanging loop distributes weight evenly before suspending the globe.
Layered pot hanger with tiered support rings
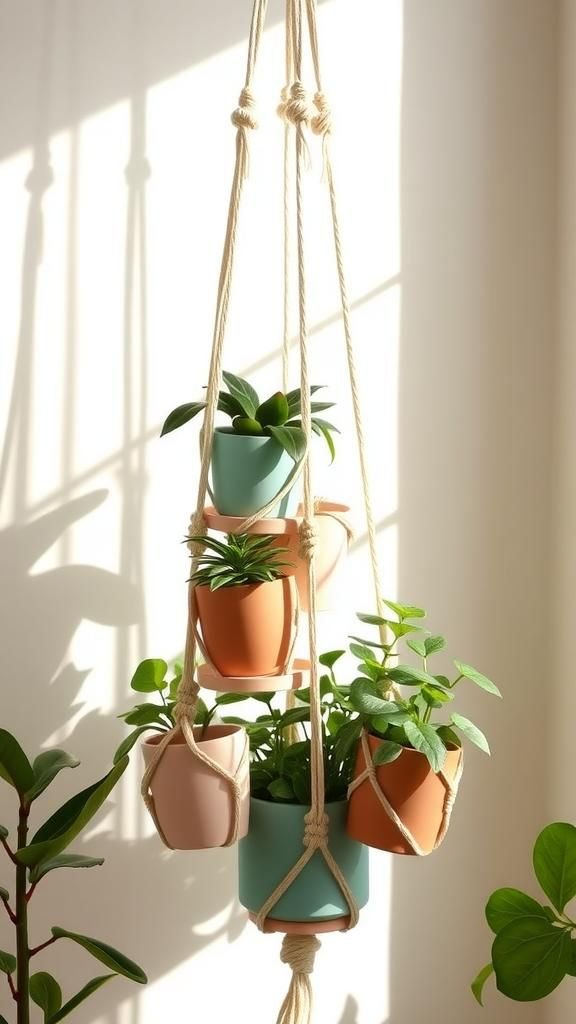
Tiered rings create a graceful stacked composition, allowing multiple pots to sit at different levels. Each ring has its own personality, and together they form a small arboretum that rises through the air.
The layered arrangement produces a pleasing rhythm as green shapes interlock, and a passing breeze sets a gentle, cascading sway. I appreciated how the verticality made a small floor footprint feel abundant.
This format encourages mixing pot materials and sizes for a collected, gallery-like grouping.
Steps
- Select sturdy rings of descending sizes and prepare cords long enough to reach between tiers.
- Attach cords to the top ring and descend to form the next ring support with secure knotting.
- Repeat for additional tiers, adjusting cord lengths to position each pot at a pleasing interval.
- Secure the lowest tier with a robust base knot to stabilize the structure.
Macrame cradle with wooden bead foot detail

A wooden bead tucked into the base acts like a small foot, giving the pot a little pedestal. The bead’s smooth warmth contrasts pleasantly with the braided cord and creates a refined little anchor at the bottom.
I liked how the bead shifted the visual center downward, lending the hanger a subtle sense of uplift. The tactile difference between bead and fiber invites a gentle thumb pause, and the small audible click when the pot settles adds a quiet domestic sound to the moment.
Steps
- Prepare cords and place a suitably sized wooden bead onto the central gathered section before forming the base knot.
- Position the bead to sit directly beneath the pot area and secure surrounding cords to hold it in place.
- Finish the base by tying a tight knot beneath the bead to prevent movement.
- Trim excess cords or leave a short tassel below the bead for balance.
Pocket-style holder for moss-lined pots
A pocket-style hanger cradles a moss-lined pot in a cozy, bowl-like nest that feels snug and verdant. The soft moss contrasts with the cord’s texture, creating a tactile duet that feels earthy and close to the soil.
I enjoyed the intimate scale of the pocket; it framed a small pot like a hand cupping a treasure. The bulbous shape offers shelter and a little micro-climate for moisture-loving plants.
It’s an approach that reads botanical and gentle, inviting closer inspection.
Steps
- Create a rounded cradle by knotting cords into a bowl-like shape that deepens toward the center.
- Place a moss-lined or shallow pot into the formed pocket, adjusting knots for snug support.
- Secure the pocket bottom with a tight gathering knot to prevent slipping.
- Add an outer wrap or binding above the pocket edge for visual reinforcement if desired.
Table of Contents