I still remember the small pile of colorful paper on my kitchen table and the quiet way a rainbow banner could cheer up a rainy afternoon. Rainbow paper craft ideas have a way of bringing out the playful side of making, whether that was childhood curiosity or a grown-up desire to make a room brighter.
There is something comforting about the weight of paper in hand and the gradual reveal of color. Over time I collected patterns and simple tricks that turned stacks of scraps into cheerful objects, and these rainbow paper craft ideas are the kind I find myself returning to when I want a cozy, hands-on afternoon.
Sunlit rainbow paper chain garland for windows
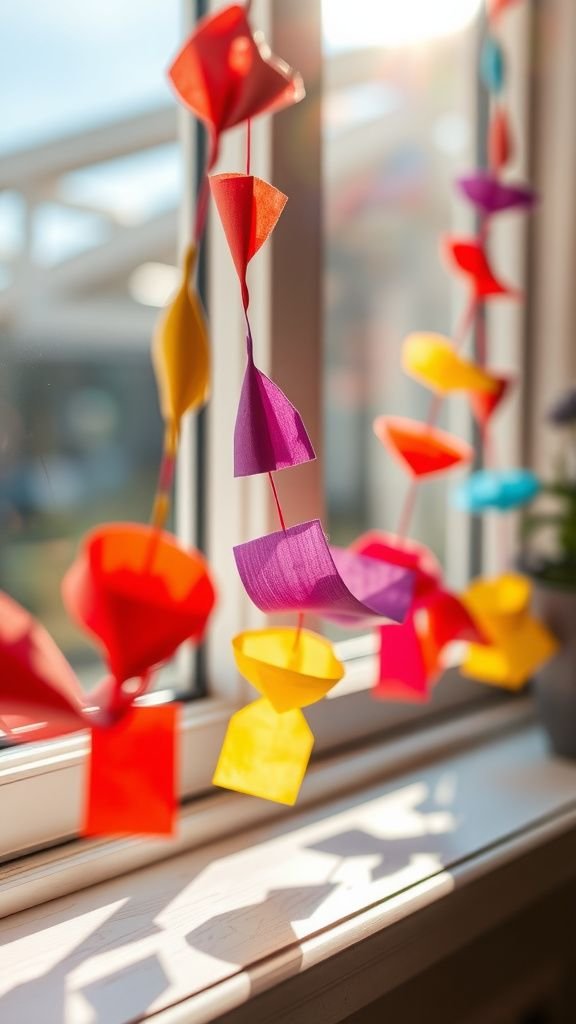
When I think of rainy Saturday mornings, the paper chain garland I made as a kid comes to mind first. The tactile rhythm of looping bright strips together felt soothing, and the way sunlight slipped through the translucent edges created a soft glow on the sill.
The colors bled into each other at the seams, giving the whole garland a living, shifting look. Hanging it made the room feel intentionally cheerful, like a small festival suspended in air, and friends often paused to trace the color progression with their eyes.
Steps
- Gather colored paper strips of equal width, a ruler, scissors, and clear craft glue.
- Form the first strip into a loop and secure its ends, then thread another strip through that loop and secure to begin the chain.
- Continue adding strips in rainbow order until reaching the desired length for the garland.
- Tie or staple the final loop to a length of twine or ribbon for hanging, then place by a bright window where light can pass through.
Layered rainbow paper flowers with textured petals
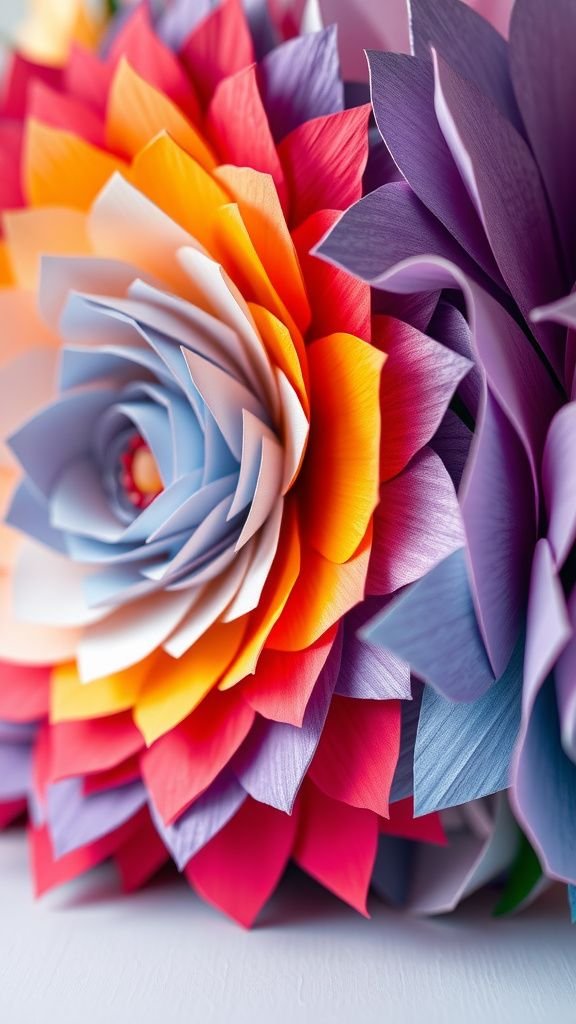
I remember pressing slightly different weights of paper as I layered petals, watching each color peek out from beneath the next. The contrast between smooth cardstock and soft handmade paper gave the blooms a tactile depth that invited touch.
When grouped together they read like a miniature garden with saturated gradients in each center. The edges sometimes curled in uneven ways that I found charming, and the whole cluster had an organic, slightly whimsical silhouette.
Those paper flowers carried a domestic warmth that real blooms sometimes lack, lasting without wilting on a tabletop.
Steps
- Select an assortment of colored papers with varied textures and trace petal shapes onto each sheet.
- Stack petals from largest on the bottom to smallest on the top, offsetting colors to create a layered rainbow effect.
- Secure the center of the stack with a small brad or glued disc, then gently shape petals outward for dimension.
- Arrange multiple flower heads together to form a bouquet or flat centerpiece.
Quilling rainbow hearts for a delicate card
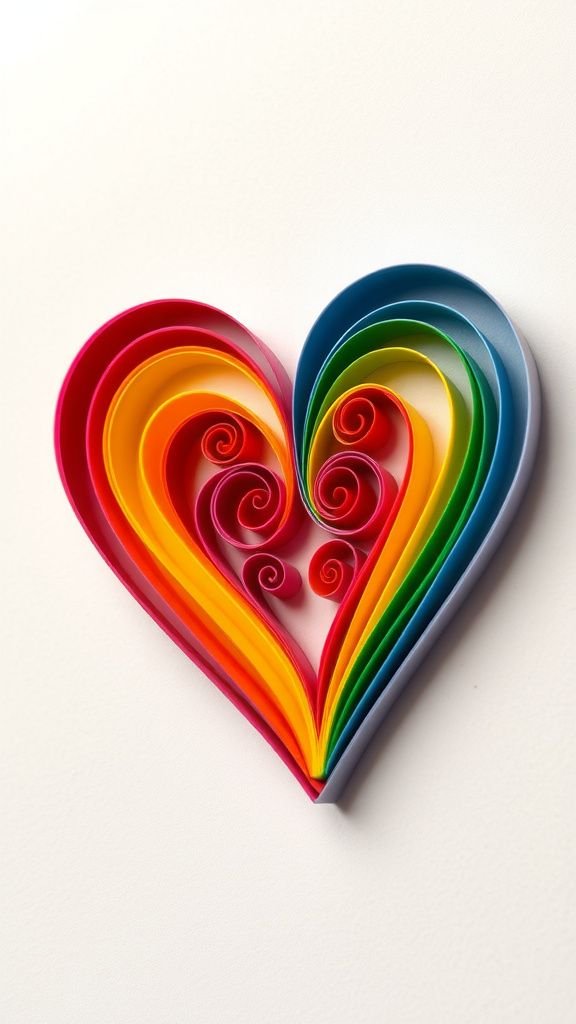
I once received a quilled heart card and kept it on my desk for months because of the careful coils of color. Tiny strips wound into spirals gave the whole piece a sweet, lacy look that felt lovingly made.
The slight sheen of the paper caught the light differently across warm and cool tones, creating small highlights where coils overlapped. The rhythm of repeating swirls offered a quiet satisfaction when viewed closely.
That little card radiated patience and charm, the kind that makes an ordinary day feel acknowledged.
Steps
- Prepare thin strips of colored quilling paper spanning rainbow shades and a quilling tool or thin dowel.
- Roll each strip into tight coils, then pinch or shape them into heart elements and glue the ends to secure.
- Arrange the coiled hearts into a larger heart shape on a card base, spacing coils for a delicate lace effect.
- Allow everything to dry flat before placing inside an envelope or displaying.
Stained-glass effect rainbow paper window cling
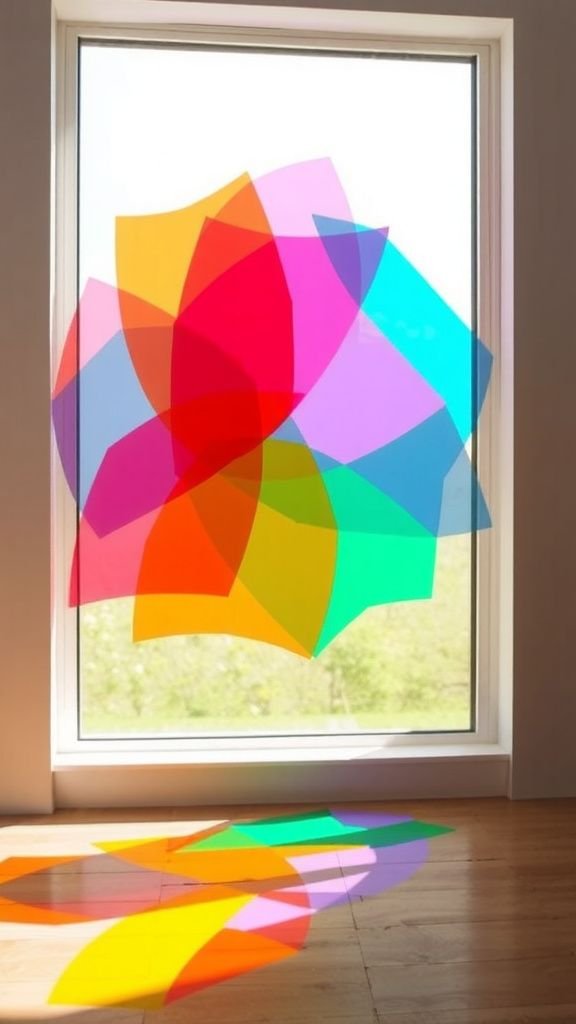
There was a lazy afternoon when I taped scraps of translucent paper to the glass and watched the living room fill with color. The effect was like a small stained-glass window, gentle and imperfect at the seams where colors met.
Light warmed the edges and cast playful reflections across the floor, turning a mundane space into something quietly theatrical. The slightly wrinkled texture of the tissue created soft diffusions, and the overall look had a lively handmade honesty rather than a glossy manufactured finish.
Steps
- Select an assortment of translucent tissue or vellum in rainbow hues and cut into overlapping shapes.
- Arrange pieces on a clear adhesive film or double-sided tape backing, allowing colors to overlap for blended tones.
- Trim the edges for a pleasing outline and press the backing onto a clean window surface.
- Remove any air bubbles and enjoy the colored light cast into the room.
Rainbow paper pinwheels scattered on a table
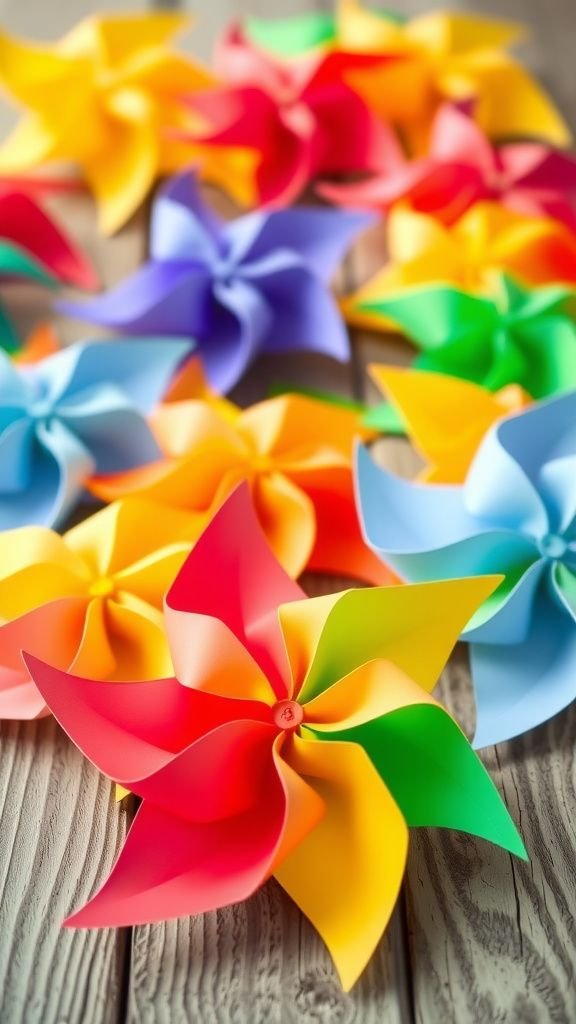
I used to watch pinwheels tilt and rotate in a summer breeze, and making paper versions captured some of that kinetic joy. The meeting point at the center felt like a tiny sun anchoring the color rays, and the straight folds created crisp highlights on each blade.
Placing a cluster of pinwheels on a picnic blanket made ordinary cutlery and cups feel celebratory. Their playful geometry held attention without demanding much; the way they caught air for a split second was always oddly calming, like a miniature wind orchestra.
Steps
- Square off colored cardstock and mark diagonal fold lines toward the center, leaving a small central square untouched.
- Fold alternating corners toward the center point and secure them together with a brad or pin through all layers.
- Mount the assembled pinwheel onto a dowel or stick and ensure it spins freely.
- Place in a vase or tuck into a garden display where it can catch a breeze.
Rainbow paper mosaic collage on a canvas
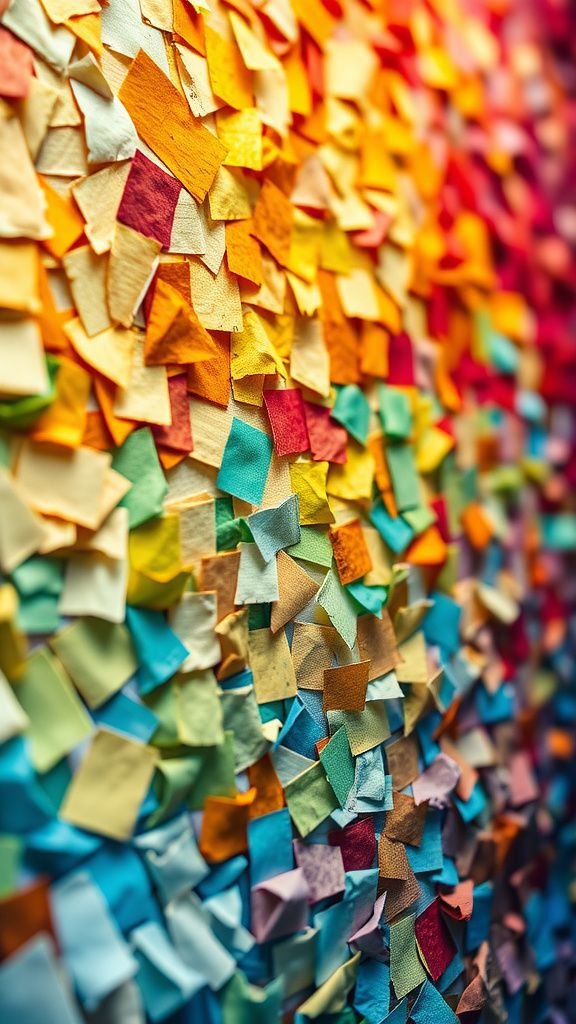
One evening I tore tiny scraps of colored paper and lost track of time while arranging them into a loose mosaic. The small irregular pieces built up a rich surface where light hit facets at different angles.
From across the room the image read as an abstract wash of color, but up close it revealed careful placement and the occasional rough edge. The tactile surface caught dust and light in pleasing ways, and the collage felt like a map of a quiet afternoon spent focusing on color and texture alone.
Steps
- Prepare a canvas or heavy board as a base and gather a palette of colored papers cut into small shapes.
- Plan a loose color flow across the surface and begin layering pieces from one edge toward the other.
- Attach each paper piece with craft glue, overlapping edges for texture and gradual blending.
- Allow the collage to dry thoroughly before framing or hanging.
Pop-up rainbow card with layered arches inside
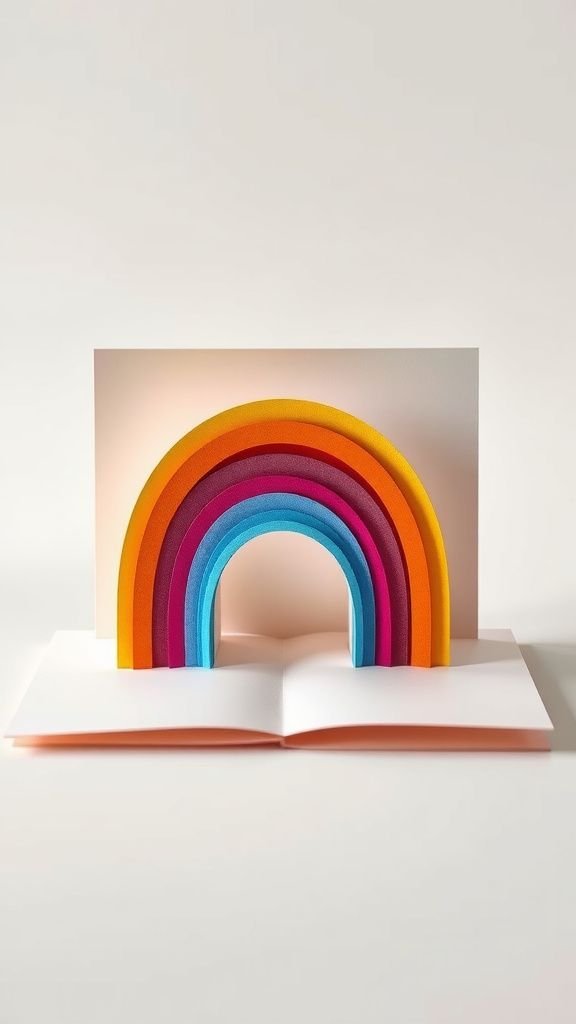
Opening a pop-up card with layered arches felt like revealing a tiny stage. Each band of color stepped forward slightly, producing depth that felt surprisingly theatrical for such a small object.
The shadow lines between layers added a sense of volume, and the bright palette created an instant smile. I remember giving one to a friend and enjoying the instant delight it caused; the motion of the pop-up made the card feel less like a note and more like a miniature performance.
Steps
- Score a card base along the fold line and design concentric arch shapes on colored paper for the pop-up layers.
- Cut and create tabs on each arch piece so they can sit perpendicular to the card fold when mounted.
- Attach the arches inside the card from largest at the back to smallest at the front, aligning tabs carefully.
- Close and reopen the card to test the pop-up motion and make any small adjustments for smooth action.
Woven rainbow paper placemats for simple dinners
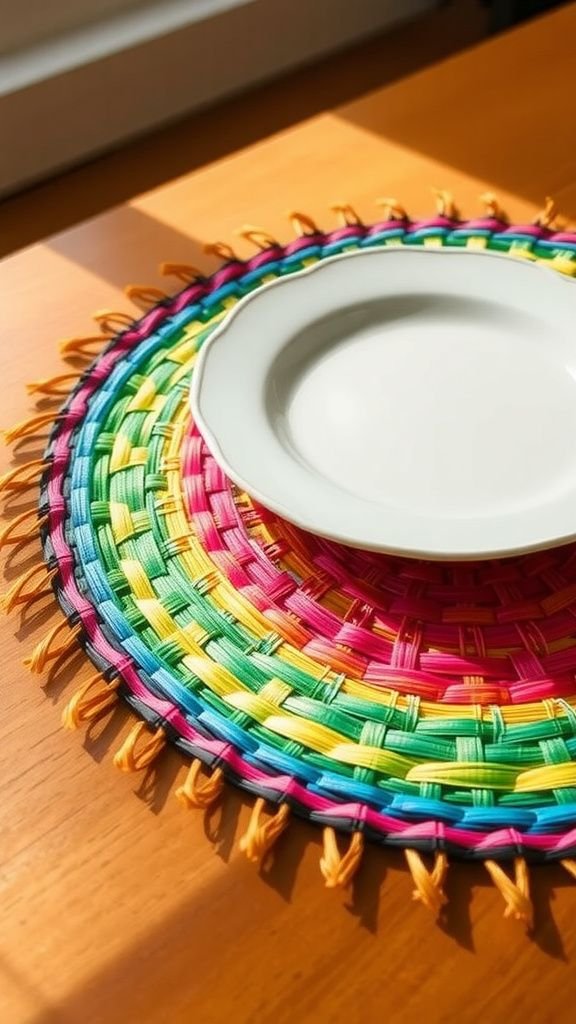
I made woven paper placemats once for a casual brunch and loved how the flat weave felt surprisingly substantial under plates. The interplay of horizontal and vertical strips created a gentle grid that showcased color intersections like tiny crossroads.
The surface had a quiet, slightly noisy texture where edges met, and the colors read differently depending on the angle of light. Laying them down gave the table a crafted feeling without fuss, turning ordinary ceramic into part of a small, color-forward set dressing.
Steps
- Cut long strips of colored cardstock for the warp and weft portions in rainbow order.
- Secure the warp strips in parallel on a flat surface and begin weaving the weft strips over and under to create a tight pattern.
- Trim excess edges and secure the ends with adhesive or by folding under for a clean border.
- Press the finished placemat flat under a heavy book if needed to help it lie smoothly.
Rainbow paper lantern with soft glowing interior
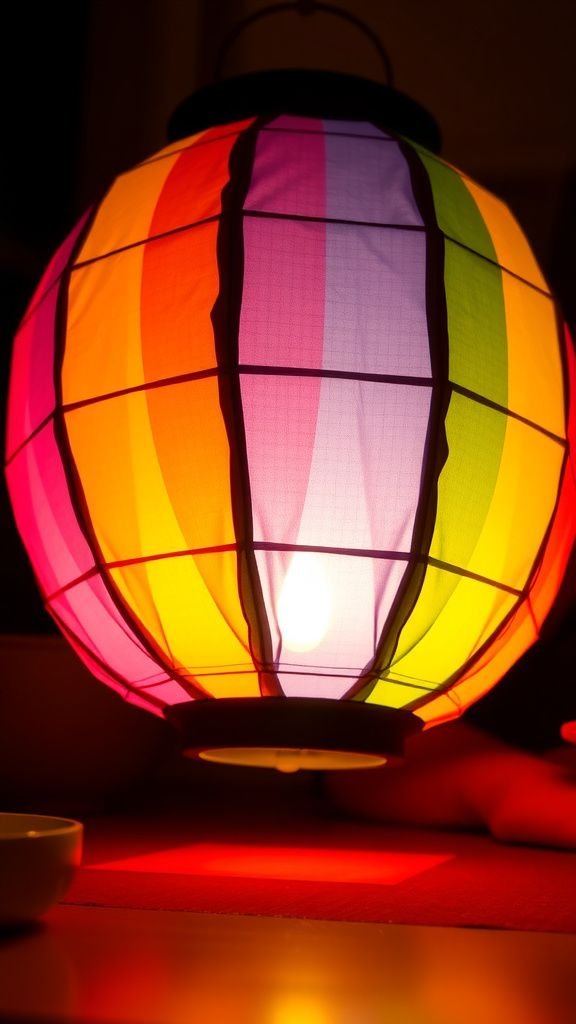
A handmade paper lantern gave my corner a warm, cozy glow one autumn evening. The translucent panes softened a small LED light into gentle color pools, and the seams where each hue met developed a lovely halo.
Looking at it felt calming, the slow diffusion of warm and cool tones providing a restful focus. The lantern had a modest presence, not shouting for attention but offering a steady companion on cooler nights.
Its quiet radiance made reading more comfortable and the room felt intentionally gentle.
Steps
- Cut panels of translucent paper in rainbow shades sized to fit a rectangular lantern frame.
- Adhere the panels to the frame, ensuring edges meet cleanly for an even glow.
- Place a battery-powered LED or warm string light inside the lantern, keeping wiring secure and ventilated.
- Position the lantern on a stable surface away from flammable materials to enjoy the soft colored light.
Rainbow bookmarks with hand-torn edges and charm
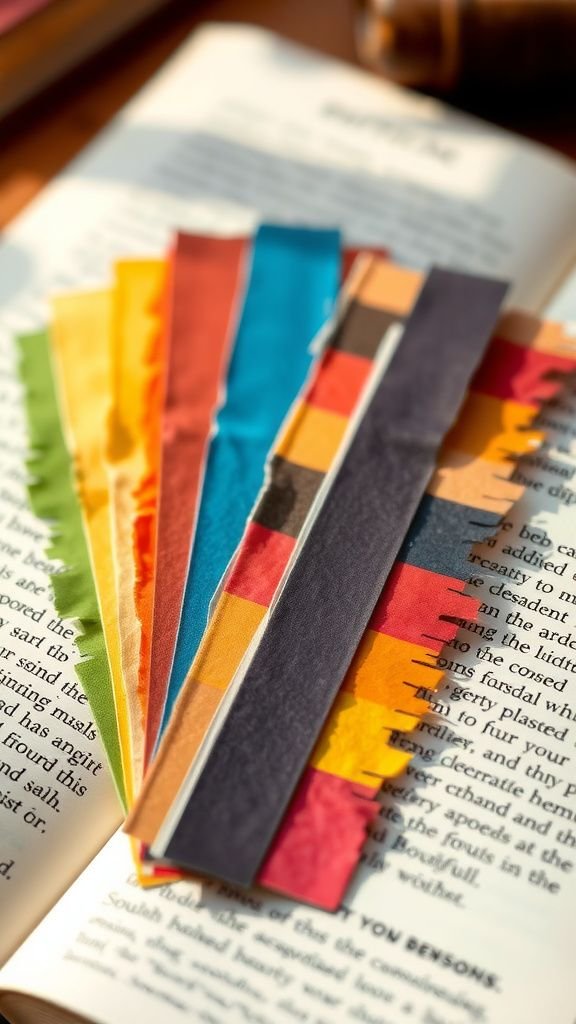
I always keep a small stack of handmade bookmarks, and the ones with hand-torn rainbow layers are my favorites. The ragged edges reveal tiny fibers that catch light and give a tactile honesty unlike machine-cut strips.
Sliding one between pages feels intimate, like leaving a colorful footprint in a story. The slim bands sit neatly without adding bulk, and the palette brightens the spine of a book on a shelf.
Sometimes I find myself pausing just to admire how the hues line up at the top when the book is closed.
Steps
- Tear strips of colored paper into bookmark-sized lengths, keeping edges intentionally uneven for texture.
- Layer the torn strips vertically on a sturdy backing paper to create a gradient effect.
- Secure the layers with adhesive and trim the sides for a neat edge while preserving the torn tops.
- Optionally laminate or add a tassel for durability before placing the bookmark in a book.
Rainbow paper garland of tiny folded stars
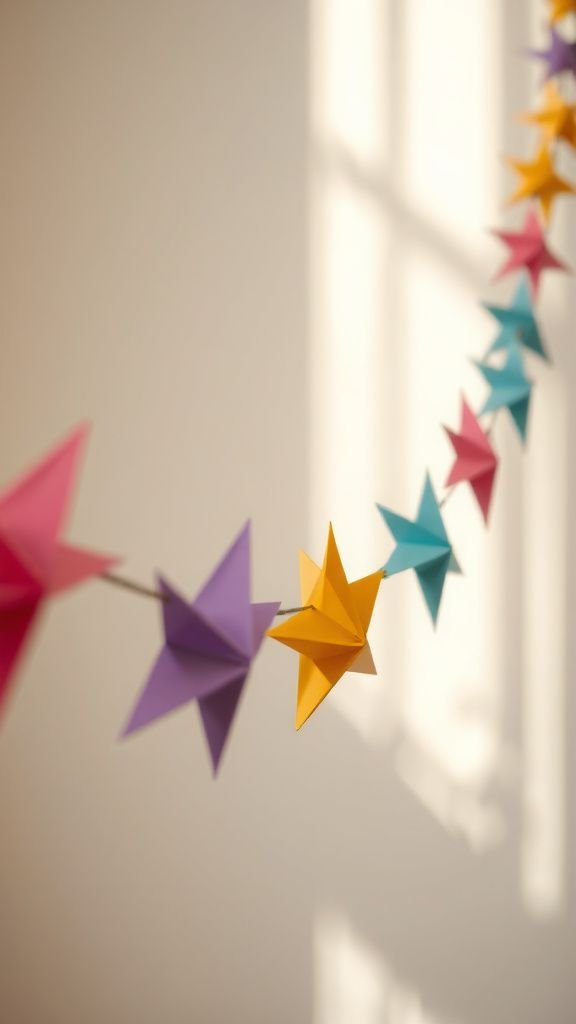
Folding tiny stars out of narrow strips felt like a quiet ritual on a long afternoon. Each star had a pleasant weight and a soft geometry that caught light on its facets.
Strung together they became a delicate garland, subtly reflective when the sun found them. The process was soothing; watching a collection grow slowly into a long string was oddly satisfying.
Hung across a doorway or draped over a shelf, the garland created a gentle constellation that made a room feel more personal and whimsically decorated.
Steps
- Cut thin strips of colored paper across the rainbow spectrum and tie a small starting knot on each strip.
- Fold the strips into five-point star shapes by wrapping and tucking toward the center, forming compact stars.
- Thread the finished stars onto a length of thin twine or thread, spacing evenly for a garland.
- Hang the garland in a doorway or along a shelf where it can sway slightly.
Rainbow paper rosette wreath for front door
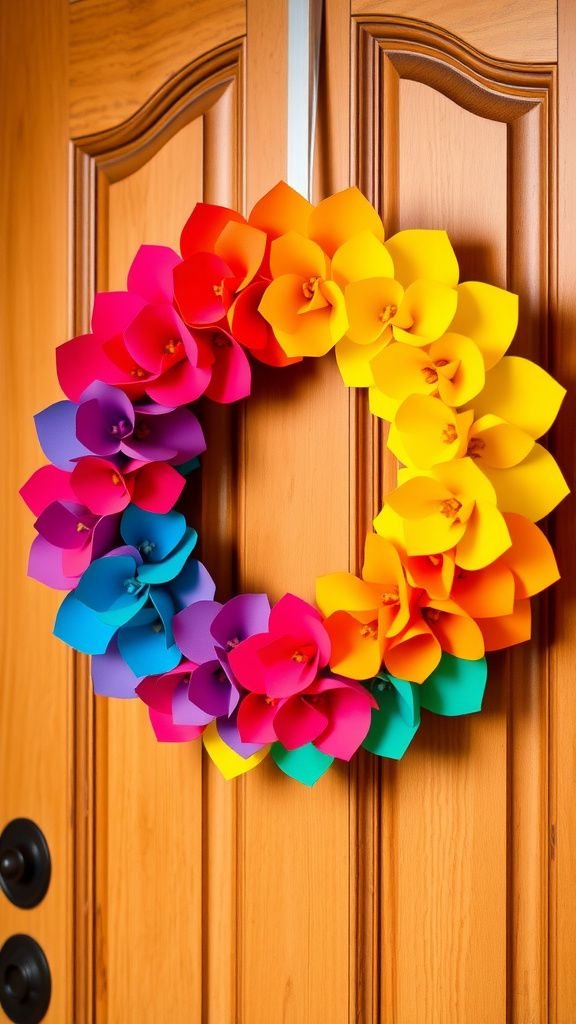
A rosette wreath crafted from layered paper petals felt like a celebration that lasted through seasons. The overlapping circles created a sunflower-like center that radiated outward in lively color bands.
The tactile concentric ridges invited fingers to trace them, and the overall roundness had a pleasing symmetry. Hanging it on the door turned a simple hallway into an arrival point that felt intentional and friendly.
Neighbors paused to comment and the wreath held up well over days, keeping a bright presence that welcomed visitors with color.
Steps
- Prepare multiple circles of colored paper in graduated sizes and score them to form rosette folds.
- Fold and press each circle into a rosette, securing the center of each with glue or a brad.
- Arrange the rosettes on a sturdy wreath base, layering from largest at the back to smallest at the front.
- Attach a hanging loop to the back and display the wreath on a door or wall.
Rainbow paper mandala wall hanging with symmetry
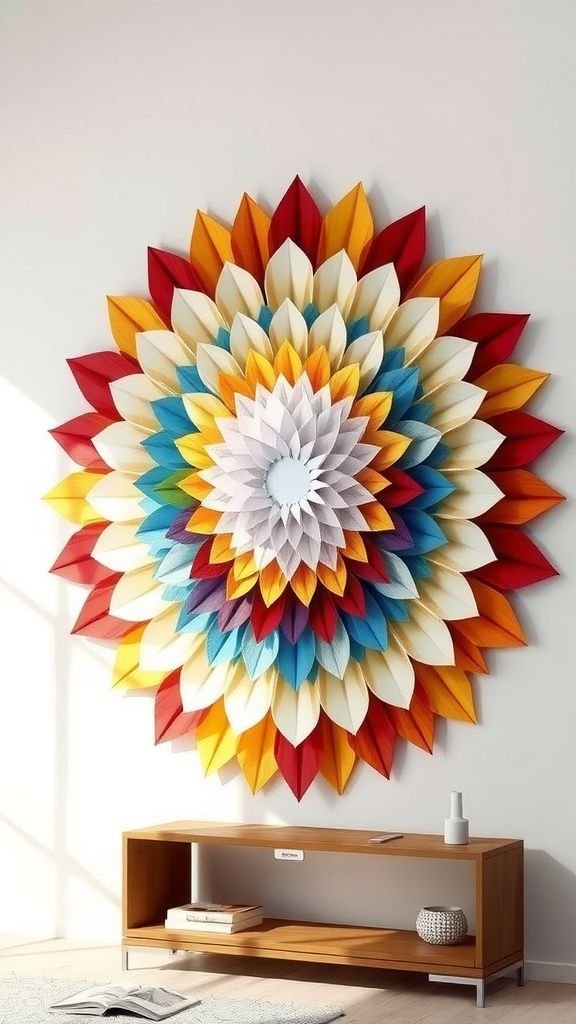
Creating a paper mandala felt meditative as patterns emerged from repeated shapes. The radial symmetry drew the eye inward, and the careful placement of each color lent a calm order to the living room wall.
Light grazed the slight elevations between layers, casting fine shadows that deepened the pattern. The mandala had a contemplative presence, like a quiet centerpiece for a wall where one might pause while passing.
It made the space feel curated, the colors harmonizing more than competing, offering a gentle visual rhythm.
Steps
- Design a radial layout on a sturdy backing and prepare concentric shapes in a rainbow palette.
- Layer the shapes from outer rings inward, aligning edges to maintain symmetrical balance.
- Adhere each layer securely and press flat to ensure even shadows and clean lines.
- Frame or mount the finished mandala on the wall as a single decorative focal point.
Rainbow paper mobiles with drifting geometric shapes
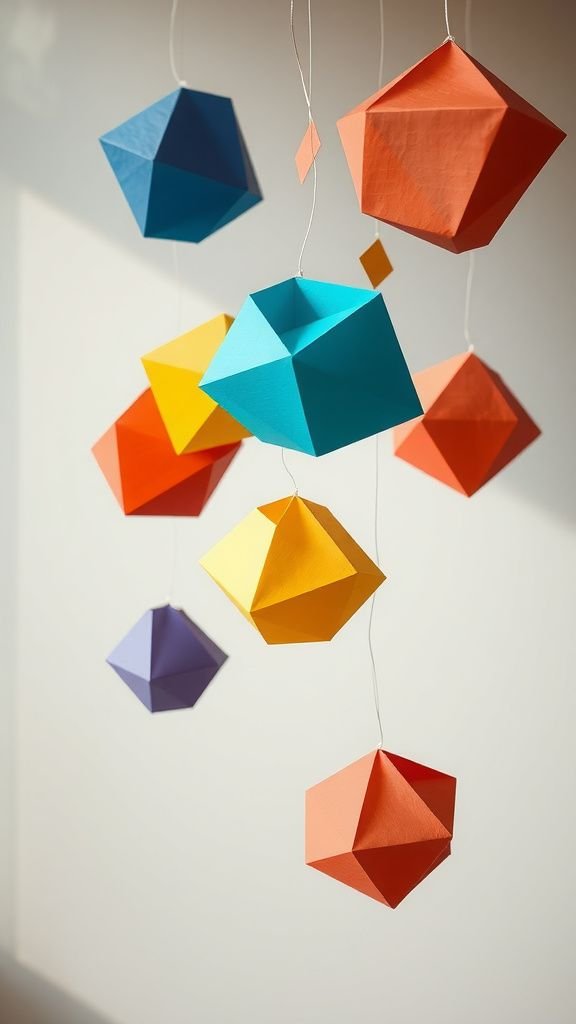
I once suspended a mobile of geometric paper pieces over a small reading nook and it became a gentle companion. Each flat shape rotated slowly, catching light differently as it turned, and the layered colors created fleeting new tones where they overlapped.
The movement was quiet and unrehearsed, like a slow conversation between pieces. Watching it felt calming after a busy day, the subtle motion easing attention away from tasks and toward a tranquil, suspended moment.
It made the corner feel thoughtfully composed with soft kinetic energy.
Steps
- Cut geometric shapes from colored papers and attach thin clear thread or lightweight fishing line to each piece.
- Balance groups of shapes at various lengths from a central hoop or stick, arranging rainbow colors across the plane.
- Ensure each string hangs freely and that the overall mobile is balanced for gentle rotation.
- Suspend from a ceiling hook in a calm area where airflow can animate the pieces.
Accordion rainbow paper fans for instant texture
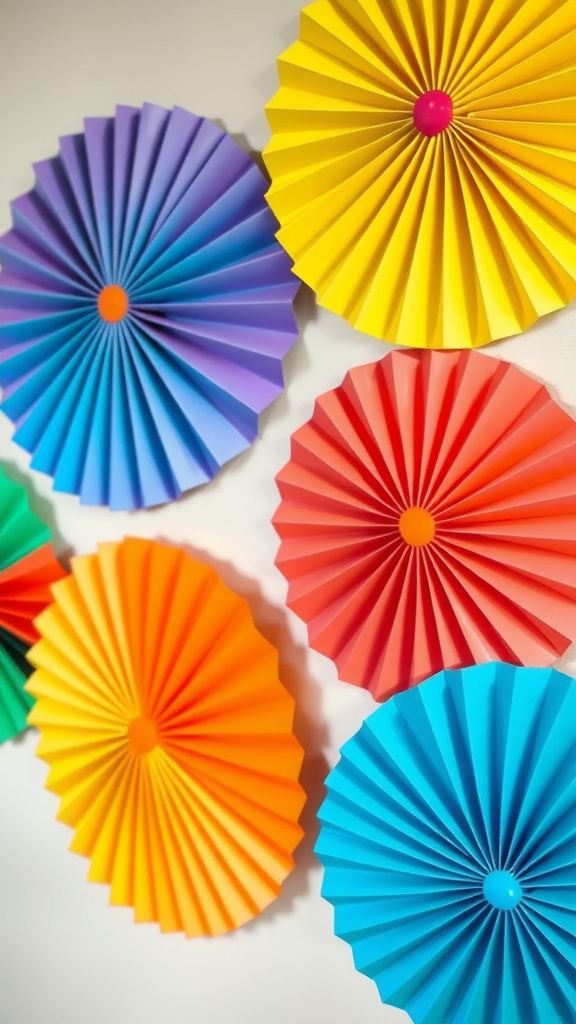
Accordion fans in bright stripes added a crisp, graphic element to a small party I once hosted. The pleated texture caught light in alternating bands of highlight and shadow, giving each fan a three-dimensional presence despite being flat when folded.
When grouped on a wall, they created a playful backdrop with repeating rhythm. Handling them revealed the satisfying snap of well-creased paper and the contrast between tight folds and broad color panels.
They felt festive without being loud, an economical way to add texture and cheer to a space.
Steps
- Cut long strips of colored paper and fold them in an accordion pattern along the length.
- Bring the two ends together to form a circular fan and secure at the meeting point.
- Fluff out the pleats evenly to create a round, three-dimensional fan shape.
- Mount multiple fans on a wall in an overlapping arrangement for a decorative display.
Rainbow paper bead necklace with glossy finish

Rolling paper into beads felt a bit like tiny alchemy, transforming flat strips into small luminous gems. The glossy finish I applied gave each bead a subtle sheen that made the colors pop and made the necklace comfortable against skin.
The rhythm of the graduated colors along the strand was calming and playful at once. Wearing it added a handcrafted accent to simple outfits, and noticing the texture against a sweater prompted compliments from friends.
The light bounced differently off each bead, creating little highlights where lacquer pooled slightly.
Steps
- Cut triangular strips of colored paper and roll each tightly around a small dowel or toothpick to form tapered beads.
- Seal the rolled paper with a thin coat of gloss or varnish and allow to dry completely.
- Thread the finished beads onto a cord or jewelry wire, arranging them in a rainbow sequence.
- Add clasps or tie ends securely to finish the necklace for wearing or gifting.
Rainbow paper confetti poppers for playful moments

I kept a stack of confetti poppers for small celebrations and found that handing one to a friend always loosened smiles. The confetti looked cheerful as it tumbled out, each paper square catching air and light briefly before settling.
The sound of a soft pop combined with the scatter of color felt instantly celebratory without being overwhelming. Cleaning up was part of the aftermath, but the brief, bright chaos felt worth it, a small eruption that marked an ordinary moment as worth celebrating.
Steps
- Prepare small squares of colored paper for confetti and a selection of cardboard tubes for poppers.
- Fill each tube with a generous amount of confetti and secure one end with tissue paper and adhesive.
- Close the other end similarly or fit a cap, then pull or tap the tube to release confetti when ready.
- Use outdoors or in an easy-to-clean area to enjoy the burst of color responsibly.
Mini rainbow paper kites for shelf decoration
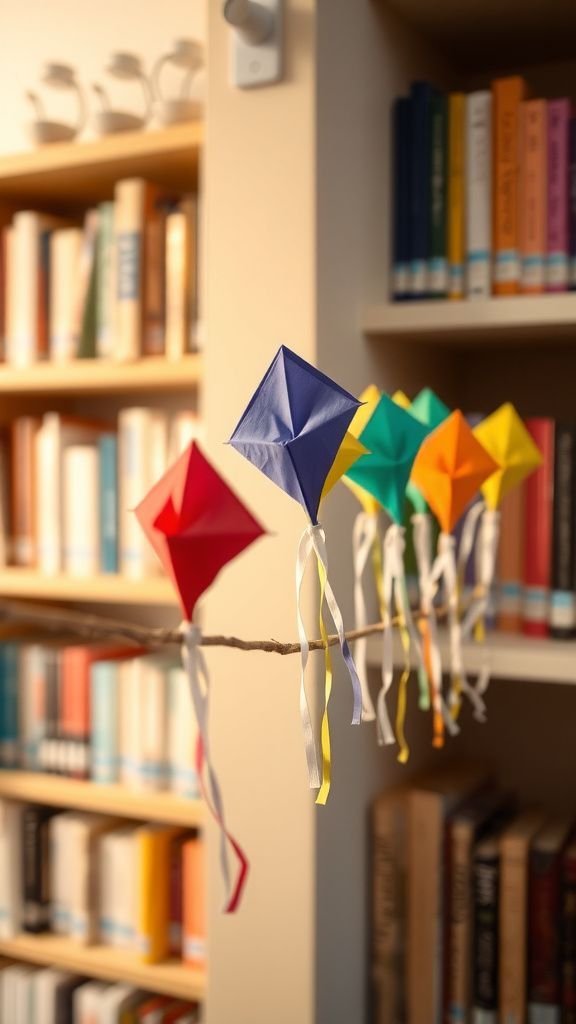
Tiny paper kites arranged on a shelf reminded me of childhood skies filled with color. Their triangular sails sat proudly on small dowel tails, and the simple geometry felt both playful and elegant.
Displaying a cluster gave a sense of movement even while they were still, like a frozen moment of wind. The bright sails contrasted with neutral books and pottery, drawing the eye along the shelf.
They brought a lightheartedness to an otherwise static arrangement, balancing structure with a sense of carefree leisure.
Steps
- Cut small triangular sails from colored paper and mount them onto lightweight sticks or dowels.
- Add a thin tail with small paper bows or strips for visual interest and stability.
- Secure the joints with a small drop of glue and allow to dry.
- Arrange the mini kites standing in a jar or laid across a shelf for display.
Rainbow paper envelopes with patterned liners
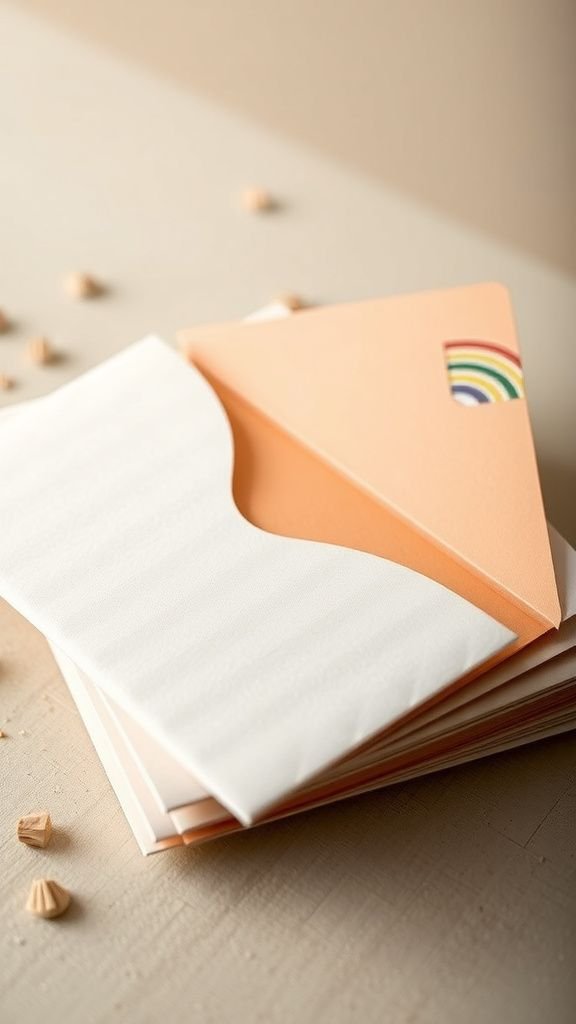
Handmade envelopes with rainbow liners felt like little gifts before the recipient even opened them. The surprise of a patterned interior added a private flourish that pleased me more than the exterior sometimes.
Sliding a note into a bright-lined envelope had a tactile satisfaction, the crisp snap as the flap closed felt complete. The contrast between a plain outside and a vivid inside made each envelope feel thoughtfully wrapped, and presenting mail this way made even a short message feel ceremonious in an intimate, friendly way.
Steps
- Fold or construct envelopes from neutral cardstock and cut liners from colored or patterned paper to fit inside.
- Adhere the liners to the inner flap and body, aligning edges for a clean interior finish.
- Insert a note or card, then seal the envelope for delivery or gifting.
- Optionally decorate the exterior with a small sticker or wax seal to complement the rainbow liner.
Rainbow paper crown for tiny celebrations
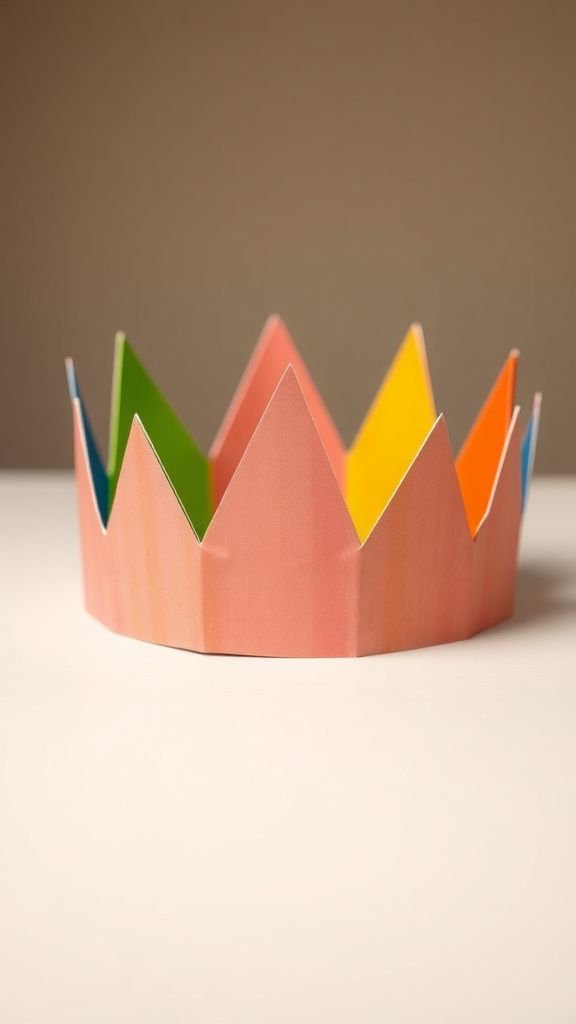
A paper crown with graduated color panels made a small celebration feel ceremonious. The gentle arc of the crown sat familiar and slightly regal, and the bright bands of color gave it a modern, playful twist.
Wearing it inspired a grin and added a simple theatricality to casual moments. It felt light on the head and balanced visually, the palette lending both warmth and cheer.
Watching someone accept the crown brought a spontaneous sense of joy, like witnessing a private coronation for a minor but delightful occasion.
Steps
- Measure a head circumference and cut a strip of sturdy paper slightly longer for overlap.
- Cut panels in rainbow colors and adhere them around the strip in sequence to form the crown exterior.
- Join the ends securely and add decorative points along the top edge if desired.
- Fit the crown to the wearer’s head and adjust the overlap for a comfortable fit.
Rainbow paper sun catcher with beaded accents
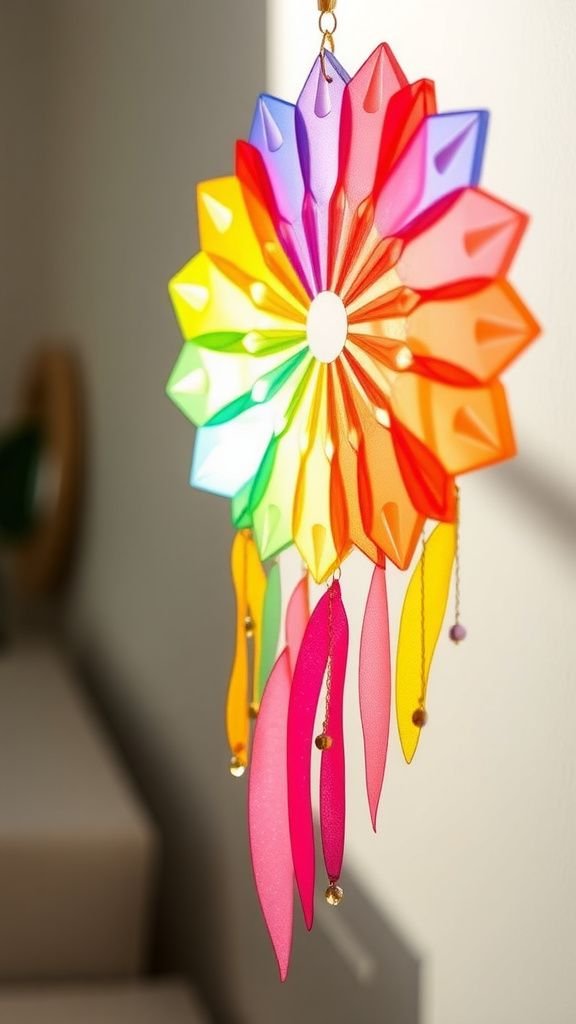
Combining paper with tiny beads produced a charming sun catcher that jingled slightly when moved. The layered paper panels softened incoming light while the beads added tiny flashes where light refracted.
Hanging it near a window turned ordinary sunlight into a series of warm jewels dancing on the wall. The tactile contrast between matte paper and glossy beads pleased my hands as well as my eyes.
Pulled aside in the morning to catch a bright sliver of sun, it felt like a small ritual to pause and enjoy the light.
Steps
- Cut layered shapes from translucent or vellum paper to form the body of the sun catcher.
- String small glass or plastic beads onto thin thread and attach them between the paper layers for accent and weight.
- Secure all connections and attach a hanging loop at the top.
- Suspend the sun catcher in a sunny spot where beads can catch and refract light.
Table of Contents