I started tinkering with jars after one too many mornings spent hunting for a stray cotton ball behind the sink. Mason Jar Bathroom Storage Crafts became a quiet habit, a way to turn simple glass into something that felt personal and a little friendlier than a plastic bin.
I remember the soft clink of glass and the scent of lavender from a jar of bath salts on the windowsill.
Over time those jars collected small stories: a chipped rim that caught the morning light, a rope-wrapped jar that survived a humid shower, a set of amber jars that made a tiny corner feel settled. Mason Jar Bathroom Storage Crafts kept surprising me with how a little glass could change the mood of a space.
Countertop jar for toothbrushes and paste

I love the way a single jar can anchor the sink area. Mornings often bring the gentle clink of bristles against glass and the cool, smooth rim under my fingertips.
A clear jar lets the colors of toothbrush handles and a gleaming tube peek through, while a paper label or twine adds a comforting handmade touch. Steam from the shower leaves a faint halo on the glass, and the whole arrangement feels reassuringly simple; it turns a small daily routine into a tiny vignette that invites a calm start to the day.
Steps
- Rinse and dry a wide-mouthed mason jar until the glass is clear and free of residue.
- Add small pebbles or decorative gravel to the jar base to hold items upright and create texture.
- Place toothbrushes and a toothpaste tube into the jar, arranging handles so colors are visible.
- Wrap twine or ribbon around the jar neck for visual interest and tie a simple knot.
- Position the jar near the sink where light highlights the glass and contents.
Wall-mounted jars with rope and plank
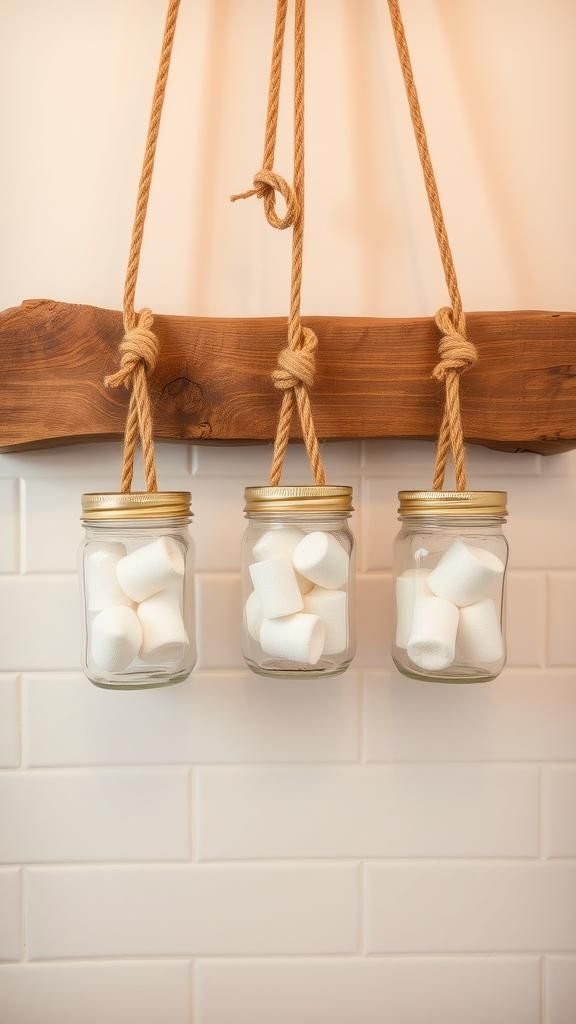
There is a satisfying farmhouse rhythm when jars hang against a reclaimed wood plank. The texture of rough-grain wood contrasts with the glass coolness, and salt-warmed rope brings an earthy scent that seems to suit soaps and combs.
Seeing cotton pads and small bottles lined up like little glass islands feels oddly comforting. In low light the jars throw tiny reflections across the plank, and grabbing a jar to reach for a swab becomes a small tactile pleasure rather than a routine fumbling in a drawer.
Steps
- Select a wooden plank finished to match bathroom tones and sand any rough edges for safety.
- Secure strong rope or metal hose clamps around the jar necks and fasten them to the plank at even intervals.
- Attach the plank securely to a wall stud or with heavy-duty anchors for stability.
- Place cotton pads, Q-tips, or small toiletry bottles inside each jar and adjust spacing for balance.
- Step back and tweak jar alignment until the arrangement looks even and accessible.
Shower-friendly soap dispenser jars

A jar turned into a dispenser adds a pleasing weight to lathering up under the shower. The thicker glass feels reassuring to the hand, and the soft click of a pump releases a familiar citrus or eucalyptus scent.
Water beads slide down the curved surface during steamy showers and refract the overhead light into tiny prisms. Seeing the level of gel move slowly day by day brings a kind of practical satisfaction, and the whole thing makes rinsing off feel just a touch more considered and personal.
Steps
- Choose a mason jar with an appropriate pump lid that fits securely and is rated for soap dispensers.
- Pour liquid soap or body wash into the jar through a funnel to avoid spills.
- Screw the pump lid on tightly and test for pump action and any leaks.
- Place the dispenser near the shower edge or ledge where it stays stable and is easy to reach.
- Refill as needed and wipe the outside to remove water spots for a clean look.
Cotton ball jar with pop-top lid display
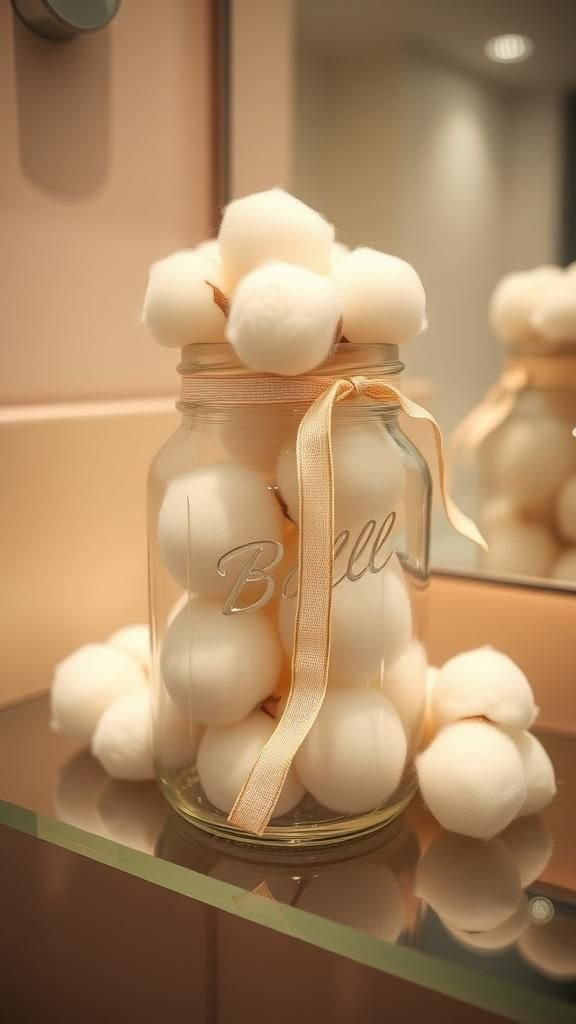
A jar dedicated to cotton rounds feels indulgent, almost like a tiny apothecary. Lifting the lid reveals a soft, pillow-like stack and a faint scent of whatever fragrance lingers in the room.
The tactile contrast between fluffy white cotton and hard glass is oddly satisfying. Placing that jar on a mirrored shelf multiplies the reflection of round shapes in warm light, and reaching in for a pad has the same comfort as unfolding a pressed flower.
It becomes one of those small things that brightens a quick skincare routine.
Steps
- Select a mason jar with a secure lid that allows easy opening and closing.
- Fill the jar with cotton balls or rounds, gently compressing for a neat appearance without overpacking.
- Decorate the lid edge with a band of fabric or ribbon for a soft accent if desired.
- Position the jar on a vanity or shelf where it stays dry and accessible.
- Replace the lid after each use to keep contents clean and dust-free.
Vanity brush organizer with gravel base

A jar packed with tiny pebbles that cradle makeup brushes makes the vanity feel more like a little studio. Brushes stand tall, their bristles fanning like tiny fans, and the gravel gives a muted clink when one is nudged.
The bristles’ scent of foundation and powder mingles faintly with the cool glass, and watching the collection of brushes create a soft skyline is oddly satisfying. Each brush becomes visible like a colored reed, and the arrangement keeps the clutter contained while adding a small sculptural note to the counter.
Steps
- Clean and dry a wide-mouthed mason jar to ensure no residue remains.
- Pour decorative gravel, small beads, or coarse sand into the base to create a stable filler.
- Insert makeup brushes bristle-side up, spacing them so handles remain easy to grab.
- Rotate the jar occasionally to maintain an even look and prevent leaning.
- Wash the jar filler or replace it periodically to keep the area fresh.
Hanging pendant lights from mason jars

Hanging jars with warm bulbs transform a bathroom into a cozy nook. Amber-tinted glass softens the glow and throws a gentle halo across tile.
The jar rim captures the filament light in a tiny, intimate reflection, and at night the whole space feels quieter, like a small café tucked into the home. Wires disappear into a ceiling rose while the glass hangs at eye level, and I always notice how the air takes on a faint warmth where the light pools, turning a routine wash into a slower, calmer pause.
Steps
- Choose mason jars that are heat-resistant and select compatible pendant light kits with secure fittings.
- Install ceiling mounts according to the light kit instructions, ensuring a safe electrical connection from a qualified source.
- Thread the bulb sockets into the jar openings and secure them so bulbs sit centered within each jar.
- Hang jars at preferred heights and test each bulb for consistent illumination.
- Adjust spacing and alignment for an even light distribution and pleasing visual rhythm.
Magnetic lid jars for metal cabinet doors

There is something satisfying about jars that cling to vertical space, freeing the sink area and adding a playful stack to a metal surface. Magnets under the lids hold small items in plain sight, and the jars themselves rattle softly when the cabinet door closes.
Seeing cotton swabs lined up behind a mirror feels a bit secretive, like a small organized hideaway. The cool tug of the magnet against the metal creates a tiny tactile reward every time the jar is lifted, and the whole solution feels unexpectedly clever without shouting for attention.
Steps
- Glue or press strong disc magnets to the underside of jar lids and allow any adhesive to fully set.
- Fill jars with small items like cotton swabs, hairpins, or small brushes for visibility and easy access.
- Place the magnetic lids against the inside of metal cabinet doors or tile surfaces to test adhesion.
- Adjust magnet strength or jar placement if jars shift or drop when the door moves.
- Remove jars carefully by pulling straight off the surface to avoid sliding.
Tiered lazy Susan with multiple jars

Arranging jars on a lazy Susan adds a playful spin to countertop storage. Rotating the platform brings different jars into view like a small carousel of daily essentials.
Labels peek out, gleaming glass catches the light, and the gentle whirl of rotation feels satisfying under a fingertip. The variety of jar heights and contents creates a miniature skyline that changes with each turn.
Reaching for a hair tie or lip balm becomes a small moment of choice, and the whole setup makes the counter feel lively and curated without being fussy.
Steps
- Select a sturdy lazy Susan with a flat surface able to support multiple jars without wobbling.
- Arrange jars of different heights and contents evenly around the platform for balance and visual interest.
- Test the rotation to ensure jars remain stable and do not collide during movement.
- Place the lazy Susan on a dry, level countertop area for easy access.
- Reorganize jar contents occasionally to refresh the look and maintain balance.
Suction-cup jar on the mirror — clever little holder?
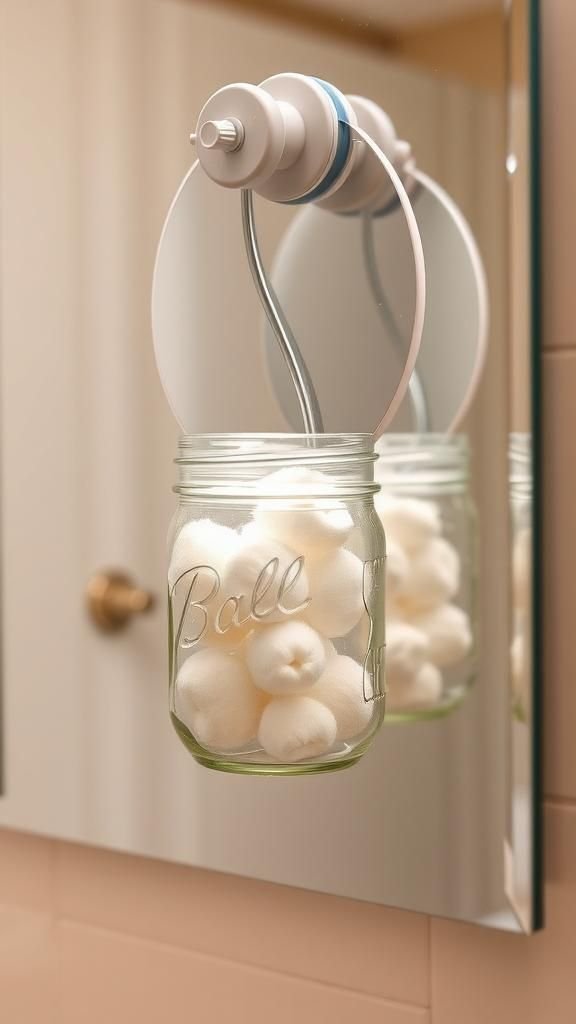
A jar clinging to a mirror with a suction cup changes the mirror from a reflection into a miniature storage wall. Seeing small tools suspended at eye level feels practicality mixed with a little surprise.
Water beads from the mirror sometimes gather where the jar meets glass, leaving faint trails that dry into delicate streaks. The jar’s contents appear doubled in reflection, lending an almost theatrical chorus of items.
It’s a small, handy solution that takes advantage of an otherwise blank surface and turns it into a playful storage spot.
Steps
- Choose a strong suction hook rated for bathroom humidity and attach it firmly to a clean, smooth mirror surface.
- Secure a jar to the hook by fitting it through a metal ring or compatible hanger attached to the jar neck.
- Place small items like makeup sponges or cotton pads inside the jar for easy reach.
- Check the suction periodically to ensure the hook remains firmly in place.
- Reposition the jar as needed for optimal convenience and mirror access.
Elegant bath salt jars with handwritten labels
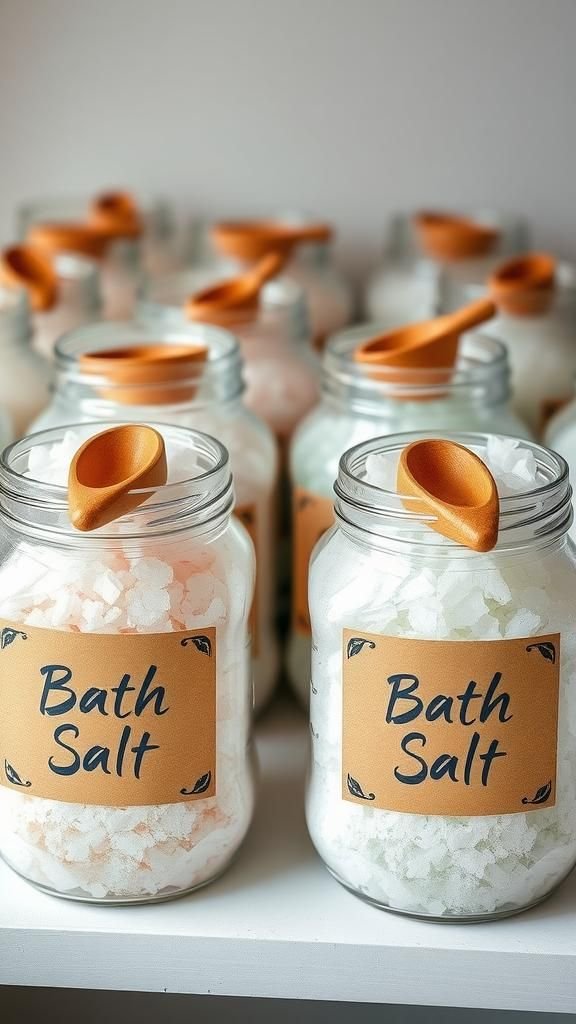
There is a tiny pleasure in flipping through jars of salts, the granules catching light like tiny crystals. Handwritten labels add a personal voice, slightly tilted and charming against the smooth glass.
Lifting a jar releases the faint mineral scent of eucalyptus or lavender, and fingers trace the fluted glass as the jar passes between shelves. The overall effect feels like a miniature apothecary nestled into the bathroom, where small rituals start with the grainy, aromatic scoop from a jar and end in a quiet, fragrant soak.
Steps
- Fill clean mason jars with bath salts, scented blends, or single-ingredient salts to preferred levels.
- Write labels on kraft paper or chalkboard stickers and adhere them to the jar fronts.
- Arrange jars on a shelf or in a basket for easy reach and an attractive display.
- Tuck a small wooden scoop into each jar or rest it on top for convenience.
- Replace lids securely to preserve scent and keep contents dry.
Galvanized shelf with row of mason jars

A row of jars on a galvanized shelf brings industrial charm to the bathroom. The cool metallic sheen of the shelf complements the clear glass and creates a neat, orderly row that feels both sturdy and approachable.
The jars contain little bursts of color from soaps and bath beads, and the metal gives a faint, reassuring clink when a jar is nudged. Placing a small plant at the end of the shelf softens the look, and the whole composition looks like it belongs in a sunlit studio where function and character meet happily.
Steps
- Secure a galvanized metal shelf to wall studs or with strong anchors for stability.
- Line the shelf with mason jars filled with toiletries, grouping similar items together for visual cohesion.
- Ensure jars sit evenly spaced and use non-slip pads if surface is slick.
- Add a small plant or decorative object at one end to balance the composition.
- Check occasional dust or water buildup and wipe the metal surface to maintain its finish.
Soft ombré jars for a coordinated vanity
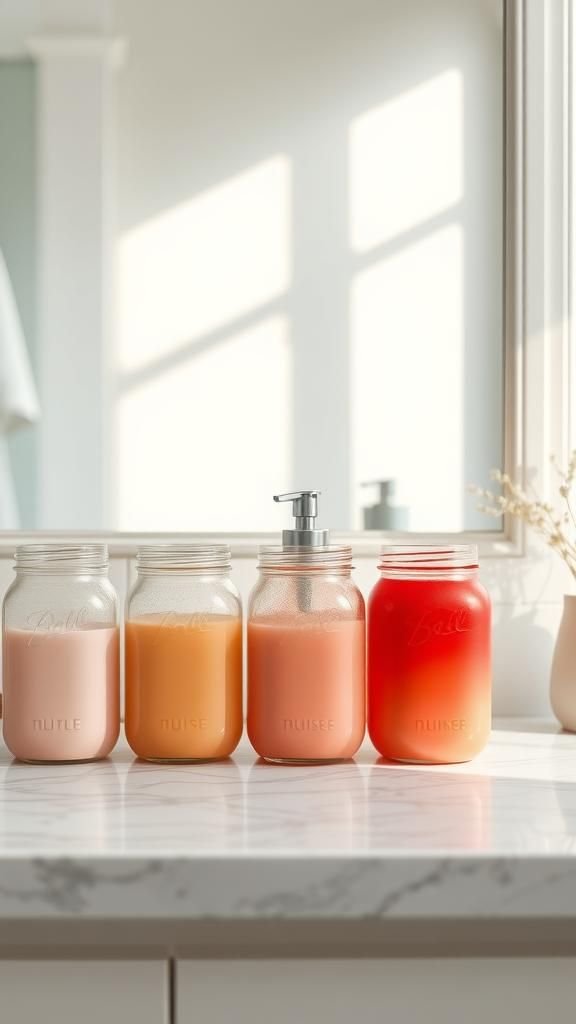
A set of jars transitioning from pale to deep color creates a small gradient that feels unexpectedly soothing. The gradual change in tone gives the vanity a sense of calm and order, and the layered hues sing softly when sunlight skims the glass.
Each jar seems to have a personality, from the palest hue that catches morning light to the deeper shade that steadies the composition. The visual rhythm of the ombré set makes sorting small items feel like arranging a little color story, and it adds a quiet design note without fuss.
Steps
- Choose identical mason jars and select non-toxic glass-safe pigments or stains for coloring.
- Apply color in graduated intensity across the jars to create a smooth ombré progression, allowing drying time between coats.
- Place jars on the vanity filled with coordinating items like cotton pads or small soaps for a cohesive look.
- Seal the colored surface if required by the pigment instructions to protect the finish.
- Arrange jars from lightest to darkest for an intentional flow on the countertop.
Etched monogram jars for a personal touch
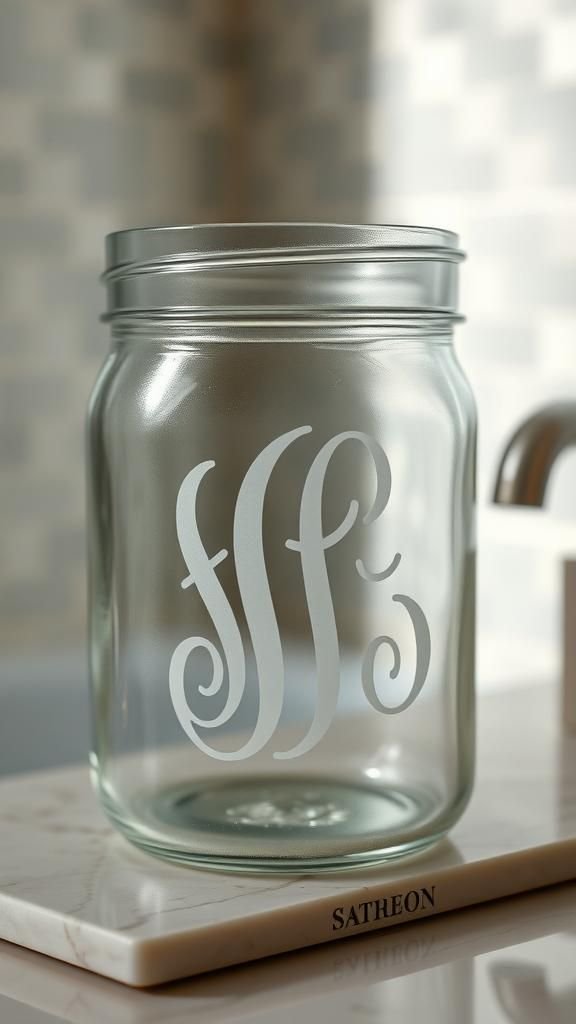
Etched glass brings a subtle, elegant whisper to storage. A single monogram etched into a jar looks like a quiet signature, and the frosted texture contrasts wonderfully with the gleam of clear glass.
Light catching the etched letter throws a soft shadow, turning the jar into a small focal point. There is a satisfying permanence to the technique; the mark does not peel away and seems to belong to the object itself.
Keeping scented cotton or tiny mementos inside makes the monogrammed jar feel like a small, personalized relic.
Steps
- Clean a mason jar thoroughly to remove oils or fingerprints before beginning any etching process.
- Apply a stencil or mask where the monogram will appear, ensuring crisp edges for a clean result.
- Apply glass etching cream according to product directions and rinse off after the recommended time.
- Remove the stencil to reveal the frosted monogram and dry the jar carefully.
- Fill the jar with items that complement the personalized look and display on a vanity or shelf.
Lotion pump conversion from a mason jar

Converting a jar into a lotion pump gives products a weightier, more intentional presence on the sink. The smooth action of the pump paired with cool glass feels gratifying each time a drop of lotion appears.
The sight of lotion level moving down through the clear glass registers like a tiny diary of use, and the overall look reads like handmade care on display. The combination of tactile metal pump and rounded glass neck has a pleasant coolness that contrasts with warmed hands, making the whole ritual feel a bit more dignified.
Steps
- Select a pump mechanism designed to fit the mouth of a mason jar and ensure compatibility with the jar thread.
- Fill the jar with lotion or moisturizer, leaving space at the top for the pump assembly.
- Insert and secure the pump mechanism, trimming any excess tube to match the jar depth if necessary.
- Test the pump action to confirm smooth dispensing and check for leaks.
- Place the jar on the sink and press gently to dispense lotion as needed.
Lid jewelry dish — small and shiny storage
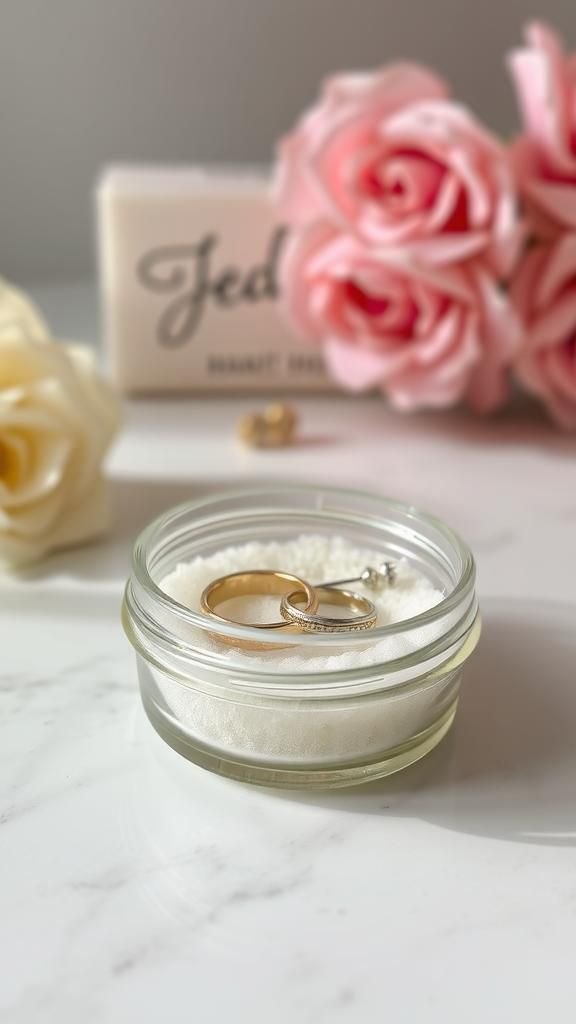
Turning a lid into a tiny jewelry dish creates a sweet little landing pad for rings and earrings. The cool metal rim and a felted base provide a quiet, protective cradle where small pieces rest at night.
I often notice the way a single ring sits threaded on the lid, catching morning light with a shy glint. The setup feels intimate, like a secret kept on the vanity, and it reduces the frantic searching that can happen late at night.
The simplicity of the lid keeps attention on the jewelry itself.
Steps
- Separate the mason jar lid and ring, and add a soft padding material such as felt to the lid center.
- Place the padded lid on a flat surface near the sink or on a vanity tray to catch rings and small items.
- Drop jewelry onto the lid at night to keep pieces together and prevent scratches.
- Clean the lid padding occasionally to remove dust or cosmetic residue.
- Replace the lid on the jar when transporting or storing small finds securely.
Over-the-door jar pocket rack idea
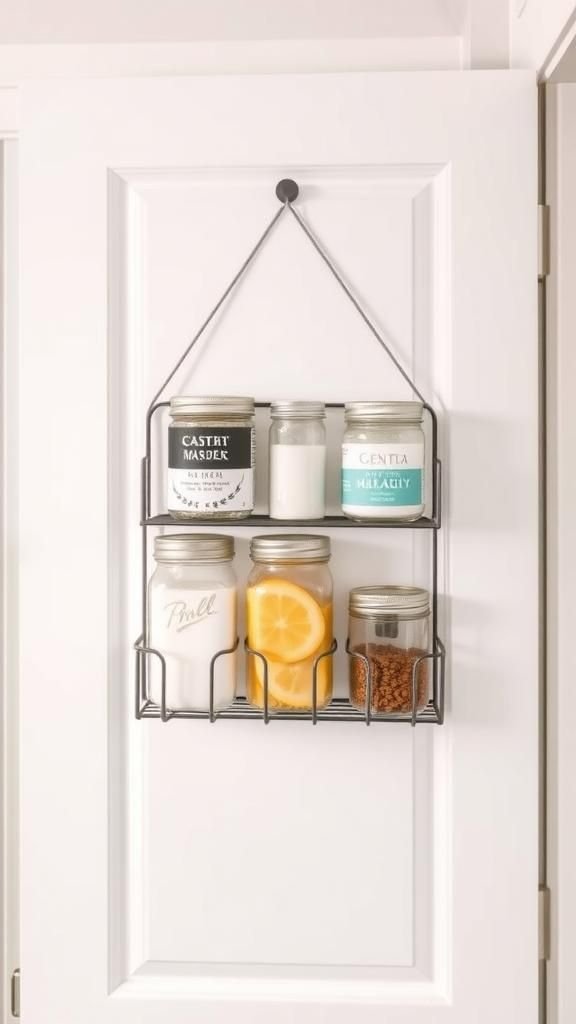
An over-the-door rack with jars slips a little library of toiletries into an overlooked vertical plane. The rhythm of jars peeking through openings feels tidy and unexpectedly decorative.
Opening and closing the door becomes a small reveal of labeled glass, and the jars swing lightly with each movement, making a delicate sound. The vertical display keeps counters free, and the sight of organized jars at eye level makes quick-access items feel considered.
The overall impression is of tidy abundance contained within a narrow, useful band of space.
Steps
- Choose an over-the-door rack designed to hold jars or attach secure holders to the rack to cradle mason jars.
- Place jars into the rack pockets or holders, filling them with frequently used items like razors or small bottles.
- Ensure the rack is balanced so the door closes smoothly without strain.
- Label each jar for quick identification and rotate contents as needs change.
- Check periodically that jars remain secure and adjust spacing for optimal fit.
Under-sink stacked mason jar system

Stacking jars under the sink turns a cramped dark space into a tidy inventory. Clear glass makes it easy to spot a missing item, and the muffled sound when jars nudge each other behind the cabinet door has a reassuring familiarity.
The cool, slightly damp air under the sink contrasts with the dry contents inside, and labels facing outward make late-night reaches less fumbled. Pulling a jar forward reveals rows of small, practical objects lined up like a little supply cupboard, and it makes refills feel straightforward rather than frantic.
Steps
- Clean and dry the under-sink area and measure shelf space to determine jar arrangement.
- Place mason jars in stable rows, grouping similar items together and labeling jar fronts for quick reference.
- Use stackable lids or low-profile shelving inserts to increase vertical capacity safely.
- Ensure jars sit away from plumbing lines and that lids are secure to prevent spills.
- Periodically check contents and wipe the area to manage any moisture buildup.
Window sill planter jars for small succulents

Succulents in mason jars on a sunny sill bring a living, breathing quality to the bathroom. The green pops against tile and glass, and the soil’s earthiness gives an organic contrast to the cool, reflective surfaces.
Morning sun warms the jars and tiny leaves, and water droplets on the rim catch the light in a pleasing way. The plants’ quiet, slow growth invites a kind of soft attention, and seeing them thrive in such a small container makes the space feel fresher and a bit more hopeful on damp mornings.
Steps
- Choose small succulents that tolerate humidity and pick jars with good drainage potential or add a drainage layer of gravel at the bottom.
- Add potting mix suited to succulents and nestle the plants gently into place without compacting the soil too tightly.
- Position the jars on a sunny windowsill where they receive bright, indirect light.
- Water sparingly and allow soil to dry between waterings to prevent root issues.
- Rotate jars occasionally for even light exposure and trim any spent leaves as needed.
Hair accessory jar for scrunchies and clips
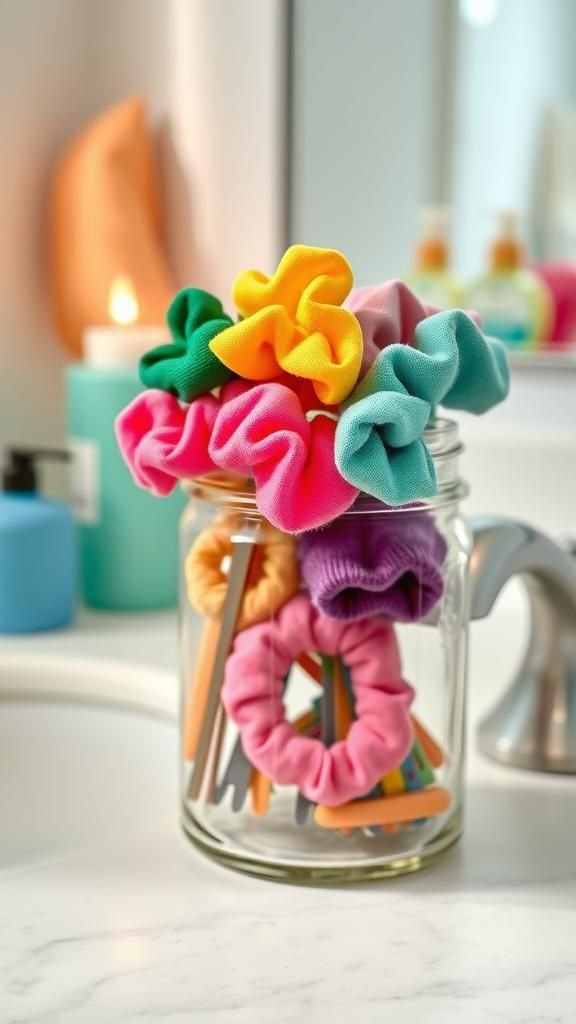
A jar filled with scrunchies and clips reads like a small celebration of textures and colors. Velvet, cotton, and metallic glints mingle inside clear glass, and reaching in feels like selecting a tiny accessory treat.
The soft bounce of a scrunchie against the glass is almost musical, and seeing the jumble contained neatly keeps the countertop calm. The jar becomes a visual promise that a lost clip is now likely to be found, and the whole idea turns a hurried hair moment into a slightly more pleasurable pause.
Steps
- Collect hair ties, scrunchies, and clips and sort them to ensure nothing sharp is mixed with delicate items.
- Place softer accessories around the jar interior to prevent metal clips from scratching surfaces.
- Fill the jar in layers to create an attractive mix of textures and colors visible through the glass.
- Keep the jar on a vanity or shelf for easy access during styling.
- Occasionally untangle and refresh the arrangement to keep the jar looking neat.
Child-friendly bath toy drying jar
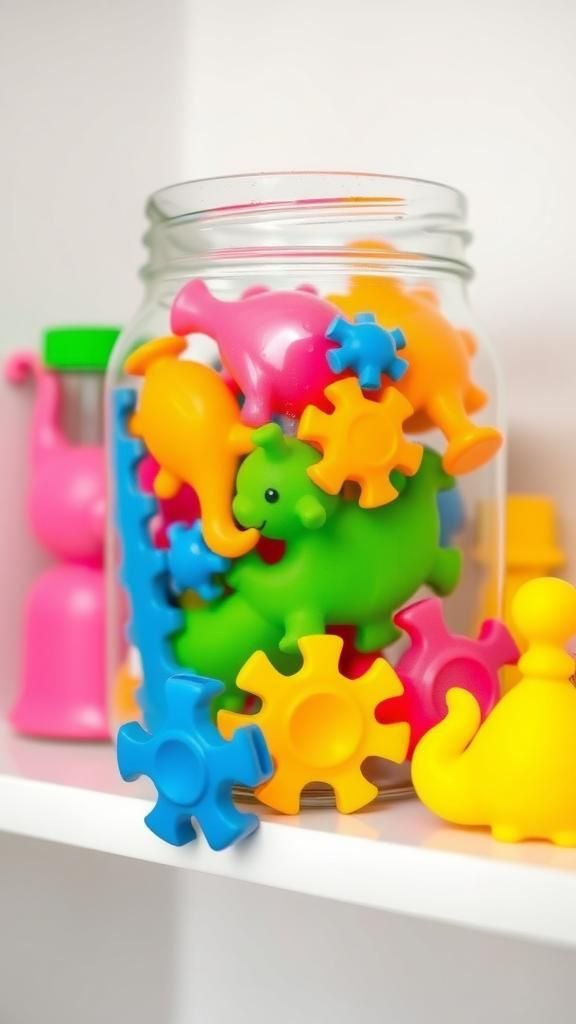
A jar used to collect and dry small bath toys becomes a tiny harbor where squeaky rubber companions await their next dip. Air moves between toys when lids are left ajar, and the memory of soap bubbles clinging to bright plastic lingers in the scent.
The jar’s translucence lets playful shapes glow under overhead light, and emptying water from toys becomes less of a chore when they have a designated, visible place. The setup keeps the tub edge tidier and turns toy care into a small ritual that children notice and enjoy.
Steps
- Choose a mason jar large enough to hold the bath toys upright without overcrowding while allowing air circulation.
- After each bath, squeeze excess water from toys and place them in the jar with the lid slightly open to aid drying.
- Empty the jar periodically to drain any collected water and wipe the interior dry.
- Clean toys and the jar routinely to prevent buildup and maintain freshness.
- Replace toys into the jar after play to keep the tub area tidy and organized.
Scented candle jar that doubles as storage
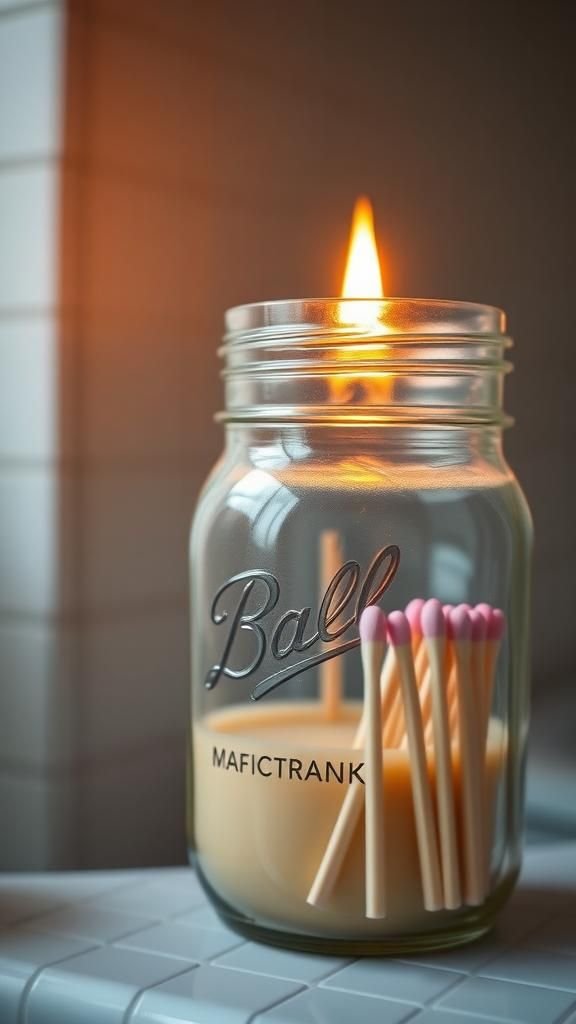
A candle in a mason jar can scent the room while the empty jar finds second life holding matches or small items. The warm glow through glass is instantly comforting, and once the candle burns down the jar’s memory is layered into its surface.
Flickering light refracts across the rim and makes the surrounding tiles feel softer. Once emptied, the jar’s interior still holds a faint trace of scent and soot that tells a small story.
Tucking the jar into a cluster of toiletries gives shelves a lived-in, cozy character that feels inviting.
Steps
- Burn a candle in a mason jar safely and allow it to cool before handling the jar.
- Remove any remaining wax carefully, using gentle heat or refrigeration to loosen hardened wax for removal.
- Wash the jar thoroughly to remove soot and residue and dry completely.
- Repurpose the jar to hold matches, cotton buds, or small grooming tools.
- Place the jar on a shelf away from direct moisture and heat to preserve its condition.
Table of Contents