Festive Christmas Tree Ornament Crafts always pull me back to a cozy living room where cocoa steamed beside a box of glitter and ribbon. My family swapped stories while making festive Christmas tree ornament crafts, and every year those handmade Christmas tree ornaments still return with a gentle sparkle and a memory attached.
Holiday ornament crafts feel like a timeline of winters past.
These Festive Christmas Tree Ornament Crafts bring charm to branches, gift wrap, and mantel displays. From rustic textures to gleaming finishes, Christmas tree ornaments become small storytellers.
I still smile at a felt star stitched by clumsy childhood hands, proof that festive ornament crafts carry warmth long after the lights dim.
Sunlit Dried Orange Slice Tree Charms

Amber citrus rings glow against evergreen needles, giving a warm farmhouse accent to the season. The gentle translucence suits daylight windows and candlelit corners, while frayed linen or jute twine lends a homespun touch.
Star anise, bay leaves, and cinnamon sticks add fragrance and texture, pairing beautifully with plaid ribbons and kraft tags. A natural palette of honey, russet, and evergreen feels nostalgic, though metallic thread or a gold bead brings a bright highlight.
These pieces nest nicely on a small wooden tray near a wreath, or top wrapped gifts for a fragrant reveal when the ribbon loosens.
Steps
- Slice oranges into thin rounds and pat dry to remove excess juice.
- Bake on low heat until fully dehydrated, flipping once for even drying.
- Thread twine through a small hole near the rind and knot for hanging.
- Add cinnamon sticks or star anise with a short tie for extra aroma.
Cinnamon Stick Stars With Rustic Winter Warmth

Cinnamon sticks arranged in star shapes bring cabin coziness and bakery fragrance to the tree. Natural wood tones pair well with tartan ribbon, kraft papers, and hand-lettered tags.
Little bells or wooden beads at the center introduce sparkle without overwhelming the simple structure. Twine or suede cord keeps the mood earthy, while a touch of metallic thread adds a gentle glint.
These ornaments tuck neatly into holiday centerpieces and garlands, and travel well as host gifts wrapped in tissue. The warm scent drifts across a room, setting a nostalgic scene among greenery and candlelight.
Steps
- Lay out five cinnamon sticks in a star configuration and hot glue the intersections.
- Wrap fine twine around each joint for added stability and texture.
- Glue a small bell or bead cluster at the center for an accent.
- Tie a hanging loop through the top point and trim any stray fibers.
Felt Gingerbread Cookie Keepsake Ornaments

Soft felt shapes echo bakery favorites without crumbs or frosting, charming kids and nostalgic adults alike. Tan, cocoa, and ginger hues meet white embroidery that mimics icing swirls, with bead sprinkles and tiny candy-like buttons for sparkle.
A thin ribbon loop complements the plush texture while keeping a playful mood. These pieces sit sweetly on kitchen wreaths and hot cocoa bar displays, and slip into stockings or treat bags as playful surprises.
The felt surface invites stitched details, from smiling faces to pretend frosting borders, creating a cookie jar effect among twinkling branches.
Steps
- Trace gingerbread shapes on felt and cut two layers for each ornament.
- Stitch facial features and icing-like swirls with white embroidery floss.
- Add bead buttons and sew both layers together, leaving a small opening.
- Stuff lightly with fiberfill, close the seam, and sew in a ribbon hanger.
Keepsake Salt Dough Handprint Holiday Medallions
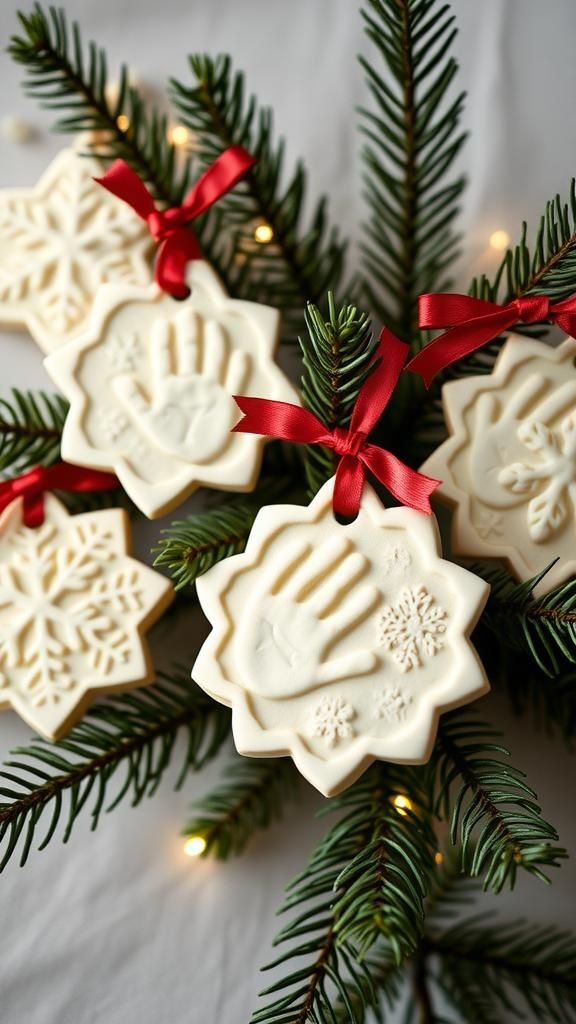
Simple pantry ingredients form smooth medallions that capture tiny hands, paw prints, or meaningful initials. Off-white dough complements neutral linens, greenery, and minimal Nordic décor, while mica powder or glitter adds festive shimmer.
A satin or velvet ribbon elevates the keepsake quality for gifting to grandparents or new parents. The matte surface pairs beautifully with stamped dates, leafy motifs, or embossed snowflakes for subtle texture.
A cluster of medallions on a narrow garland turns a hallway into a memory lane, and a single ornament on a stand feels like a tiny heirloom spotlight.
Steps
- Mix flour, salt, and water into a pliable dough and roll to desired thickness.
- Cut circles, press handprints or stamps, and add a hanging hole with a straw.
- Bake on low heat until firm and fully dry, then cool completely.
- Brush on acrylic color or metallic accents and thread a ribbon through the hole.
Snow-Tipped Pinecone Woodland Ornaments
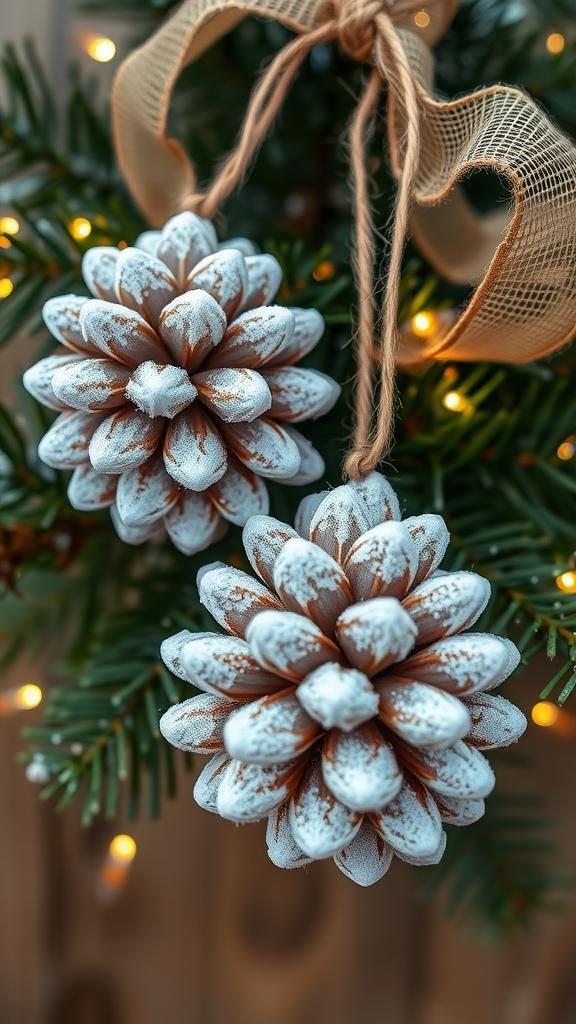
Pinecones bring forest texture to branches, their scales catching faux snow and glitter for wintry sparkle. Natural tones sit well with burlap, kraft paper, and unvarnished wood, while satin ribbon lifts the look into a dressier mood.
Small charms like brass acorns or tiny bells carry a gentle jingle and a vintage feel. A bowl filled with these ornaments becomes a woodland centerpiece, and a few tucked onto gift wrap offer a surprise that hints at the outdoors.
Frosty edges against glossy baubles create a pleasing mix of matte and shine within the tree.
Steps
- Clean and dry pinecones thoroughly to remove debris.
- Brush white craft paint onto tips and sprinkle fine glitter while tacky.
- Wrap a ribbon or twine around the stem end and knot securely.
- Add a small bell or charm near the knot for a finishing touch.
Crystal Beaded Snowflake Wire Ornaments

Clear and iridescent beads strung on thin wire form icy snowflakes that catch every twinkle of light. The look pairs with glass baubles, mercury glass accents, and mirrored garland for a silvery winter scheme.
Pale blue or champagne beads shift the palette for coastal or vintage themes, while frosted seed beads lend a soft, snowy blur. These snowflakes store flat and look elegant tied onto napkins for wintry place settings.
A cluster near a window brings prismatic sparkle during daytime, turning sunlight into tiny starbursts across the room.
Steps
- Cut equal lengths of thin wire and twist into a six-armed base.
- Thread beads along each arm, creating balanced patterns on opposite sides.
- Secure bead ends by looping the wire tip back through the last bead.
- Form a small loop at the top and add monofilament or ribbon for hanging.
Paper Quilling Snowflakes With Elegant Filigree

Coiled paper strips gather into delicate filigree, bringing lace-like geometry to the tree. White and pale blue shades feel icy and refined, while gold or rose accents introduce warmth.
Lightweight construction suits slender branches, and a dusting of fine glitter transforms the edges into frosty lace. Framed on cardstock, a single snowflake becomes wall art beside a wreath, and a boxed set makes a thoughtful hostess gift.
The intricate loops and teardrops invite close viewing, rewarding the eye with graceful symmetry amid glowing lights.
Steps
- Cut thin paper strips and wind them tightly using a quilling tool.
- Release coils slightly, glue ends, and pinch into teardrops or marquise shapes.
- Arrange shapes into snowflake arms and adhere to a central base.
- Add a hanging loop with thread or monofilament and let dry completely.
Mini Embroidered Hoop Heirloom Ornaments
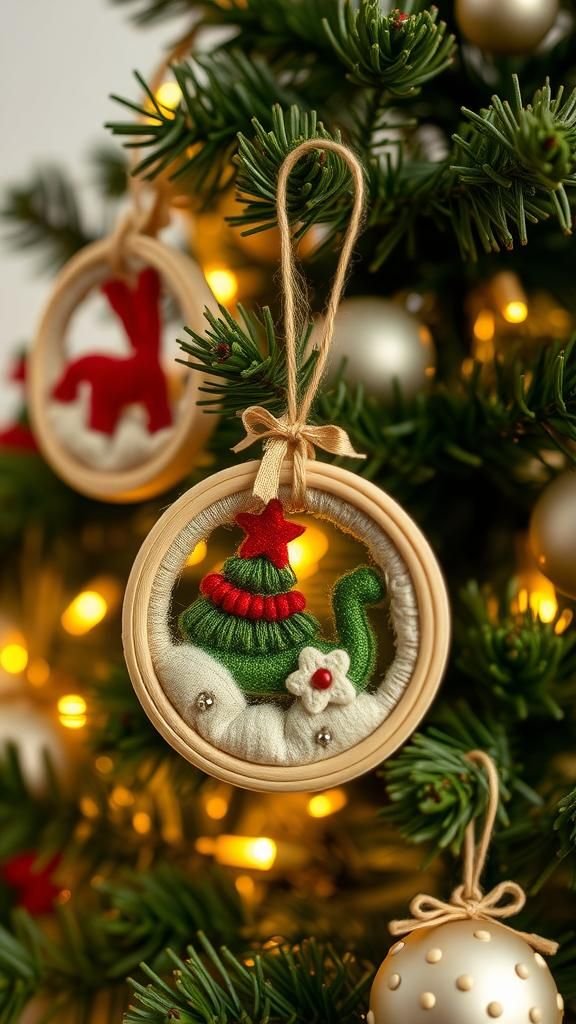
Tiny wooden embroidery hoops frame winter scenes, monograms, or stitched florals, bringing cottage charm to branches. Linen, velvet, or gingham fabrics create different moods, from refined to homespun.
Metallic floss accents shimmer under lights, while seed beads add jeweled notes. A slender velvet ribbon makes a graceful hanger, turning each hoop into a small portrait for the tree.
These pieces display nicely on a gallery wall during the off-season, and a monogrammed set becomes a heartfelt gift for a newlywed couple or a growing family.
Steps
- Center fabric in a mini hoop and tighten the screw.
- Sketch a simple motif and embroider with floss, adding occasional beads.
- Trim excess fabric at the back and secure with felt to finish.
- Tie a ribbon around the hoop screw to create a hanging loop.
Tiny Knit Sweater Ornaments With Nordic Flair

Pocket-sized sweaters bring après-ski charm, especially in heathered yarns and fair isle colorwork. Cream, cranberry, and forest green echo alpine lodges, while a single stripe or snowflake motif keeps the scale balanced.
Wooden mini hangers or twig perches add whimsy and texture. These sweaters look adorable near hot cocoa stations and are delightful tucked into Advent calendars.
A coordinated set in gradient hues creates a cozy theme across the tree, while a personalized initial tag turns each one into a winter wardrobe for branches.
Steps
- Knit two small sweater panels with simple colorwork and a matching pair of sleeves.
- Seam shoulders and sides, then attach sleeves along the arm openings.
- Pick up stitches for a ribbed collar and finish with a tidy bind-off.
- Steam block lightly, weave in ends, and hang from a tiny hanger or twig.
Mason Jar Lid Photo Frame Ornaments
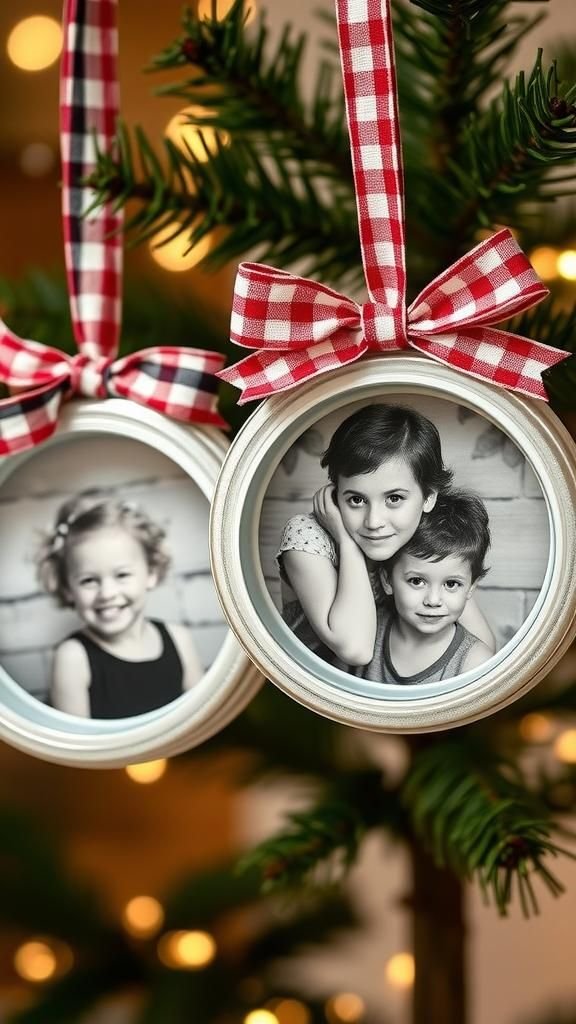
Metal jar lids transform into charming frames, keeping favorite photos near the glow of the tree. A rim lined with gingham or velvet ribbon softens the industrial edge, while glitter paper backings add sparkle.
Black-and-white portraits feel timeless against evergreen needles, and a hand-lettered year on the rim turns the piece into a dated keepsake. These ornaments double as gift toppers that reveal a memory as the wrap comes off.
A cluster arranged on a shelf functions as a compact gallery for small spaces.
Steps
- Trace and cut a photo to fit inside the jar lid’s inner circle.
- Adhere the photo to a glitter or cardstock backing for support.
- Wrap ribbon around the outer rim and secure the ends with glue.
- Punch or drill a small hole in the rim and tie a hanging loop.
Boho Macramé Star Cord Ornaments
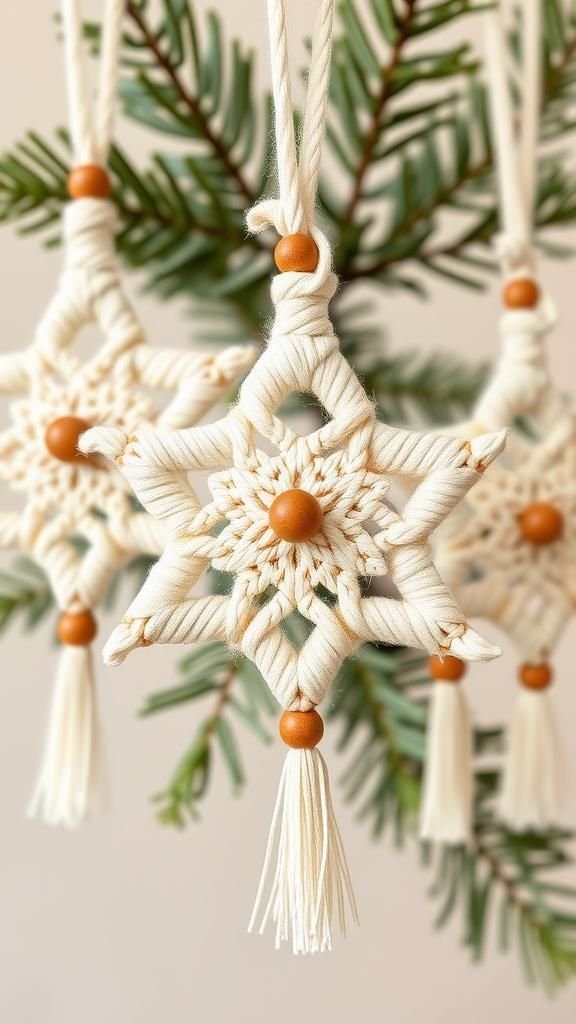
Soft cotton cord knotted into star shapes brings airy texture and a relaxed boho accent to greenery. Natural, blush, or sage cords pair nicely with wood beads and dried botanicals for an earthy palette.
A brushed fringe catches light and adds movement, creating a soft halo around the star points. These ornaments complement wicker baskets, ceramic vases, and pale linens in a neutral holiday scene.
A set on a branch in a vase offers a minimal tabletop forest that stays lovely from winter through early spring.
Steps
- Cut equal lengths of cotton cord and secure them to a small metal ring.
- Create square knots to form five arms radiating from the ring.
- Shape each arm into a point and tie off securely at the tips.
- Comb out fringe ends and trim evenly, then add a hanging loop.
Air-Dry Clay Stars With Metallic Gleam

Smooth clay stars offer a refined canvas for texture stamps, imprints, and gilded finishes. White clay delivers a porcelain look that pairs with glass baubles and mercury glass, while charcoal or navy gives a moody, modern contrast.
Metallic leaf or mica powder introduces a soft gleam that plays beautifully with candlelight. Monofilament hangers keep the focus on clean shapes, and a tiny initial on the back turns each star into a thoughtful keepsake.
A scattering across a wreath or mantel garland adds sculptural calm to holiday scenes.
Steps
- Roll out air-dry clay and cut star shapes with a cookie cutter.
- Press textures or stamps into the surface and poke a hanging hole.
- Allow to dry fully on a flat surface, flipping midway for even drying.
- Apply metallic leaf or pearlescent accents and thread a hanger.
Hand-Lettered Wood Slice Heritage Ornaments
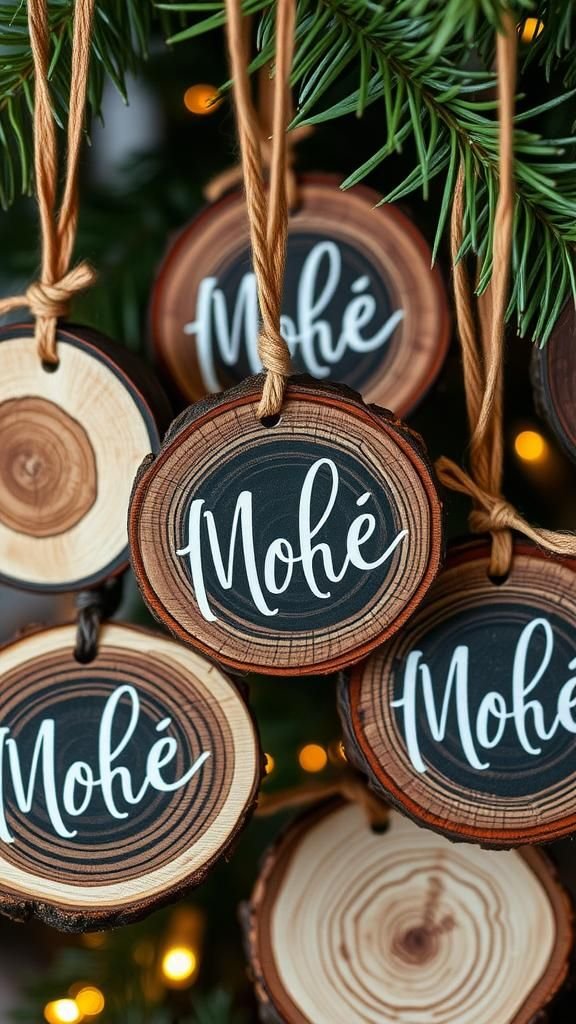
Natural wood slices carry the charm of tree rings and bark, offering a rustic stage for names, dates, and short phrases. A matte black background with crisp white lettering echoes chalkboard style, while natural wood topped with metallic script feels refined.
Leather cord or jute loops emphasize the organic vibe, and tiny evergreen sprigs at the knot introduce fragrance. These ornaments line up beautifully on a mantel garland, and a boxed collection with family surnames becomes a heartfelt holiday present that returns year after year.
Steps
- Drill a small hole near the top of each wood slice and sand lightly.
- Apply a base coat or leave natural, depending on the desired look.
- Hand-letter names or phrases with a paint pen and let dry.
- Thread leather or jute cord through the hole and tie a hanger.
Scrabble Tile Name Banner Ornaments

Wooden letter tiles lined across ribbon or twine spell names, nicknames, or festive words, turning branches into a playful marquee. Natural tile grain pairs with plaid fabrics and gingham bows, while a few red beads stand in for holly berries.
Short words dangle vertically for narrow spots, and longer names drape in gentle arcs across wider branches. These small banners slide easily into stockings and travel safely in envelopes as cheerful mail.
The crisp typography adds graphic contrast among round baubles and glass drops.
Steps
- Lay out letter tiles to form the desired name or word.
- Glue the backs of the tiles onto a ribbon or twine strip.
- Add mini bows or bead clusters at the ends for accents.
- Tie a loop at the top or ends for hanging on the tree.
Layered Ribbon Evergreen Silhouette Ornaments
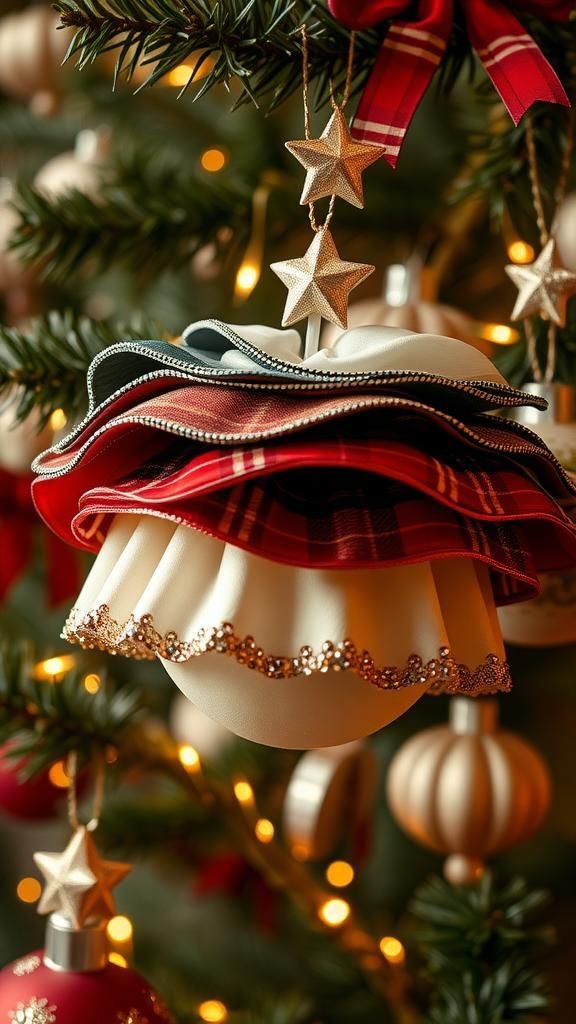
Ribbons stacked in graduating lengths create a stylized evergreen silhouette on a narrow backing, blending texture and color in a neat vertical line. Velvet, satin, and grosgrain combine for a tactile mix, while tartan brings nostalgia and metallic edges add sparkle.
A slender wooden skewer or cinnamon stick becomes a trunk, and a tiny star at the top nods to classic themes. These ornaments tuck neatly into tight spaces on the tree and pair well with candy canes, bells, and felt shapes in a cheerful mixed display.
Steps
- Cut a felt backing strip and a series of ribbon lengths from widest to narrowest.
- Glue ribbons horizontally onto the backing, shortest at the top, longest at the bottom.
- Attach a small stick as the trunk and a star embellishment at the top.
- Add a loop of thread or ribbon behind the top for hanging.
Cookie Cutter Shadowbox Tin Ornaments

Metal cookie cutters transform into tiny shadowboxes with paper backdrops, glittery snow, and miniature scenes. Silver tins feel classic, while copper or enamel-coated shapes bring color.
A snippet of sheet music or book text sets a nostalgic tone behind small trees, deer, or stars. These ornaments look enchanting clustered near twinkle lights, where reflective edges amplify the glow.
A ribbon tied through a drilled hole completes the piece, and a set in a vintage tin makes a charming gift that hints at holiday baking and storybook nights.
Steps
- Trace the cookie cutter onto cardstock and cut a matching backdrop.
- Glue the paper inside the cutter, then add a small figurine or tree.
- Sprinkle faux snow or glitter along the base and secure with clear glue.
- Drill or punch a hanging hole and tie a ribbon loop through it.
Clear Bauble Snow Globe Story Ornaments

Transparent fillable baubles become tiny snow globes dotted with flurries, mini trees, and sprinkled sparkle. The glassy surface pairs well with mirrored garlands and crystal beads, creating a wintry glow.
A ribbon collar at the cap adds color, while a simple monofilament hanger nearly disappears. These ornaments catch and scatter tree lights, turning a branch into a miniature winter scene.
They look magical gathered in a glass bowl beside candles, and a gift box lined with tissue keeps them ready for a snowy reveal.
Steps
- Open a fillable clear ornament and add faux snow to the bottom.
- Drop in a miniature tree or figurine and adjust the placement.
- Replace the top securely and wipe away any stray static clings.
- Tie a ribbon around the cap and add a hanger for the branch.
Vintage Sheet Music Star Ornaments

Aged sheet music transforms into star shapes with a timeworn patina. Sepia notes and soft edges suit antique ornaments, mercury glass finials, and velvet bows.
A dusting of mica gives a gentle shimmer, while a stamped date on the back records the year. These stars rest beautifully on a piano, tucked among garlands and candlesticks, or tied to choir gifts for a melodic nod.
Neutral tones fit both maximal and restrained trees, adding a lyrical moment to branches without stealing the spotlight.
Steps
- Cut five identical strips of vintage-look sheet music.
- Fold each strip into a pointed unit suitable for star assembly.
- Arrange and interlock the units to complete a five-point star.
- Seal edges lightly with decoupage medium and add a hanger.
Coastal Seashell And Twine Keepsake Ornaments

Beachcombed shells find a new season alongside evergreen, blending driftwood tones with winter greens. Pearly surfaces reflect tiny lights, while jute twine and sea glass beads evoke shoreline walks.
White coral fragments and sand-dusted finishes keep the palette breezy and calm. These ornaments feel at home on a coastal-themed tree or nestled in a bowl of shells and pine sprigs on a console table.
A handwritten tag naming the beach adds narrative charm, turning each piece into a postcard from warmer days.
Steps
- Clean and dry selected seashells, removing any residue.
- Drill a tiny hole near the top of each shell if needed.
- Thread twine through the hole and knot securely for hanging.
- Add sea glass beads or a small charm above the shell.
Quilty Fabric Yo-Yo Bloom Ornaments
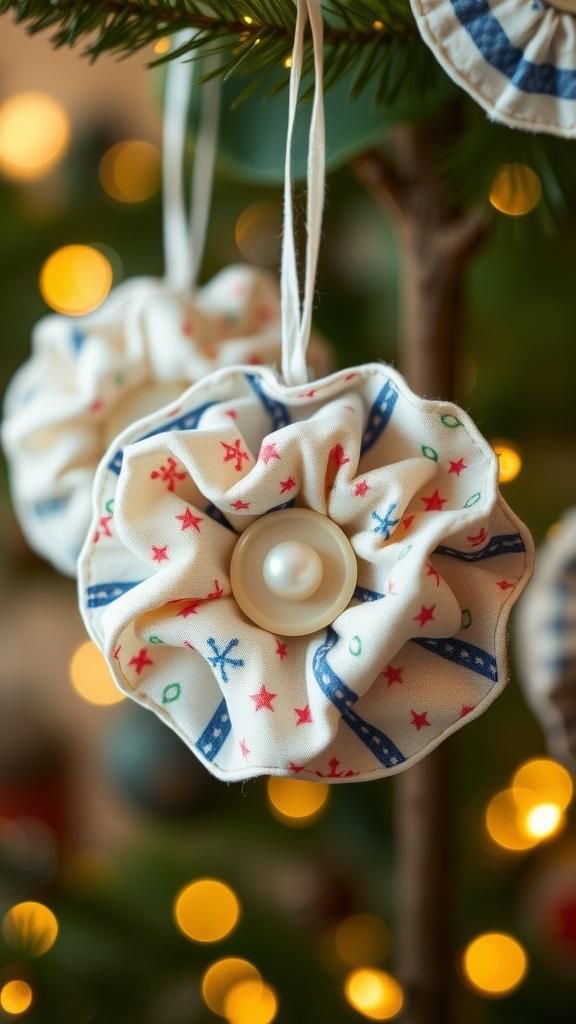
Puckered fabric circles layer into soft blooms with a sweet vintage feel. Calico prints and tiny florals echo heirloom quilts, while velvet centers or pearl buttons introduce gentle shine.
A palette of cranberry, pine, and cream suits classic trees, and pastel stacks enhance a cottage holiday scheme. Lightweight construction works well on slender branches, and a small cluster in a shadowbox frame brings color to a sewing nook.
These ornaments slip easily into envelopes for long-distance gifting, bringing a touch of handmade comfort across miles.
Steps
- Cut fabric circles and stitch a running thread near the edge.
- Pull threads to gather into yo-yos and knot securely.
- Layer two or three yo-yos and sew a button or bead at the center.
- Sew or glue a ribbon loop to the back for hanging.
Mini Button Wreath Ornaments With Cheerful Color
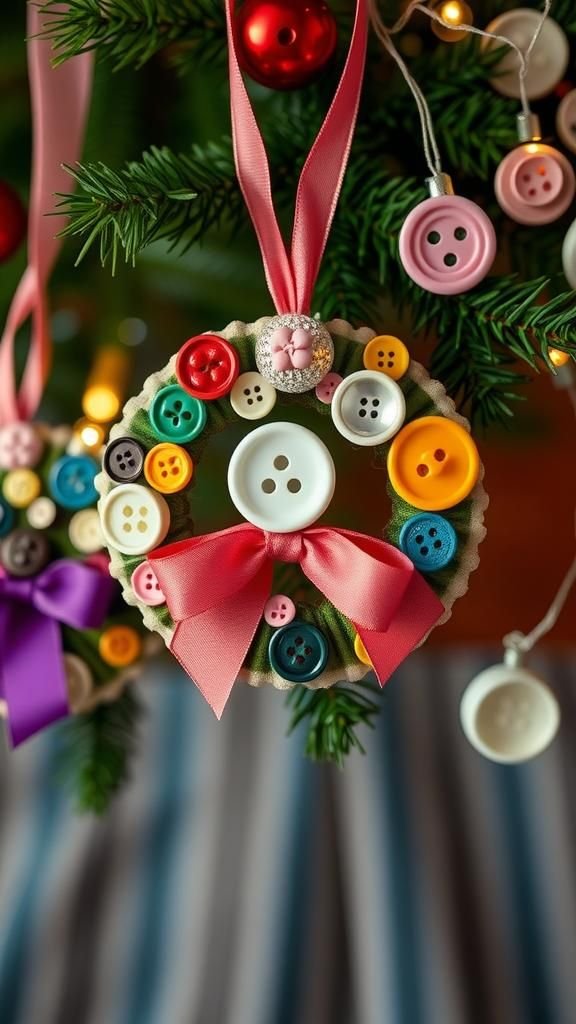
A ring of buttons creates a playful wreath that pops among greenery. Glossy reds and greens feel classic, while pastel candies or monochrome white bring a modern twist.
Tiny bows at the top add a sweet finish, and a hint of glitter thread woven between buttons introduces shimmer. These ornaments brighten small trees and garlands, and they rest neatly on gift wrap, echoing the circular seal of a wax stamp.
A tin filled with extra buttons invites future additions, evolving the collection year after year.
Steps
- Form a small wire ring sized for a miniature wreath.
- Thread buttons around the ring, alternating sizes and colors.
- Twist the wire ends to close and adjust the button spacing.
- Tie a small bow at the top and attach a hanging loop.
Table of Contents