I remember the first time I picked up a length of cotton cord and tried a basic knot; the room felt calmer and there was a little thrill when a pattern began to emerge. Working through a few Beginner Macrame Wall Hanging Ideas helped me learn rhythm with my hands and notice how texture and shadow change a plain wall.
These Beginner Macrame Wall Hanging Ideas are gentle projects that welcome small mistakes and pleasant surprises.
Each idea felt like a quiet weekend experiment, with soft fibers, tactile knots, and a rewarding sense of finishing a cozy piece for home.
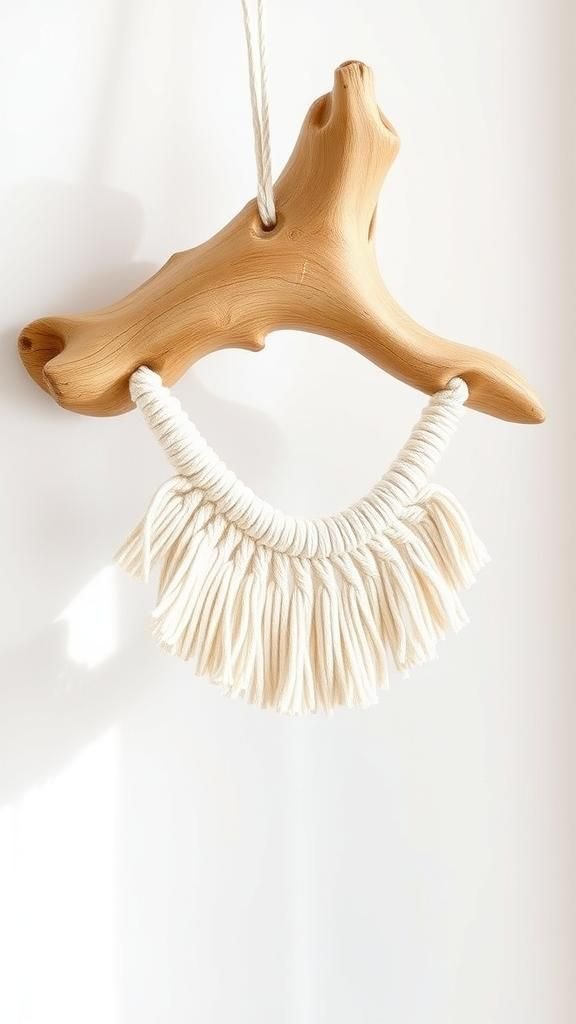
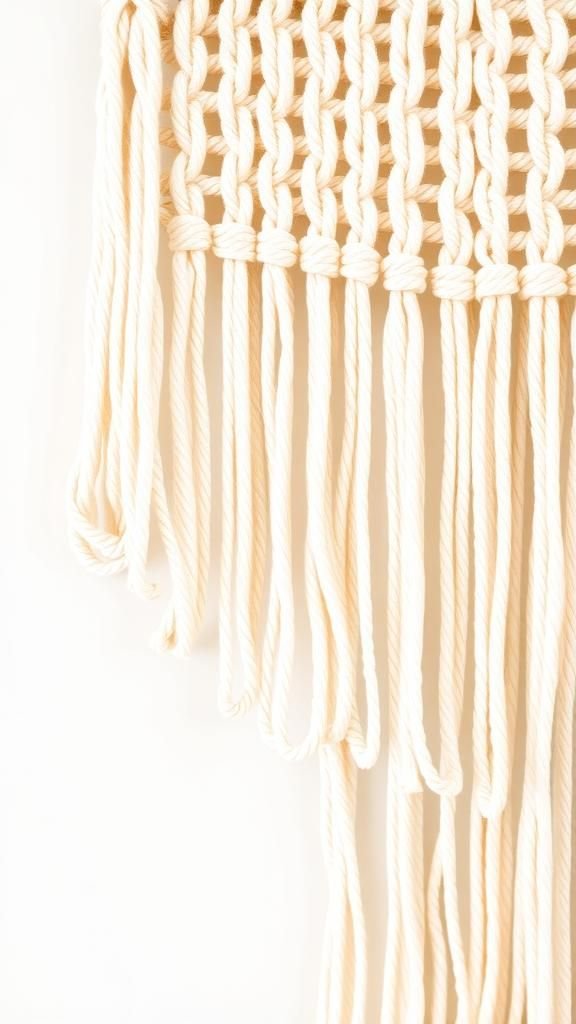
Soft fringe on a simple wooden dowel

This piece leans into comfort with long, feathered fringes that sway in a light breeze. The cotton cord has a matte softness that invites fingers to trace the lines, and the wooden dowel offers an earthy contrast.
I liked the way shadows played along the fringe at sunset, making the wall feel warmer. The overall mood is relaxed and a touch nostalgic, like a well-loved sweater draped over a chair.
It feels welcoming without fuss, a quiet texture that brightens a small corner.
Steps
- Choose a wooden dowel and cut cotton cord lengths to the desired hanging length.
- Fold cords in half and attach to the dowel using lark’s head knots across the width.
- Create a pattern with alternating square knots to form a top band.
- Trim the bottom lines into a gentle V or straight edge for the fringe.
- Hang the dowel and gently comb or trim fringe to refine the shape.
Chevron rows with subtle ombre dye effect
![]()
The chevron pattern has a satisfying regularity that feels comforting to the eye. Each zigzag band gently leans into the next, and the faint ombre wash adds a soft watercolor feel where darker color pools near the tips.
I appreciated how the dyed ends looked like they’d sunk into the fibers, giving depth without overpowering the natural cord. This hanging reads like a muted painting, with the macrame knots creating a low-relief texture.
It made my living space feel calmer, as if a small landscape had settled on the wall.
Steps
- Prepare cords and dye the lower sections for a gentle ombre fade, then let dry fully.
- Attach cords to a sturdy dowel and arrange in pairs for the chevron layout.
- Form alternating diagonal half hitch rows to build the zigzag pattern.
- Add a finishing row of square knots or a fringe to balance the piece.
- Trim fringe evenly and hang on a simple wall hook.
Miniature half-moon macrame with driftwood
This small half-moon feels like a little coastal souvenir pinned to the wall. The semicircle of cords fans out from a piece of driftwood with smooth worn grain and sun-bleached tones.
I liked how the contrast between the rigid curve of the wood and the fluid softness of the fibers created a playful tension. Sitting above a bedside table, it brought a seaside hint without loud colors.
The texture invites casual touching, and the compact size makes it an easy accent for a gallery-style arrangement.
Steps
- Find a short piece of driftwood and prepare short lengths of cord folded in half.
- Attach cords to the wood using lark’s head knots across the curved edge.
- Trim cords into a rounded half-moon silhouette and comb fibers for softness.
- Add a few decorative knots near the top for visual interest.
- Hang with a thin cord loop tied at the driftwood ends.
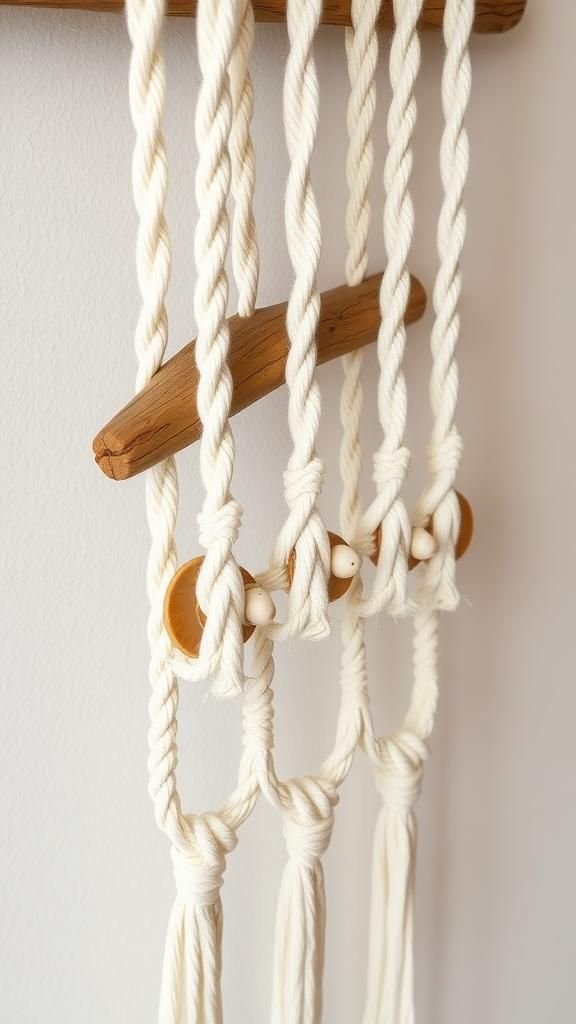
Boho tassel cluster with wooden bead accents

A cluster of fluffy tassels feels playful and tactile, each tassel bouncing slightly when the air moves. Warm wooden beads threaded through add a handcrafted note and a pleasant contrast against the soft fibers.
I enjoyed how the beads gave the piece a rhythm, almost like punctuation between the tassels. Hanging near a sunny window, the textures catch light differently over the day, with the beads picking up tiny gleams.
The overall effect is lively yet cozy, bringing a handcrafted charm to an otherwise plain wall.
Steps
- Cut multiple cord bundles for tassels and form each with a tight binding at the top.
- Slip wooden beads onto selected hanging cords for accent points.
- Attach tassels and cords to a short wooden dowel using secure knots.
- Arrange tassel lengths to create a balanced cluster and trim any uneven ends.
- Hang from a single cord loop and adjust bead positions for visual rhythm.
Minimal geometric lines for a modern wall
This design keeps things spare and clean, with straight cord lines meeting at crisp angles to form a geometric silhouette. The cotton cords sit flat against the wall, and the simple repetition of angles creates calm visual order.
I liked how the piece could read as both art and a bit of architecture, a subtle statement without fuss. The tactile knots are understated, lending texture without clutter.
Placed above a narrow console, it made the space feel more intentional, like a carefully chosen sketch pinned to the wall.
Steps
- Prepare equal-length cords and anchor them to a thin wooden dowel in parallel groups.
- Create diagonal clove hitch or half hitch rows to build the geometric angles.
- Mirror the pattern on the opposite side for symmetry and a central meeting point.
- Finish with a compact fringe or tidy folded ends for a sharp look.
- Trim ends evenly and hang at eye level for modern impact.
Textured knot cluster like a cozy pillow
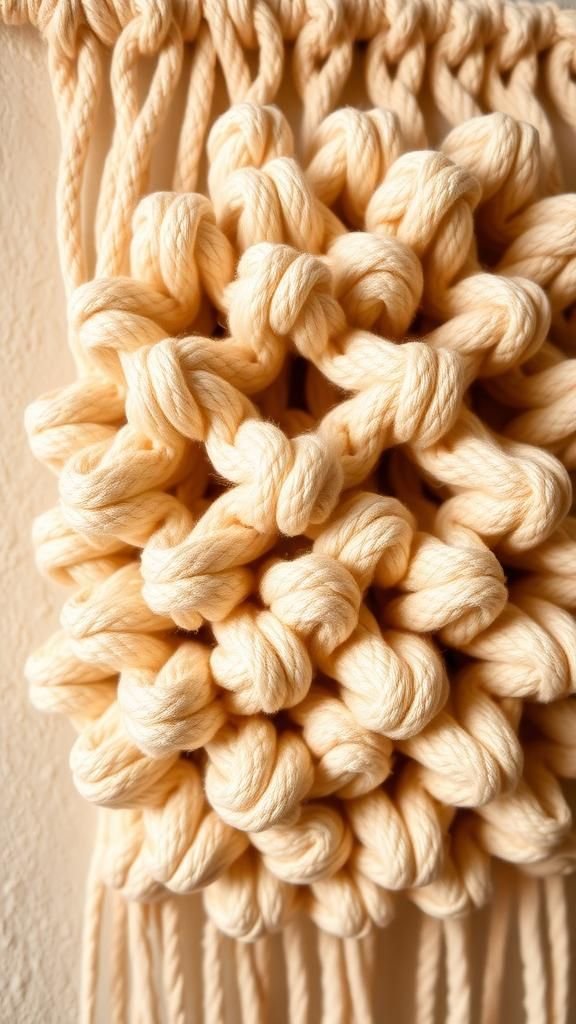
This hanging feels plush, with dense clusters of knots that create a tactile, cushion-like surface. The repeating knot groups catch light and shadow, producing a quilted look that invites leaning in for a closer look.
I appreciated the comforting density; it read almost like fabric turned vertical. The effect is warm and snug, suitable for a reading nook or entryway where a bit of soft texture brightens the space.
It felt like a hug you could hang on the wall, with lots of tiny ridges to trace with your fingertips.
Steps
- Gather medium-thickness cotton cord and cut many short equal lengths.
- Attach cords densely to a wide dowel and form repeated square knot clusters across the width.
- Compress clusters together to create a padded, textured surface.
- Trim lower ends into a soft, rounded silhouette for a pillow-like finish.
- Secure hanging cord to both ends of the dowel and display at eye level.
Asymmetrical layered pieces for playful balance
I enjoy how asymmetry brings a sense of movement; this hanging has longer strands on one side that taper into shorter ones, creating an off-kilter rhythm. Layers overlap in a casual way, and the uneven silhouette reads as deliberate and relaxed rather than unfinished.
The mix of tight knots and loose fringe makes the piece lively, with a slight bohemian edge. It felt especially good above a plant stand, where the irregular lines echoed the organic shapes of leaves.
There’s a friendly looseness to it that feels personal and improvised.
Steps
- Attach cords of differing lengths to a mid-length wooden dowel for an off-center layout.
- Create several small knot groups on one side and leave the other side more open.
- Add a few diagonal knot rows to bridge layers and create movement.
- Trim the lower edge into an angled silhouette to emphasize asymmetry.
- Hang the dowel slightly off-center to enhance the relaxed balance.
Rounded mandala-inspired small wall piece
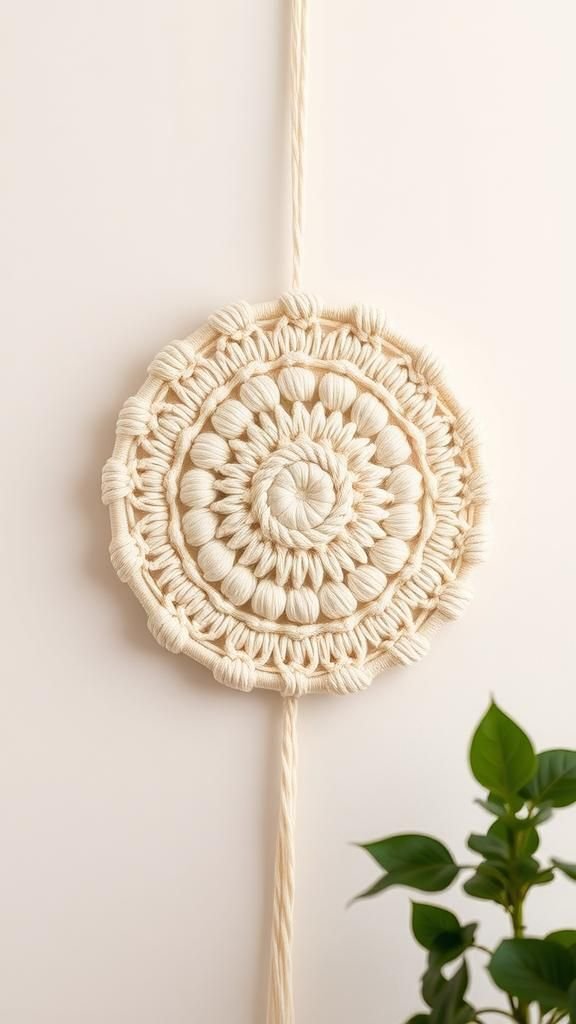
This compact round piece has a meditative quality, like a tiny textile galaxy. Concentric bands of knots create a gentle ripple, while small looped details add a filigree effect.
I liked how the center seemed to draw the eye inward, offering a small pause in a busy room. The tactile concentric patterns change subtly with the angle of light, making the piece feel alive.
It fit beautifully above a nightstand, providing a quiet focal point that felt handcrafted and intimate, with every tiny loop carrying a hint of patience.
Steps
- Mount a small metal or wooden ring and prepare shorter cord lengths folded in halves.
- Attach cords around the ring and form concentric knot rows radiating from the center.
- Introduce small decorative loops or picots between rows for lace-like texture.
- Finish with a tidy fringe or trimmed loops to define the outer edge.
- Hang on a small nail or picture hook at eye level.
Driftwood and shell accents for seaside charm
Combining driftwood and shells brings a light coastal feeling that is quietly nostalgic. The shells add tiny shiny moments that catch sunbeams, while the driftwood offers weathered texture and an organic anchor.
I liked how the shells felt like little surprises tucked among the knots, each with its own smooth curve. The overall palette stayed neutral but lively, with pale ivory cords against the deeper grain of the wood.
Hung in a bathroom or hallway, it suggested a slow walk on the shore without being obvious or kitschy.
Steps
- Select a piece of driftwood and small natural shells with holes or wire them for attachment.
- Attach cords to the driftwood and weave a simple pattern leaving places to thread shells.
- Thread shells onto chosen cords or tie them into knot clusters for secure placement.
- Balance the shell placement visually along the length of the driftwood.
- Hang using a thin cord loop and adjust shell spacing for even visual weight.
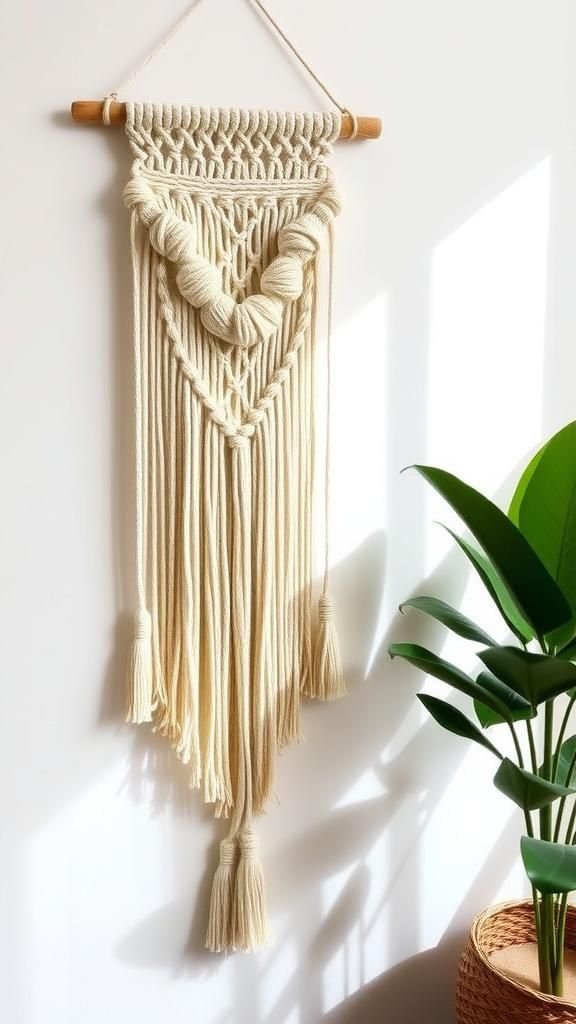
Monochrome layers with braided center band
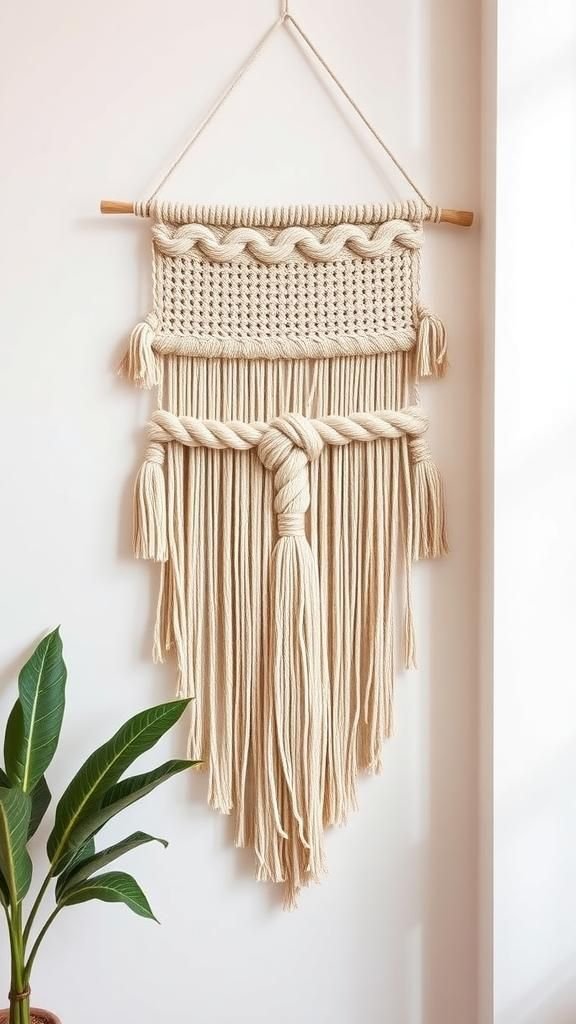
A single color can feel very sophisticated when layered thoughtfully. This design uses tones of one shade, with a prominent braided band across the center that anchors softer fringes above and below.
The braid has a tactile heft that contrasts with the airier surrounding cords. I enjoyed the quiet unity of the palette; it felt like a small textile study in tone and form.
The piece read like a calm sculpture on the wall, unobtrusive yet refined. It worked well with muted interiors where texture matters more than color.
Steps
- Select cords in the same color and cut lengths for layered rows and a central braid.
- Attach cords to a wide dowel and reserve a central section for the braided band.
- Form a thick three-strand or multi-strand braid in the center and secure the ends.
- Arrange the surrounding cords into looser knot rows and a soft fringe.
- Trim fringe and ensure the braid sits centered before hanging.
Curved scallop pattern with gentle waves

Scalloped rows form a delightful rhythm that feels almost musical. Each curved wave of knots flows into the next, producing a gentle repetition that is soothing to the eye.
The layered scallops create subtle pockets of shadow, enhancing depth and giving the piece a soft three-dimensional quality. I found this pattern relaxing to look at, like watching small waves on a calm pond.
Placed above a sofa, it added movement without noise, and the tactile curves encouraged a curious fingertip exploration when passing by.
Steps
- Cut multiple cord groups and attach them evenly across a dowel.
- Form curved scallop rows using series of half hitch or clove hitch knots.
- Layer additional scallop rows beneath to build depth and shadow.
- Trim the bottom edge into a rounded, scalloped silhouette.
- Mount the dowel with simple hardware and adjust scallop depth as desired.
Macrame with wooden ring centerpiece focal
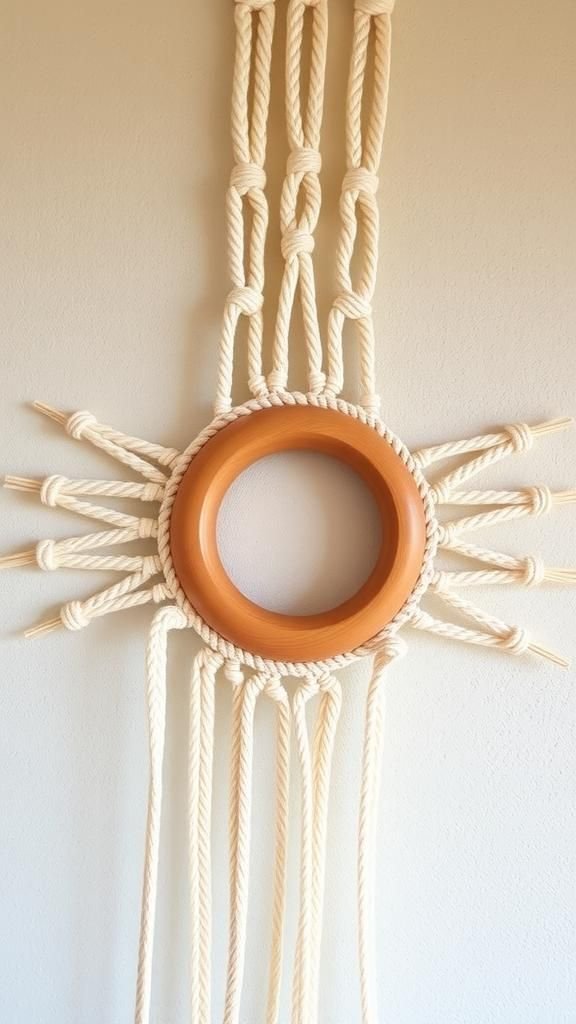
A wooden ring in the center creates a strong focal point that feels grounding. The ring’s smooth curve contrasts nicely with textured knot bands radiating outward, and it gives the design a geometric heart.
I liked how eyes were naturally drawn to the ring, then encouraged to follow the surrounding knotted shapes. The combination felt balanced and intentional, with enough detail to be interesting but not overwhelming.
It added a handcrafted, slightly architectural note to a hallway or above a desk, where the centered form responded well to linear spaces.
Steps
- Choose a polished wooden ring and prepare cords folded in halves for attachment.
- Attach cords around the ring using lark’s head knots to form the central anchor.
- Build outward knot rows from the ring using alternating square knots for texture.
- Add a lower fringe or shaped edge to complete the composition.
- Secure a hanging loop at the ring top and display centered on the wall.
Leather cord accents for rustic contrast

Introducing thin leather strips adds a warm, slightly rugged edge to the soft cotton. The leather slips through the knots with a smooth sheen and dark color that punctuates the neutral cords.
I appreciated how the mix of materials felt handcrafted and a little adventurous, as if the piece had a story. The leather brought a tactile contrast that was pleasant under fingertips and added visual weight, especially when paired with a darker wooden dowel.
It read as slightly masculine without being heavy, a balanced mix of soft and structured elements.
Steps
- Gather cotton cord and a few lengths of thin leather cord in complementary tones.
- Attach cotton cords to a dowel and weave leather cords intermittently through knot rows.
- Secure leather ends neatly among knots to prevent slipping.
- Form a balanced lower fringe and trim any excess leather for a tidy finish.
- Hang the piece to let leather accents add contrast against the cotton.
Tassel garland strung in a layered arc

A layered arc of tassels reads like a cheerful textile garland. Each tassel moves independently, catching tiny drafts and creating a gentle kinetic quality.
The layered semicircles produce a pleasing rhythm of shadow and light, and the compact scale makes it friendly for small nooks. I enjoyed how it brightened a plain shelf without demanding attention, adding a handmade cheerfulness.
The textures felt playful and lightweight, like fabric confetti that settled into an orderly, soft curve on the wall.
Steps
- Make multiple matching tassels and prepare two or three cords for the arc supports.
- Tie tassels at regular intervals along each support cord to form layered semicircles.
- Secure the ends of each support cord to a small wooden dowel or brass rod.
- Adjust spacing so the layers overlap nicely and provide depth.
- Hang the dowel and spread tassels for an even arc.
Mini wall pocket for tiny plants or treasures

A compact pocket feels practical yet ornamental, cradling a small pot or dried bouquet like a little textile nest. The pocket’s weave creates snug sides that carry the round shape of a plant pot, and the hanging adds life to a vertical surface.
I loved how a tiny trailing plant softened the knotwork, sending green tendrils down through the cords. This piece felt alive and functional, like a small living vignette on the wall.
It was a gentle way to bring greenery into tight spaces with a soft handmade frame.
Steps
- Create a rectangular or rounded macrame panel with side supports to form a pocket shape.
- Fold and knot the lower edge to create a secure pocket base for a small pot.
- Reinforce pocket sides with additional knot rows to hold weight.
- Place a small potted plant or dried arrangement inside the pocket.
- Hang at a comfortable height where the plant can trail naturally.
Layered neutral tones with varied textures

Combining cords of slightly different thicknesses creates a subtle depth that feels layered and rich without color noise. Fine strands sit next to chunkier ropes, producing a rug-like texture that reads as thoughtfully arranged.
I liked the way each texture caught light differently: the thinner cords shimmered faintly, while the thicker ones created stronger shadow bands. Together they made a calm composition that felt handcrafted and warm.
Hung over a simple bench, it lent a collected look, as if assorted fibers had been chosen for their tactile conversation.
Steps
- Select cords in neutral shades with a mix of thin and thick gauges.
- Attach cords to a wide dowel and arrange the different textures in alternating groups.
- Create a combination of knot styles to highlight contrasts between cord types.
- Shape the lower edge into staggered layers to show the textural mix.
- Hang and step back to check balance and tactile rhythm.
Feather-inspired fringes with delicate curves

Feather-like fringes have a graceful taper that floats at the bottom of the piece. The fibers are teased into gentle curves, creating a soft silhouette that looks light as air.
I found the shapes evocative of birds’ wings or tall grasses bending in a breeze. The tactile surface feels silky under fingertips, and light plays along the curves to accentuate each feathered edge.
Placed near a window, the play of motion and shadow made the piece feel animated, bringing a lyrical softness to a neutral wall.
Steps
- Attach cords to a dowel and separate lower sections into small groups for individual feathers.
- Shape each group into a tapered feather by fraying and trimming edges carefully.
- Use gentle combing to soften fibers and create smooth curved silhouettes.
- Arrange feathers to overlap slightly for depth and movement.
- Hang near a light source to enhance shadow and gentle motion.
Bohemian ladder with spaced knot rungs

A ladder-like layout with spaced horizontal knot rungs feels both decorative and graphic. The repeated horizontal bands create a pleasing cadence that feels handcrafted yet structured.
I liked how the negative space between rungs allowed the wall color to act as part of the design, making the piece feel airy. The texture of the knots offered a subtle relief, giving the hanging a tactile score across its length.
It worked well as a tall slim accent in narrow spaces, suggesting vertical movement without overwhelming the wall.
Steps
- Attach multiple long cords to a vertical dowel to form the ladder’s sides.
- Create horizontal knot rungs by bringing cords across in parallel groups.
- Space rungs evenly and secure each with tight square knots.
- Add a small fringe at the bottom or leave ends neat for a clean finish.
- Hang vertically to emphasize the ladder form.
Ring and fringe with contrasting color tip

A central ring combined with a tipped-color fringe creates a small dramatic accent without loud hues. The fringe ends dipped in a muted shade give a deliberate punctuation to the soft neutral cords.
I enjoyed the subtle pop of color that felt intentional, like a framed sentence in an otherwise quiet paragraph. The ring adds structure, and the tipped fringe provides movement that draws the eye downward.
It works well when paired with other neutral textures, offering a tiny focal note that anchors a grouping of small artworks.
Steps
- Select a central ring and prepare cords with lower ends dyed or painted in a contrasting shade.
- Attach cords around the ring and arrange knots to frame the ring.
- Form a flowing lower fringe so the colored tips show as a gradient.
- Trim fringe to even or slightly tapered length to emphasize the color tips.
- Hang so the ring sits centered and the color tips hang freely.
Rustic jute weave for an earthy feel

Jute brings an earthy, slightly rough texture that feels grounded and organic. The natural brown tones and coarse fiber contrast with softer cotton pieces, lending an artisanal weight to the hanging.
I liked the sturdy look and the way the jute caught dust motes in a warm amber glow under evening light. The tactile sensation is more rugged under touch, suggesting a cabin or cottage spirit.
Hung near other natural elements like a woven basket or potted fern, it enhanced an earthy corner without calling attention to itself.
Steps
- Choose jute cord of medium thickness and prepare lengths for the main panel.
- Attach jute to a sturdy wooden dowel and form tight knot rows for a rustic weave.
- Combine a few softer cotton cords for contrast if desired.
- Finish the lower edge with a short fringe or blunt cut for a raw look.
- Secure the hanging to a robust hook due to jute’s heavier weight.
Monochrome looped fringe like woven lace
Looped fringes create a delicate lace-like surface that reads as airy and intricate. The loops catch tiny highlights and form a soft, repeating field of texture.
I appreciated the lightness; it looked like fabric embroidery stretched vertically, offering a refined touch without complexity. Close inspection reveals tiny sculptural pockets where loops meet knotwork, each holding a subtle shadow.
The overall impression was elegant and quiet, suitable for a calming bedroom wall where the texture can be admired up close.
Steps
- Attach cords to a dowel and form looped fringe sections by folding and securing groups of strands.
- Create a base of tight knot rows to anchor the loops.
- Space looped sections evenly across the width for balanced lace effect.
- Secure loop ends and trim any stray fibers for neatness.
- Hang slightly above furniture for a refined decorative accent.
Table of Contents