I still remember sitting at a kitchen table with a bowl of tiny glass beads and a playlist humming in the background, picking at color combinations for beaded friendship bracelet designs. There was something calming about the way the beads slid across my fingers, a rhythm that let me talk and make at the same time.
Over time those experiments turned into small stacks of bracelets that friends asked about.
These beaded friendship bracelet designs kept showing up in my bag and on wrists at casual meetups, each one carrying a tiny memory of the day it was made.
Soft chevron with seed beads and shimmer
![]()
I made this chevron piece on a slow afternoon and remember how the seed beads glanced in different light. The pattern sits like a little V that curves naturally with the wrist, and the tiny shimmer beads create a soft pulse when the hand moves.
The palette leaned toward pastel tones that felt like warm tea and rainy windows. It has a delicate weight, not too heavy, and wears close to the skin so that the overall look reads as subtle and thoughtful rather than flashy.
Steps
- Prepare embroidery floss in three contrasting colors and secure them to a clip or tape point.
- Follow a classic V-pattern by knotting outer strands toward the center, repeating across the length until the desired size is reached.
- End with a small row of seed beads threaded on the center strands and finish by tying a secure knot and trimming excess.
- Create a simple loop or braided tail for a neat closure.
Bright rainbow rows for cheerful stackable sets
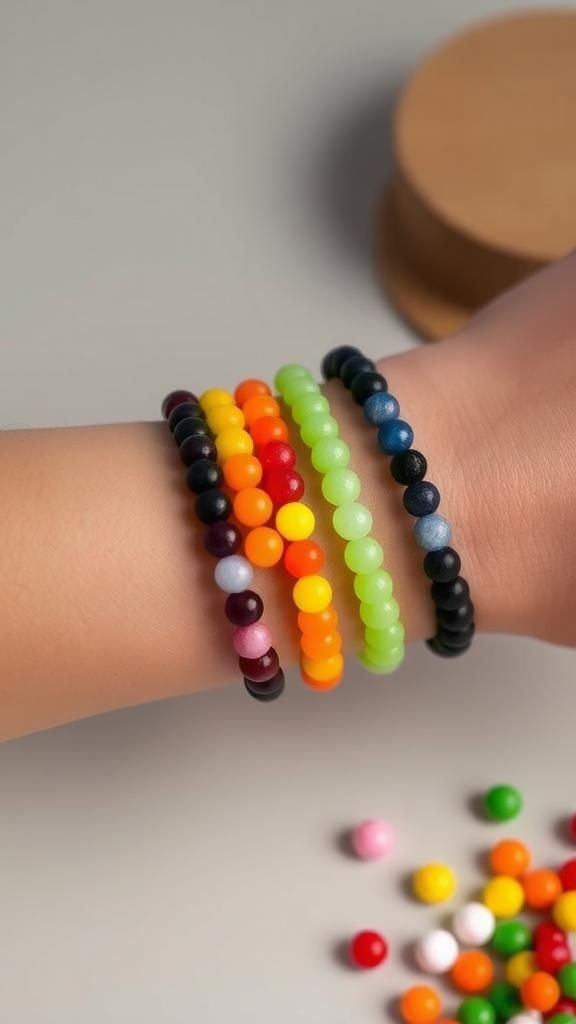
This design felt like bottling up a sunny afternoon. Each row of beads is arranged in a clean band of color, so when worn in a stack the whole wrist reads like a miniature color chart.
The seed beads have a tiny matte finish that contrasts with a glossy accent bead slipped in now and then. Wearing them together creates a playful jingle and a layered warmth against the skin, the kind of accessory that invites a smile without shouting for attention.
Steps
- Select seed beads in a spectrum of colors and string them onto a length of strong beading thread.
- Form even rows by securing thread across a small loom or by threading back and forth with consistent tension.
- Finish ends with a sturdy knot and a jump ring or clasp for closure.
- Repeat to build multiple thin bracelets designed to sit together as a stacked set.
Tiny alphabet name beads with pastel accents
I once threaded a name on a bracelet for a friend’s small birthday and the way the letters settled between soft pastels felt quietly personal. The tiny letter beads are firm and tactile, each one a small, blocky punctuation among round seed beads.
Pastel spacers cushion the letters so the whole piece breathes along the wrist. It sits low and intimate, often half-hidden under a sleeve, and prompts a few curious glances that turn into compliments and short conversations about who the name belongs to.
Steps
- Gather small alphabet beads, pastel seed beads, and a length of beading wire or strong thread.
- Thread beads in a planned layout with letters centered and pastel beads flanking them for balance.
- Crimp or knot securely at the ends and add a clasp or loop for a tidy finish.
- Trim excess and check that the name string sits flat when worn.
Chunky boho beaded cuff with wooden accents

There was a weekend market where I picked up a handful of wooden beads and this cuff idea grew from that haul. The larger beads create a satisfying weight and a textured contrast against smoother glass seed beads.
It hugs the wrist more like a cuff than a slim bracelet, making a casual statement that reads earthy and warm. The wooden pieces smell faintly of sun and old stalls, and when the hand moves the beads whisper softly against one another in a way that feels unhurried.
Steps
- Select a sturdy base cord and large wooden beads mixed with glass accent beads.
- String beads densely along the central section to create a cuff-like width.
- Secure ends with strong knots or crimps and add a loop-and-button closure or toggle.
- Test the fit so the cuff sits snugly but comfortably on the wrist.
Delicate metallic thread with seed bead highlights

This bracelet felt like a little piece of quiet glamour. A strand of metallic thread glints faintly, catching light in a way that’s subtle rather than bright.
Seed bead highlights sit like punctuation along the length, giving the piece a delicate rhythm. It slides against skin with a whisper and pairs easily with other thin bracelets.
Wearing it felt a bit like adding a soft echo to an outfit, a small detail that can make a plain sleeve look thoughtfully finished.
Steps
- Choose a fine metallic thread and small seed beads in complementary tones.
- String beads intermittently along the thread and keep even spacing for a balanced look.
- Secure the ends with small crimps or neat knots and add a minimal clasp.
- Test the bracelet for comfortable drape before trimming excess thread.
Ombre glass beads flowing from dark to light
I remember lining up little glass beads on a tray to watch the color shift from deep jewel tones to a pale edge. The ombre effect feels like a small landscape on the wrist, moving from dusk to dawn across a few inches.
Glass beads catch and bend light, so the gradient appears to shift as the hand turns. The result is quietly dramatic without fuss, the kind of bracelet that starts conversations because people lean in to admire how the colors meet and fade into each other.
Steps
- Arrange glass beads in a gradual color sequence from darkest to lightest.
- Thread them onto strong beading wire, maintaining the gradient order.
- Finish with secure crimps and a matching clasp so the gradient reads uninterrupted.
- Polish gently to enhance the glass sheen before wearing.
Tiny charms threaded through seed bead strands
A few small charms slipped between seed beads can feel like little punctuation marks along a strand. The charms add an extra layer of personality, clinking softly when the wrist moves.
I like the way the beads frame each charm so it reads as part of the design rather than a separate piece. The balance between the delicate beadwork and the small metal accents creates a playful contrast, a mix of smooth glass and cool metal that pairs well with both casual and slightly dressier looks.
Steps
- Select a string of seed beads and a handful of small metal or enamel charms with jump rings.
- Thread the beads and slide charms into place at chosen intervals along the strand.
- Secure ends with crimps or knots and add a clasp or braided tail for closure.
- Inspect charm placement for even spacing and comfortable movement.
Spiral rope beadwork with a flowing twist
This spiral rope design is one I return to when I want something a bit sculptural on the wrist. The beads curve around one another in a gentle helix, giving the piece a tactile twist that feels pleasing under the fingers.
Light plays differently on inward and outward-facing beads, creating a subtle movement of highlights and shadow. It has a firmer presence than flat patterns and fills a small stretch of arm in a way that feels both decorative and comforting, like a tiny braided ribbon.
Steps
- Plan bead placement on a curved bead rope pattern and prepare strong cord or wire.
- Work beads in an alternating sequence to create a consistent spiral along the length.
- Secure both ends with crimp beads and attach a clasp or loop closure.
- Gently shape the rope so the spiral sits neatly when worn.
Miyuki delica mosaic with crisp geometric form
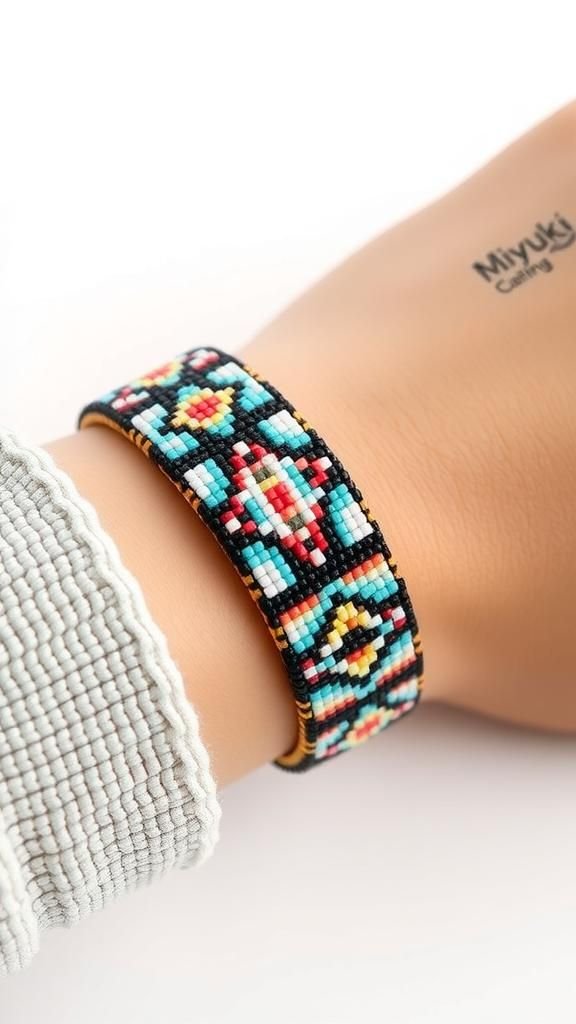
I fell for Delica beads because they sit like tiny tiles, making geometric patterns feel almost architectural. This mosaic bracelet reads like a miniature grid, with sharp lines and blocks of color that hold together in a tidy band.
The bead edges give a refined, almost pixelated sheen that glows under light. Wearing it feels a little like carrying a miniature work of art on the wrist; the pattern rewards close looks and tends to prompt compliments from people who appreciate small details.
Steps
- Choose a beading loom or peyote stitch method and a set of uniform Delica beads.
- Build a repeating geometric pattern row by row, keeping tension consistent for a flat band.
- Finish both ends cleanly with beading thread and attach end findings or a clasp.
- Press the band gently so the mosaic sits flat on the wrist.
Braided bead chain with soft textile core

This piece combines the comfort of textile with the sparkle of beads, and that contrast is what makes it so pleasant to wear. A soft cord core gives the bracelet a gentle bend, while beads braided into the surface produce a subtle pattern that moves with the wrist.
It feels cozy rather than rigid, and the tactile mix of soft fiber and smooth beads is oddly soothing. The overall look is relaxed and slightly rustic, like a favorite knit paired with something glinting at the cuff.
Steps
- Select a soft cord core and bead types that fit comfortably over the cord.
- Braid or plait the cord while integrating beads into the outer strands at regular intervals.
- Secure ends with tidy knots and add a clasp or braided loop for closure.
- Compress the braid gently so beads sit evenly along the surface.
Tiny floral bead clusters like garden sprigs

I enjoy arranging tiny beads into little flower motifs because they feel cheerful without being childlike. Each cluster sits like a tiny bloom spaced along the strand, and together they form a delicate garland around the wrist.
The centers catch light differently from the petals, creating a soft interplay of sparkle and shadow. Wearing the strand has a spring-like quality; it lifts plain outfits and pairs well with other floral accents.
It often prompts people to smile and mention how it feels happily unexpected.
Steps
- Gather small round beads for petals and slightly larger beads for flower centers.
- Thread clusters by grouping petals around a center bead, securing each cluster to the main strand.
- Repeat the floral spacing along the length and finish ends with a secure knot or crimps.
- Add a decorative closure that complements the floral aesthetic.
Minimalist bar bead with clean linear focus

This minimal bar bracelet has a quiet, modern feel that I often reach for when layering. A thin bar of beads stretches across a narrow cord, creating a little horizon line across the wrist.
The simplicity highlights material quality, so the small glass beads and smooth cord become the focal point. It wears like a refined accent, not demanding attention but giving polish to everyday looks.
The tactile sensation is smooth and unobtrusive, and it pairs easily with both casual and slightly tailored pieces.
Steps
- Select a slim central bead bar or string small beads tightly to form a linear section.
- Thread the bar onto a thin cord and position it centrally on the wrist length.
- Secure with neat knots or crimps and add a discreet clasp.
- Adjust cord length so the bar sits flat and centered when worn.
Macramé micro knots with scattered glass beads
Working with tiny macramé knots and glass beads produced a feel that’s both textural and meticulous. The knotting creates a flexible band that molds slightly to the wrist, while the scattered beads peek out like stars across a dark sky.
The surface invites a little run of fingertips along it, because the knots and beads create tactile contrast. It’s a design that reads handmade in the best way, with each knot marking a small rhythm along the strand and beads interrupting that rhythm pleasantly.
Steps
- Prepare a base cord and several working cords for knotting, plus small glass beads.
- Tie repeating macramé knot sequences, sliding beads into place at chosen points.
- Continue until the desired length is reached and finish with secure knots and a loop or clasp.
- Trim and seal ends to prevent fraying for a neat finish.
Beaded friendship bracelet with tiny tassel ends

Adding a small tassel to the end of a beaded strand gives the bracelet a playful tail that moves freely. The tassel fibers brush the skin softly and introduce a different texture compared to smooth beads.
I like how the tassel offers a casual finishing note that feels handmade and relaxed. When the wrist moves the tassel bobs with a little life, making the piece feel animated rather than static.
It’s an approachable accent that keeps the bracelet from feeling overly neat.
Steps
- String beads along a cord and allow extra length at the ends for tassels.
- Secure beadwork and create tassels by grouping threads and binding at the top.
- Trim tassel ends to a tidy length and tidy the binding so it looks consistent.
- Add a small bead or cap at the tassel base if desired for visual weight.
Chevron with metallic accents for evening wear
![]()
This chevron variant adds slender metallic beads that catch lamp light, giving the classic V-pattern a slightly dressier edge. The metallic accents slide between matte seed beads and break up the color blocks with tiny flashes.
It still feels hand-made and casual, but the gleam lifts it toward evening wear without becoming formal. Wearing it after dark is a small pleasure because each turn of the wrist produces a soft glint that reads like an intentional little accent rather than loud sparkle.
Steps
- Arrange seed beads in chevron order, integrating metallic beads at chosen points.
- Work the pattern across with consistent knot tension for a clean V-shape.
- Finish with a secure knot and add a clasp or braided loop for closure.
- Check metallic bead placement under warm light to ensure balanced glints.
Stack-friendly micro bead bands in neutral tones
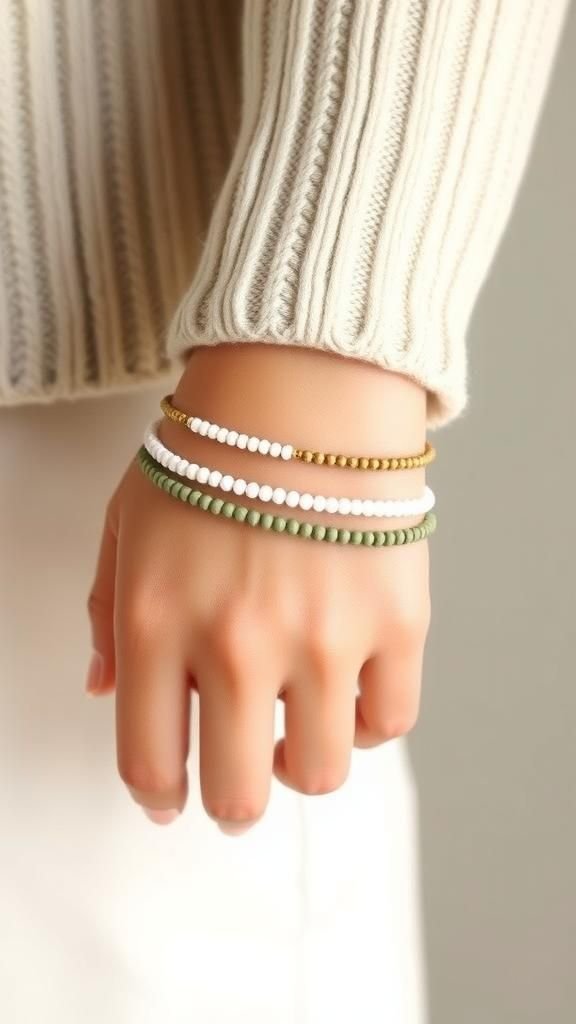
These micro bead bands were made with quiet outfits in mind. The tiny beads form narrow bands that layer without creating bulk, and neutral tones let them merge into a soft gradient when stacked.
The overall effect is tidy and harmonious, like a little color study on the wrist. They are unobtrusive enough for everyday wear yet provide an understated polish when stacked with a watch or a chunkier bracelet.
The sensation is light and steady, a string of small comforts around the arm.
Steps
- Choose tiny seed beads in a palette of neutral colors and a delicate beading thread.
- Create narrow bands by stringing beads closely and securing ends with neat knots or crimps.
- Add simple closures or braid the ends for a seamless look.
- Assemble a set of multiple bands intended to be worn together for a layered effect.
Gilded thread and glass bead mix for subtle shine

A thin gilded thread paired with glass beads feels quietly luxurious. The thread shimmers in a diffused way, while glass beads catch sharper highlights.
Together they create a layered sheen that is gentle rather than bold. I remember pairing this with a simple dress and feeling like the bracelet added a thoughtful finish.
The tactile contrast between smooth beads and metallic thread makes the piece feel carefully composed, and it tends to make casual clothes look more considered without demanding attention.
Steps
- Select a fine gilded or metallic thread and complementary glass beads.
- String beads intermittently and maintain an even rhythm along the thread.
- Secure ends with small crimps or tidy knots and complete with a minimal clasp.
- Test the bracelet under different lights to ensure the gilded thread complements the bead sheen.
Chevron with tiny seed bead tassels at ends
![]()
This version of the chevron pattern adds miniature tassels at the ends, which feel playful and personal. The tassels are small enough to stay tidy but lively enough to create motion when the hand moves.
The main chevron band remains neat and patterned, while the tassels soften the finish and introduce a textile note. I like how the tassels give a handmade flourish that suggests care without fuss, a finishing touch that reveals a casual, friendly mood when the bracelet is noticed up close.
Steps
- Create a chevron pattern with seed beads or knotted threads to the desired length.
- Leave extra thread at the ends and bind small bundles to form tiny tassels.
- Trim tassel tips evenly for a neat appearance and secure any loose threads.
- Ensure the tassels balance visually with the chevron band before trimming final lengths.
Seed bead mosaic with subtle star motifs

I arranged tiny beads into little star shapes set against a muted backdrop and enjoyed how the tiny motifs peek out without shouting. The small stars appear like constellations when the arm is extended, and the bead surface catches scattered light for a gentle twinkle.
The bracelet reads like jewelry that favors whispered detail over headline glamour. It pairs beautifully with a plain sleeve, where the motifs reward someone who leans in to look.
Wearing it often felt like carrying a very small, private sky.
Steps
- Plan a bead mosaic layout with tiny star motifs and choose matching Delica or seed beads.
- Weave the pattern using loom work or peyote stitch to maintain motif clarity.
- Finish with clean edges and secure ends using crimps or end bars.
- Attach a simple clasp and check motif alignment when the bracelet lies flat.
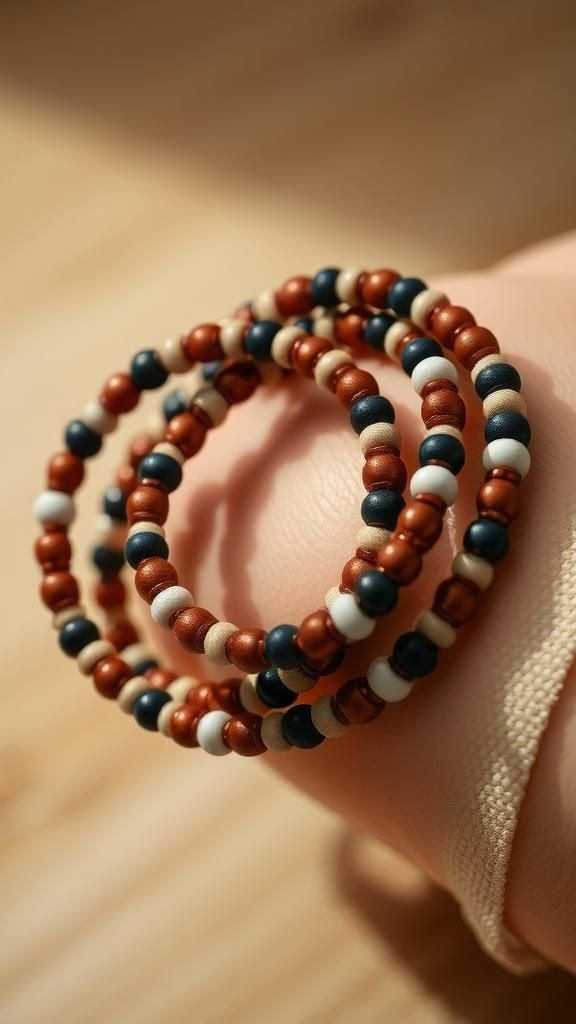
Earth-toned ombre with matte finishing beads

An ombre done in earth tones feels like wearing a small strip of landscape. Matte beads soften the color transitions and reduce shine so the bracelet reads as calm and grounded.
There is a pleasant weight to the piece thanks to slightly larger bead sizes, and the matte finish gives a soft, velvety touch under the fingers. It pairs well with neutral knitwear and layered metal tones, bringing a natural, quiet accent that blends instead of competing with other accessories.
Steps
- Select beads with a matte finish in a gradient of earthy shades and arrange them in order.
- String onto a sturdy thread, keeping the gradient consistent along the length.
- Finish ends with secure crimps and a matching clasp for seamless continuity.
- Wear alone or with other neutral bracelets to enhance the layered effect.
Playful pastel beads with tiny heart spacers

I created a pastel strand punctuated by little heart-shaped spacer beads and enjoyed the combination of sweetness and restraint. The tiny hearts sit like small surprises between soft washed colors, and the whole piece reads as youthful but not childish.
When the wrist moves, the hearts glint and catch attention more than the surrounding beads, creating a small rhythm of focus points. It feels like a wearable note of affection, something that prompts a warm smile whenever it’s noticed.
Steps
- Choose a gentle pastel palette of seed beads and small heart spacer beads.
- Thread the beads with heart spacers interspersed at chosen intervals for visual rhythm.
- Secure the ends with neat knots or crimps and add a small clasp or loop.
- Check the spacing so hearts appear balanced when the bracelet is worn.
Table of Contents